Plant Bulbs Now For Spring Color

The official beginning of autumn fell earlier this week, the autumnal equinox. It was ninety degrees here, so it didn’t feel very fall-like. This day marks the beginning of nights being longer than days. Days get progressively shorter and nights get longer until we reach the winter solstice, when the trend reverses. To gardeners, the autumnal equinox means it is time to stop delaying and order those bulbs that will be planted now for flowers next spring.

Almost every garden can benefit from the addition of spring-flowering bulbs, whether that is “true” bulbs like daffodils and tulips, or corms, tubers, or rhizomes. I have a special appreciation for bulbs because most of them flower very early, before annuals and perennials have started blooming. Those early flowers give me an emotional boost, reminding me that the cold part of the year is reaching an end and that the garden season will soon begin.

If you are new to gardening or if you are trying to help someone develop an interest, bulbs are a good place to start. The majority are low maintenance. Beyond the task of digging the holes and dropping in the bulbs, bulbs don’t demand much except for an occasional sprinkle of lime or fertilizer. When flowering has finished and the foliage has withered to brown, it can be removed. Bulbs then remain dormant until next spring, when they push their foliage and buds through cold soil to bloom again.

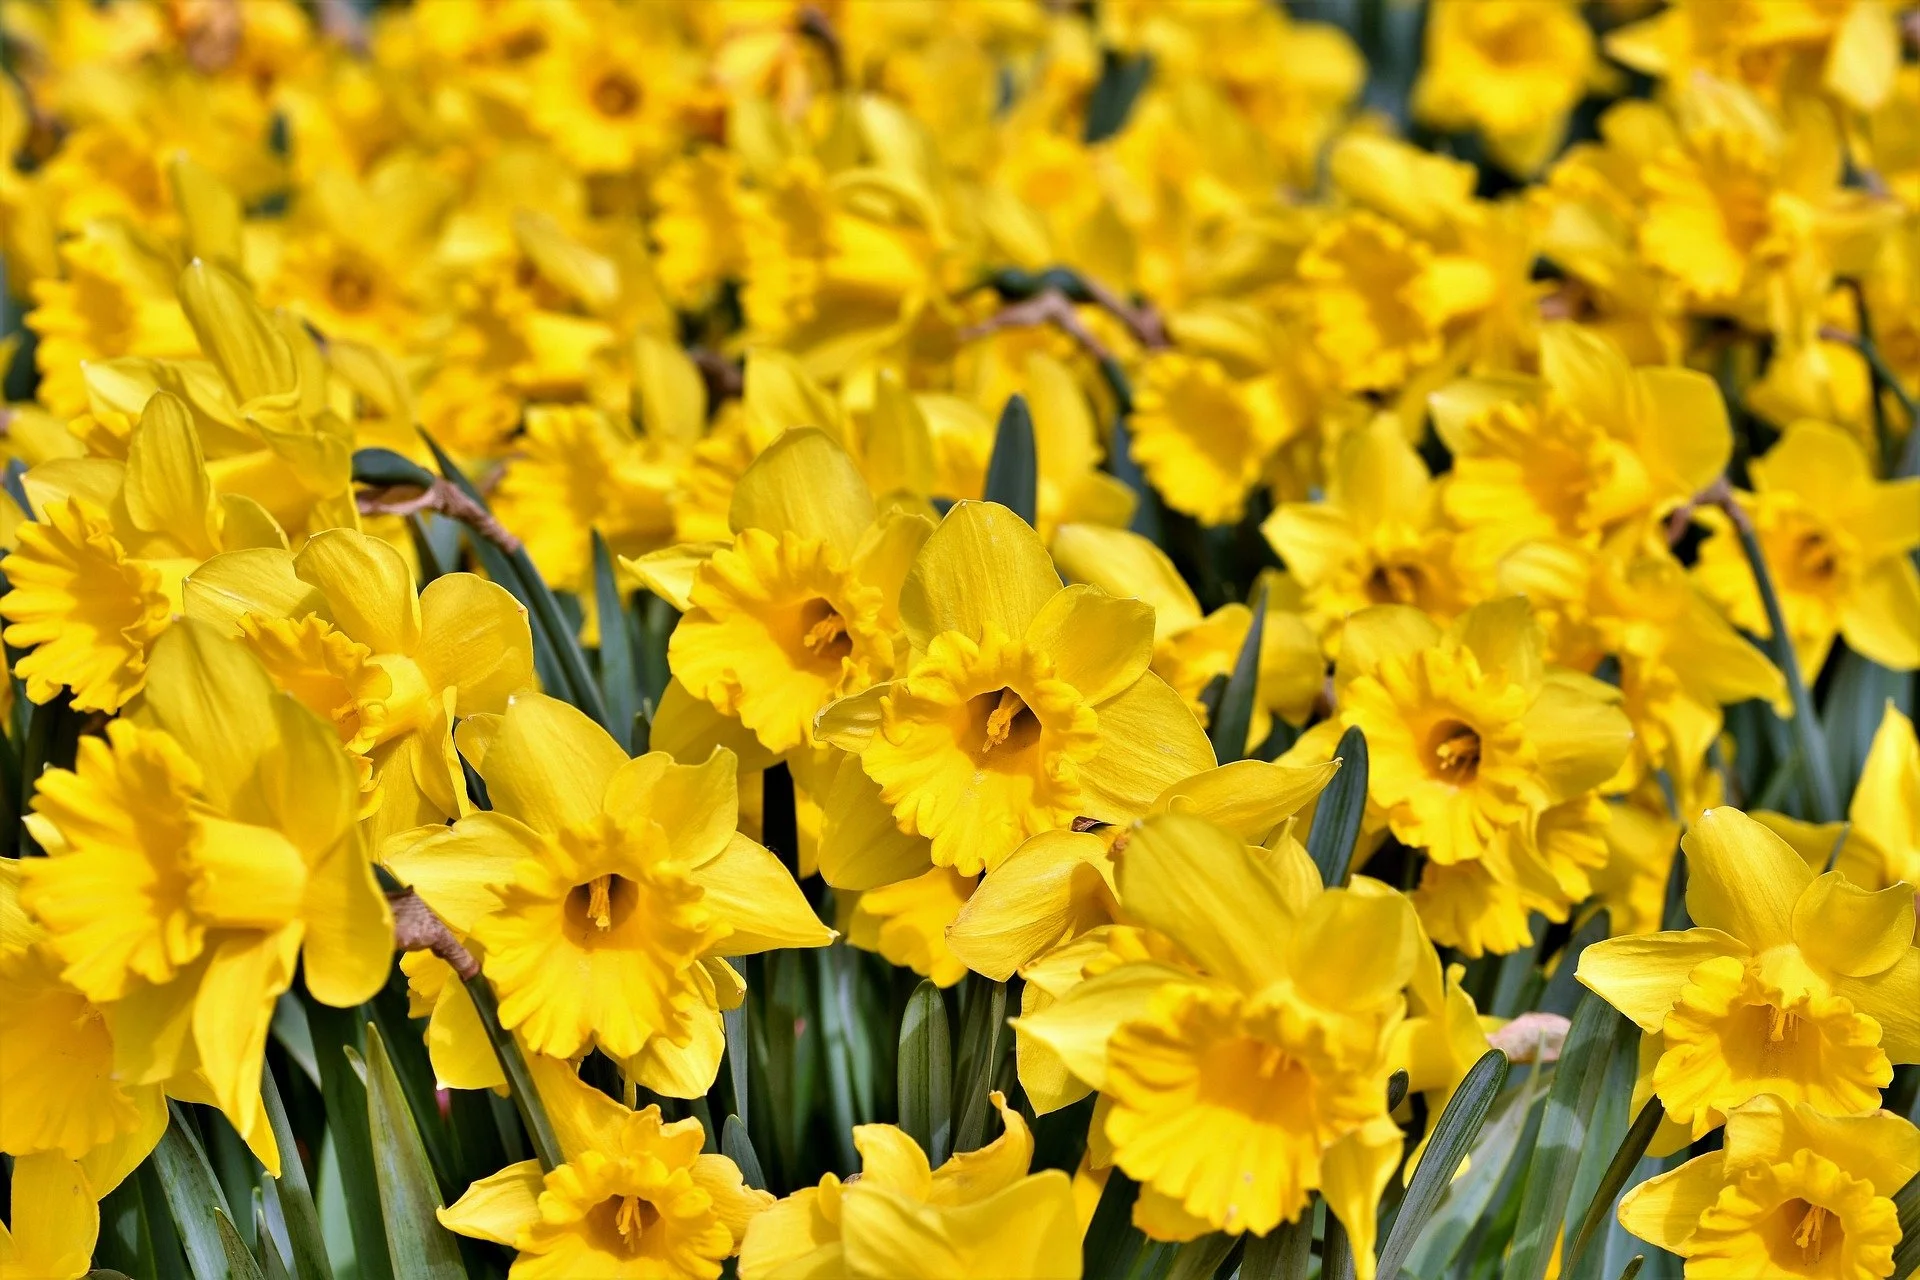
Daffodils are easy and reliable, a good place for beginners or black-thumb gardeners to start. They are available with early, mid-season, or late spring flowering period, and a wide variety of flower types. For the best appearance in the garden, start with a large group of just one type (King Alfred daffodils are a sunny yellow, strong grower that you can find in every big box store at very reasonable prices) and plant them in groups. A grouping makes an impact, while dotting them about in ones or twos just makes flowers look sad and lonely. Check the package instructions for ideal planting depths. I use a bulb auger (looks like a giant drill bit) in my cordless drill to dig holes quickly and easily. It can be difficult to visualize the exact underground distance of your hole, so use a piece of colored duct tape on the augur to mark the desired depth. Keep holes a consistent depth so they all flower at the same time.

Happy bulbs will produce offsets. Once these offsets become numerous, the foliage becomes congested and flowering is reduced. This is an indicator that bulbs should be lifted, separated, and replanted. While one should do this separation and replant process while the bulbs are dormant, I have difficulty in locating them when they are without leaves, so I divide mine just as soon as they start showing signs of spring foliage. While this is not the textbook recommendation, it does not appear to have much of a negative impact on flowering.

Daffodils are an easy choice, but tiny little crocus bulbs flower even earlier, occasionally appearing through snow. Remember snow? My part of the southeast hasn’t seen too much of it in the last few years. Crocus bulbs (corms) are small which makes them a breeze to plant, but also means you need more of them to make a visual impact. Other easy choices are Allium (flowering onion), Ipheion (blue star flower), Muscari (grape hyacinths), Gladiolus, and Squill. I love Tulips, but recent southeastern winters have been a little too warm to give them the cold period they need to appear at their best.

It is almost inevitable – Once a new gardener has experienced success with the easy spring bulbs listed above, an appetite follows for expanding to other types of bulbs. There are bulbs that flower in summer, fall, and winter, so find a reliable seller and expand your choices. My favorite source for ordering bulbs is Brent and Becky’s Bulbs, from Gloucester, Virginia (www.brentandbeckysbulbs.com). Some top-notch local nurseries have a wide assortment of bulbs that are priced individually, allowing you to buy the exact number that you want. Just don’t wait too long to purchase. Popular choices may sell out early.
Bald Cypress, Deciduous Conifer

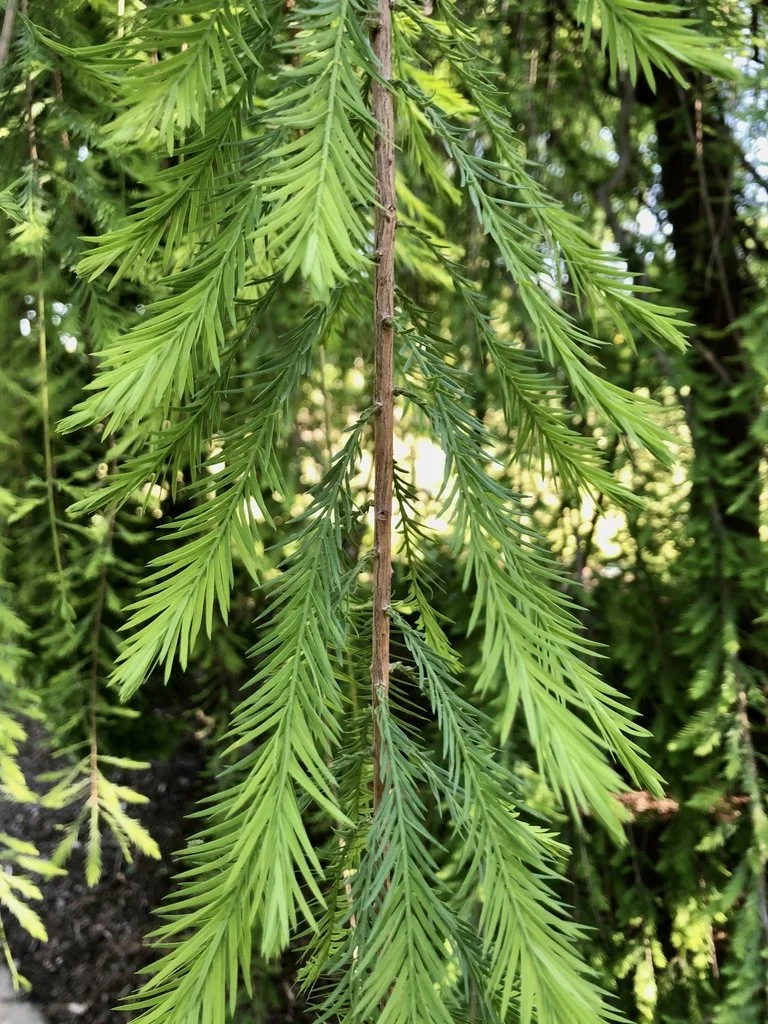
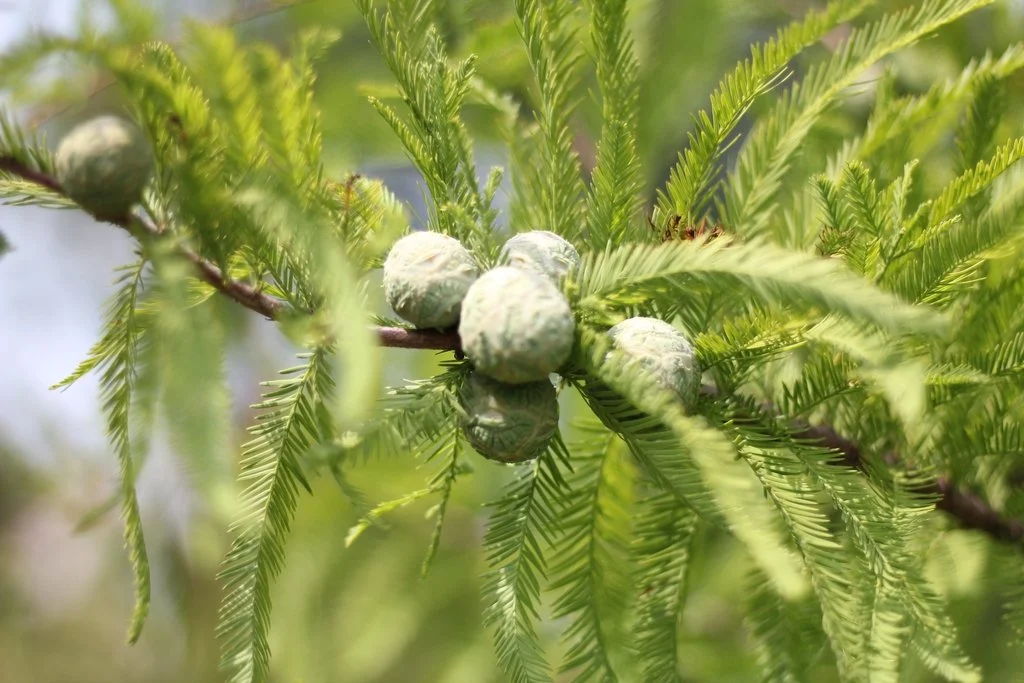
Bald Cypress, Taxodium distichum (pronounced taks-O-di-um DIS-ti-kum) is an unusual native. It is one of a very small group of trees that are deciduous conifers. The bark of young trees exfoliates in long strips, revealing a warm cinnamon color underneath. It has two types of seed cones. Female cones are large marble-sized green balls held at the ends of it branches, while the male cones are pendulous, darker, and held closer to the tree’s upper interior. Although the tree has tough wood and tolerates heat and humidity, the feathery foliage looks soft and delicate. Needles spiral around the stems. Most trees have an attractive coppery-brown fall color before the feathers shed.

Bald Cypress grows well in coastal areas where it is known for pushing up “knees” when grown in swampy or water-logged soils. Many coastal trees are festooned with Spanish moss. The tree’s tolerance for low-oxygen soils makes it a great choice for heavy clay (read: low oxygen centent) soils in non-coastal areas.

Bald Cypress is hardy in zones 4-9. It needs full sun and acid soil, as trees exhibit an unhealthy yellowing (chlorosis) in alkaline soils. Trees are resistant to damage by deer. Mature trees can reach heights up to 70 feet and widths to 30 feet. The dwarf cultivar ‘Peve Minaret’ reaches 20 feet, despite early labels that called for a maximum height of 8 feet. Several weeping forms are available. Green Whisper® (JFS-SGPN’) was discovered in South Carolina and has a warmer, almost orange fall color. Shawnee Brave™ (‘Mickelson’) is widely available, and has a narrow pyramidal form.

Low maintenance and heat tolerance make Bald Cypress a good choice for street trees. Growth rate is moderate to rapid, making the narrow forms an option for planting in new subdivisions, where other trees might struggle in compacted soil of low fertility.

Feathery foliage of Bald Cypress. Photo by Cathy Dewitt CC BY 4.0

Female Bald Cypress seed cones. Photo by Synezis CC BY-SA 4.0

Fall color and form of ‘Shawnee Brave.’ Photo by Jim Robbins CC BY-NC-ND 4.0

Wonderful Blue Winged Wasps

I have a new, favorite insect: blue-winged wasps. Some of you may recall that last year I had enormous numbers of June bugs and Japanese beetles hovering over the pasture next to my orchard. (If you want a refresher, click HERE.) At the time, I was determined to purchase and apply a product to kill the grubs that hatch into these eating machines. Life got in the way, and I never did the research to determine which grub killer was the best choice – you know, the right product to address these specific insects, toxic enough to be effective but not so toxic that it would kill beneficial insects. So, the year went by without any insecticide application. And Mother Nature did the work for me, free of charge.

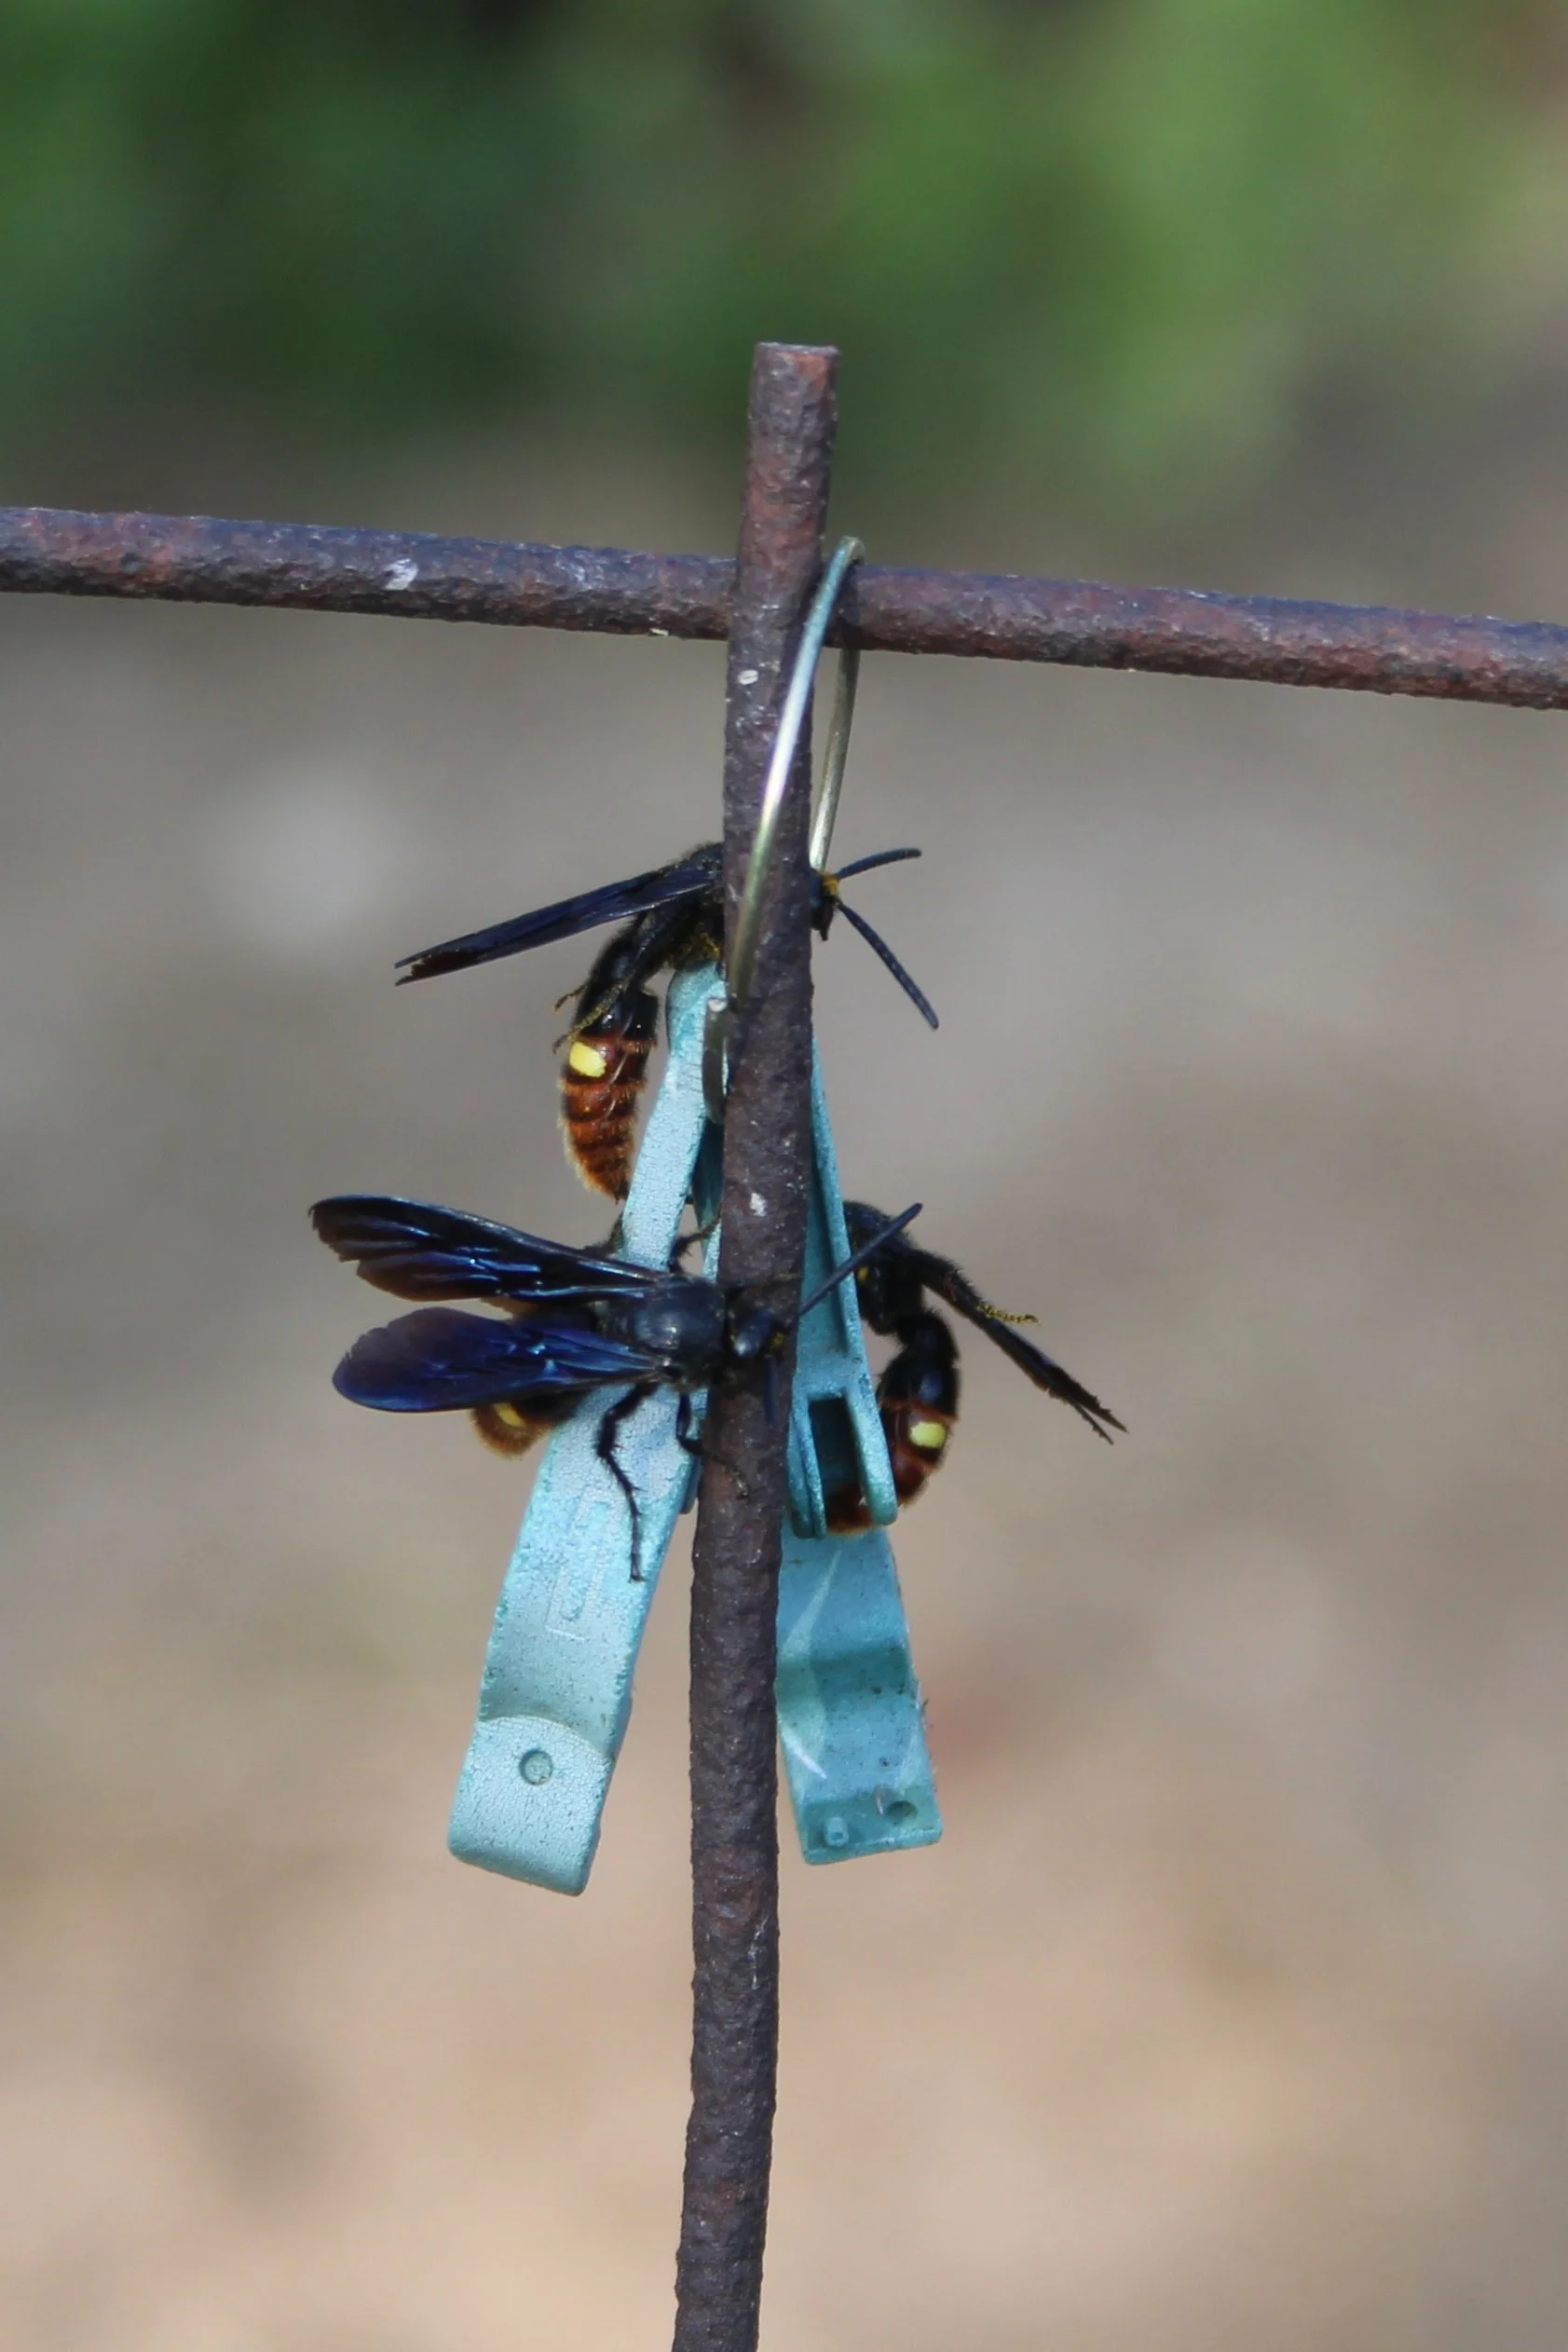
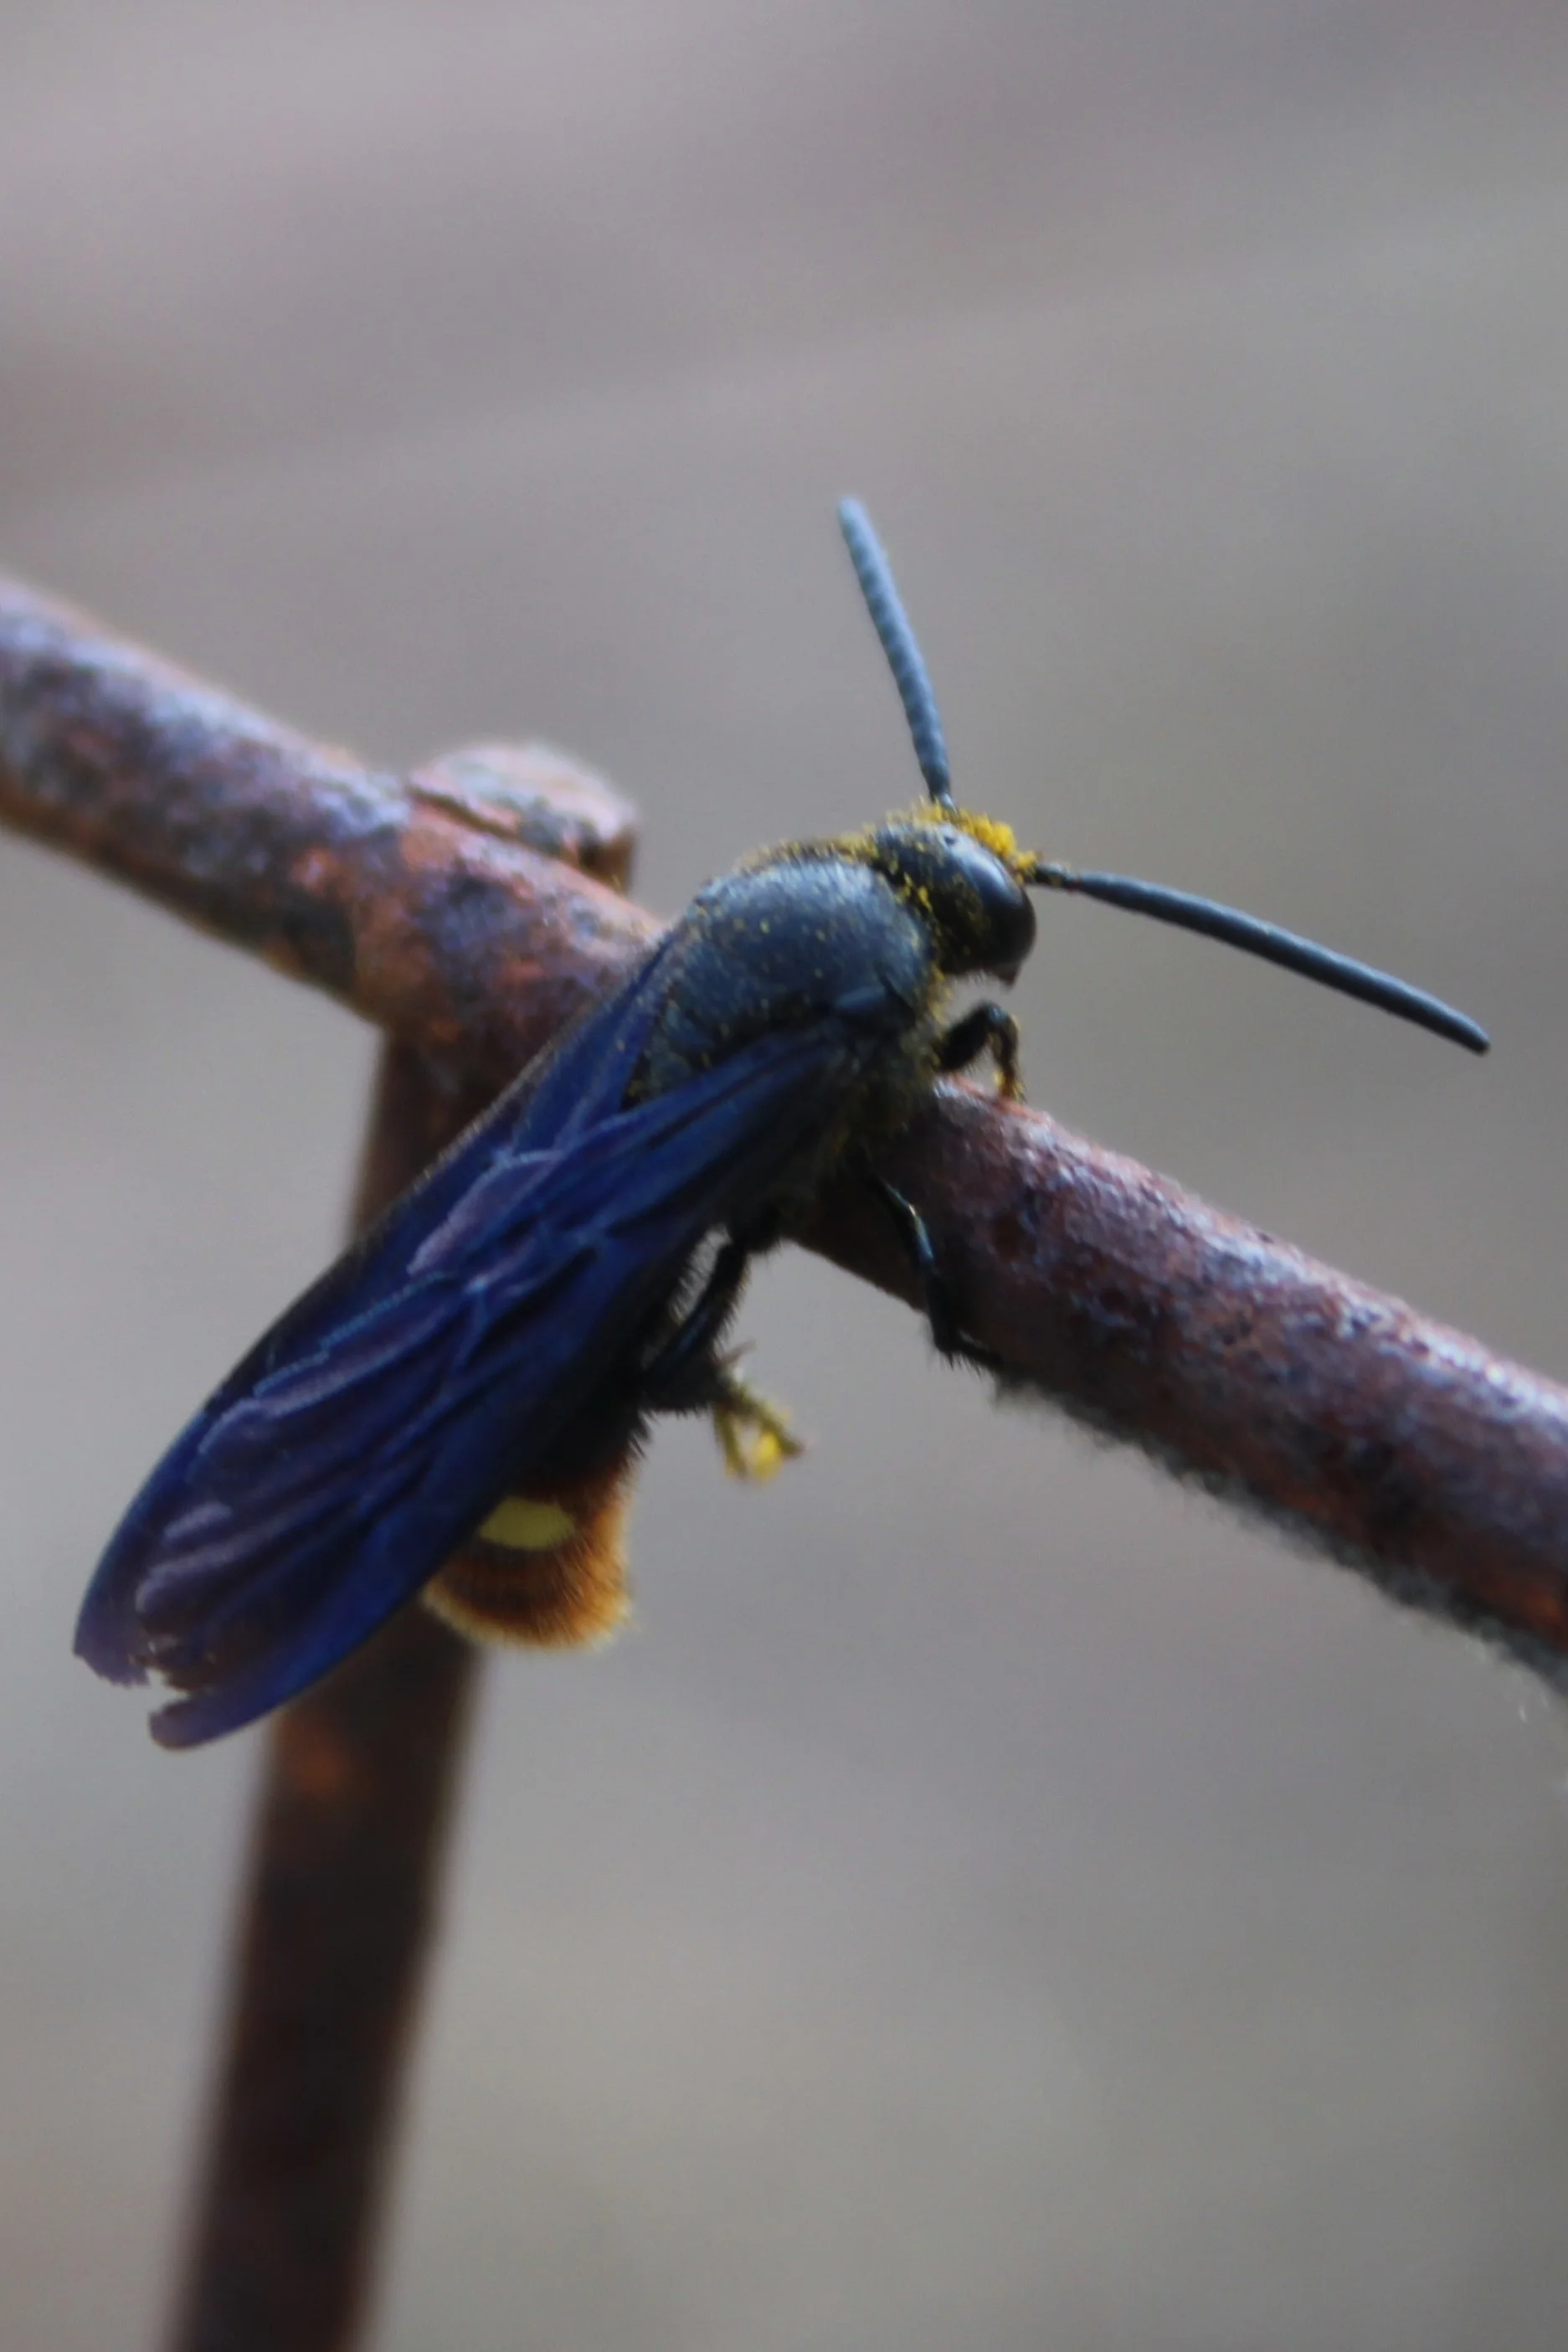
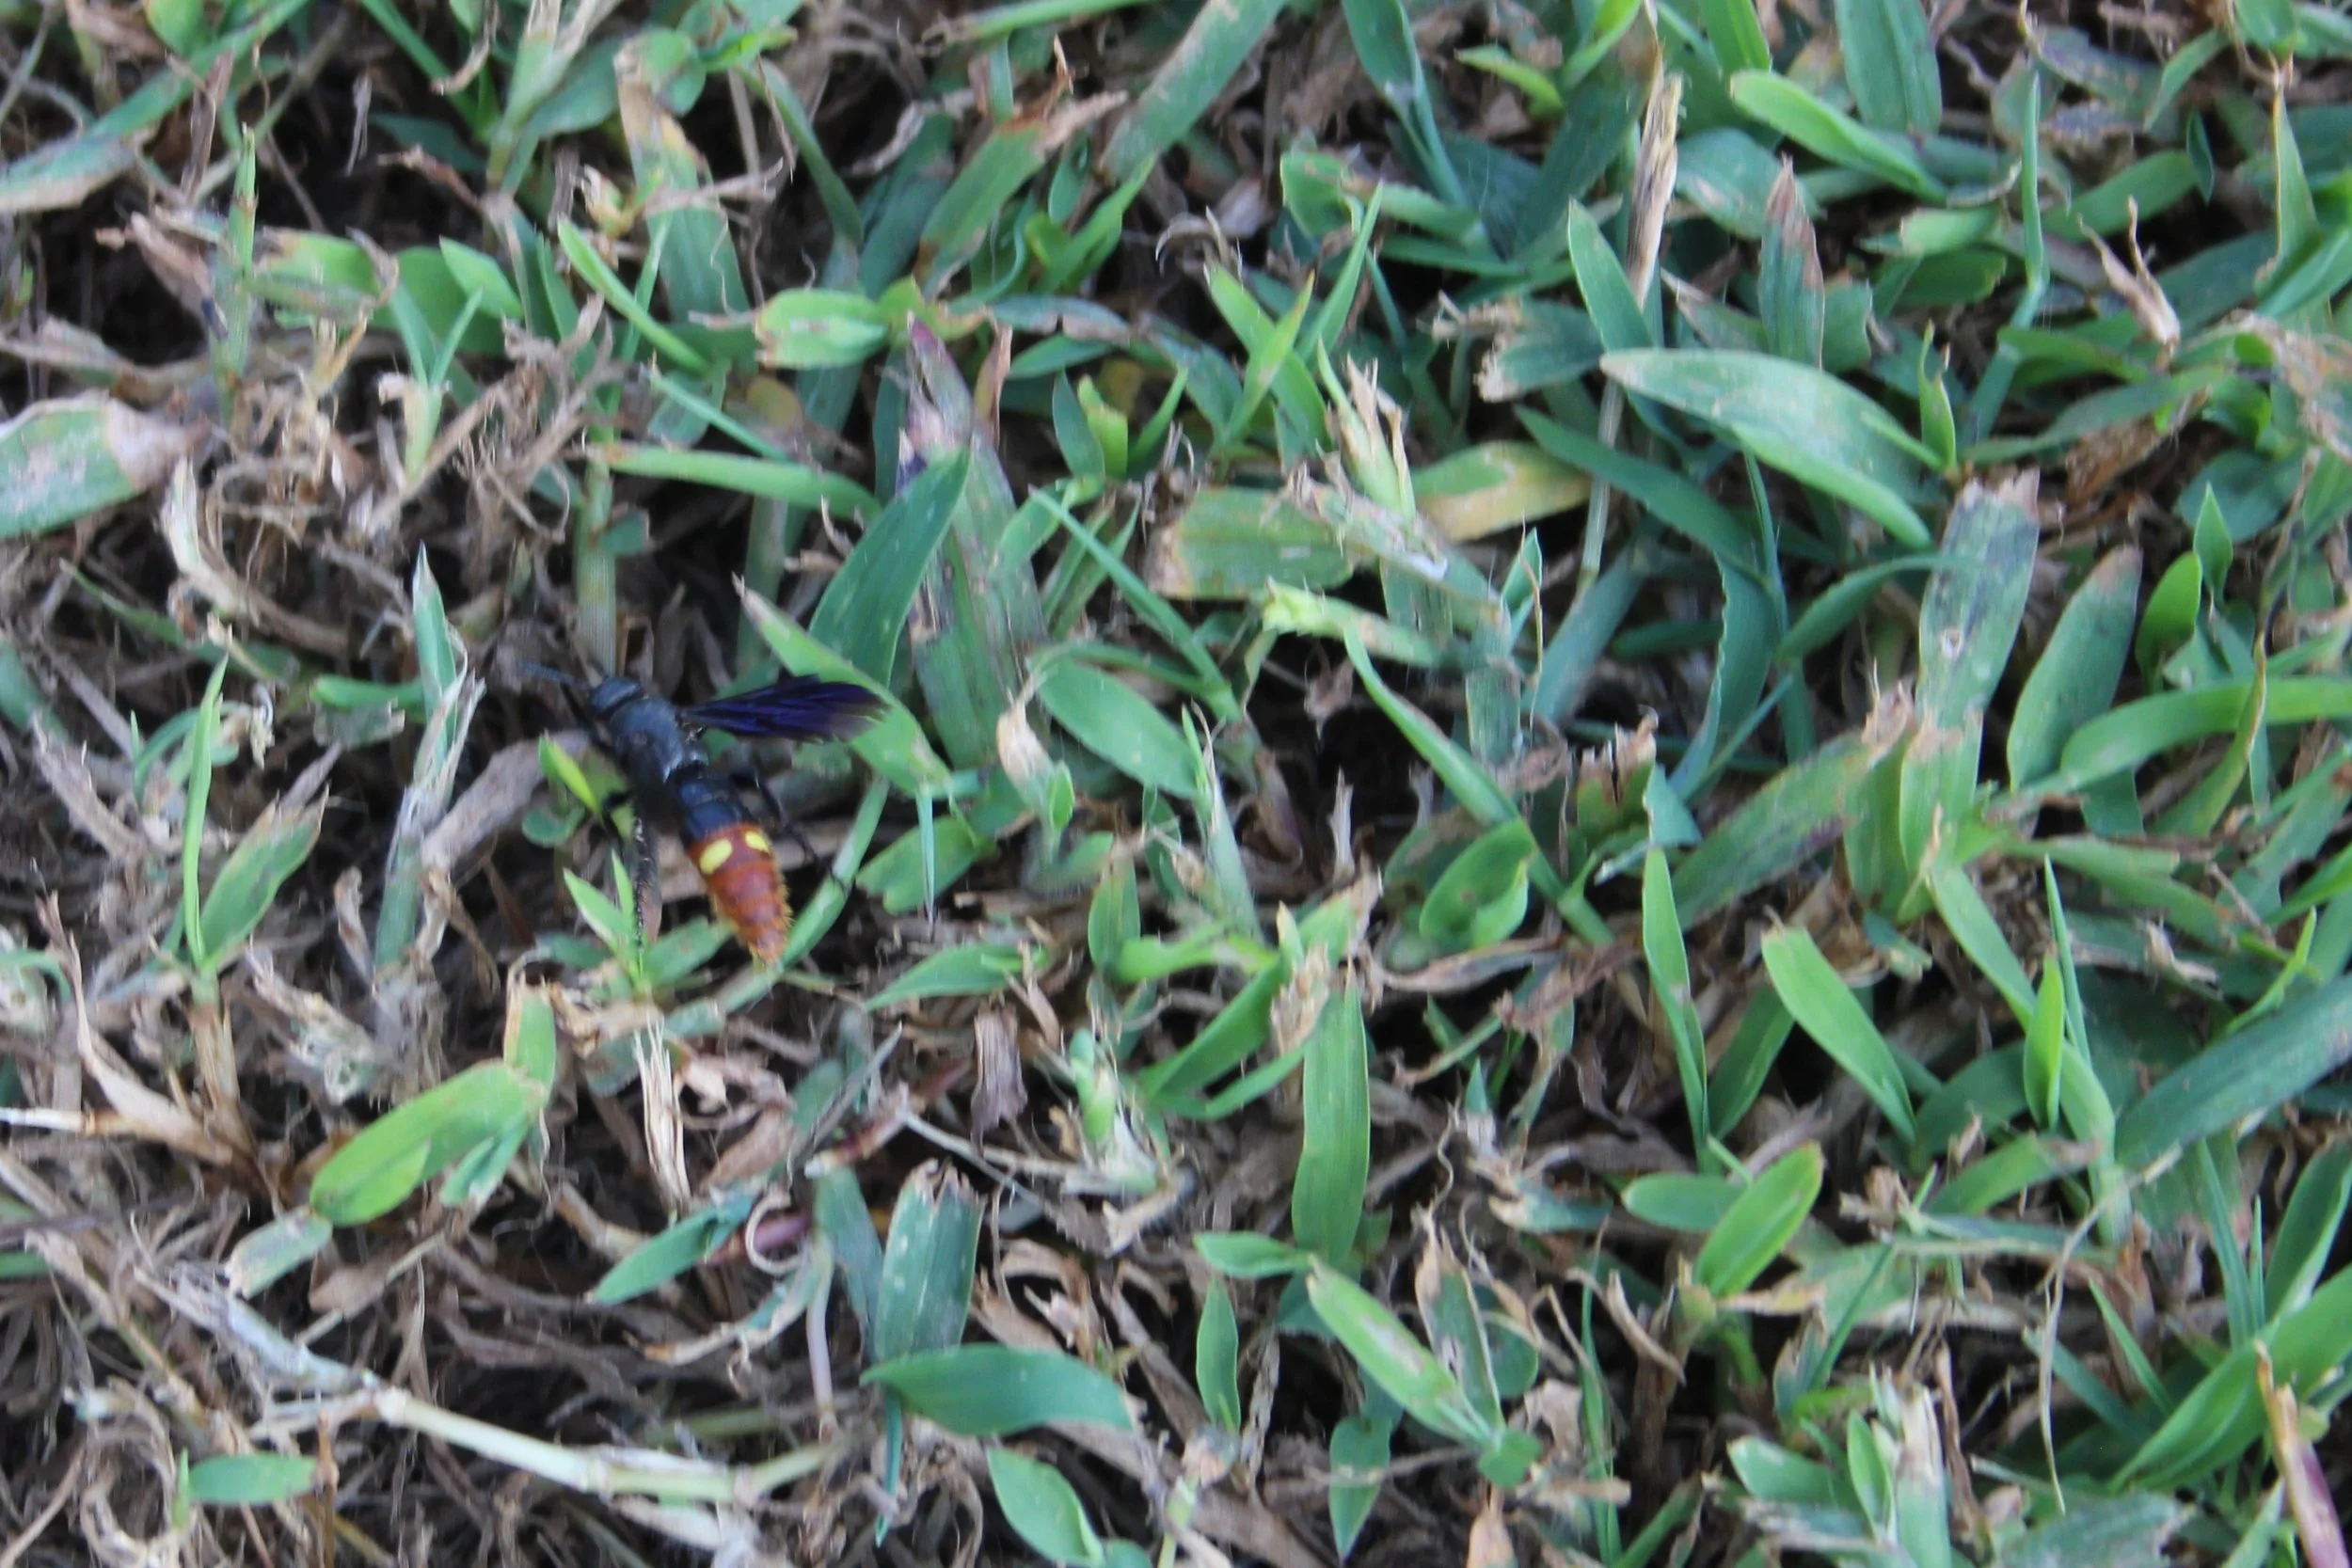
Scolia dubia, commonly known as two-spotted scoliid wasps, blue-winged scoliid wasps or digger wasps, have pretty blue wings, black head and thorax with a rusty-colored abdomen, with a couple of yellow blobs on their rear segments. Females are not aggressive, and won’t sting you unless you really, really mess with them. Males do not have the capacity to sting. They will let you get up close and personal with a cell phone. Despite groups of them congregating in the late afternoon on the wires of my protective cages around blueberry plants, they are known as solitary wasps. This means that they nest alone and feed their babies alone, unlike hornets or paper wasps that live in communes.

When I see large number of these wasps zooming around the pasture just a few inches above the ground, they are shopping for a family dinner. Guess what is on the menu? It is the white grubs that develop into June bugs and Japanese beetles! When the wasp detects a grub, she dives into the soil (see common names above – “digger” wasps) and paralyzes the grub with a sting, then lays her egg on the grub’s body. When the egg hatches, the hatchling’s first meal – a dinner that lasts about two weeks -- is the paralyzed grub. The wasp larva spins a cocoon and becomes a prepupa in the Fall and rests during winter. As warm temperatures return, the prepupa becomes a pupa, which then molts into an adult that emerges in the Spring.

While any insect that hunts and destroys Japanese beetle grubs is a hero in my estimation, blue-winged wasps are also good pollinators. They visit goldenrod often, so check yours out to see if you are hosting these very good bugs.

Blue-winged wasps congregate on fence wire just before dusk.

This blue winged wasp has a dusting of pollen on her head after visiting the nearby pollinator garden.

Not a great photo, but this wasp has detected a white grub under the turf. She drove into the ground and emerged after depositing her egg on the grub.

Passionflower Pops In The Garden

When we first moved to our current property, I was excited to find Maypop plants (Passiflora incarnata, pronounced pas-si-FLOR-ah in-kar-NAH-tuh) growing. This native vine tolerates heat and drought. I found it in sunny areas as well as partly sunny areas, on inhospitable soils that receive no supplemental irrigation. Maypop is cold hardy in zones 5-9. It borders on aggressive in the Snoddy garden. I have tried to eradicate it in several unwanted locations, but it springs back to life from its deep roots. It grows very rapidly, and can be used as a groundcover.

Another common name for Maypop is Passionflower. The intricate flowers are purple and white, with a central structure that was used by Catholic priests in the 16th century to symbolize or describe the crucifixion of Jesus Christ, the passion. How did the common name arise? Well, if you step on one of the fruits, it “may pop.”

I allowed several vines to remain in the pollinator bed next to our orchard (okay, I got lazy and allowed them to flourish unchecked). The flowers are beautiful, unlike anything else. I was looking forward to eating the egg-size fruit, which is reputed to be delicious. The internal structure is similar to pomegranate. I kept an eye on them, ready to harvest as soon as the lime-green fruits turned yellow. Unfortunately, the wild creatures that live in our woodlands are not so patient. They removed the almost-ripe fruits from my vines. All but one, and that one lonely survivor showed teeth marks from either groundhogs, opossums, skunks, or rabbits. Sorry, I don’t share food with rodents.

Even without harvesting a single fruit, I am glad that I allowed the vines to remain. Their leaves have fed a number of different larvae and adult butterflies have flocked to the flowers. A common name for the Gulf fritillary butterfly is passion butterfly. While Maypop fruit is edible, the vine stems and leaves are toxic to humans, dogs, cats, and horses. Deer leave the vines untouched, but Japanese beetles devour the foliage. Despite its toxicity, Maypop would make a great addition to a pollinator garden, especially when planted in a container to eliminate root spread and given a trellis to support its climbing via tendrils.  One trusted university source says that the vines are extremely flammable and should not be planted near the home.

It's a Plant-Eat-Plant World

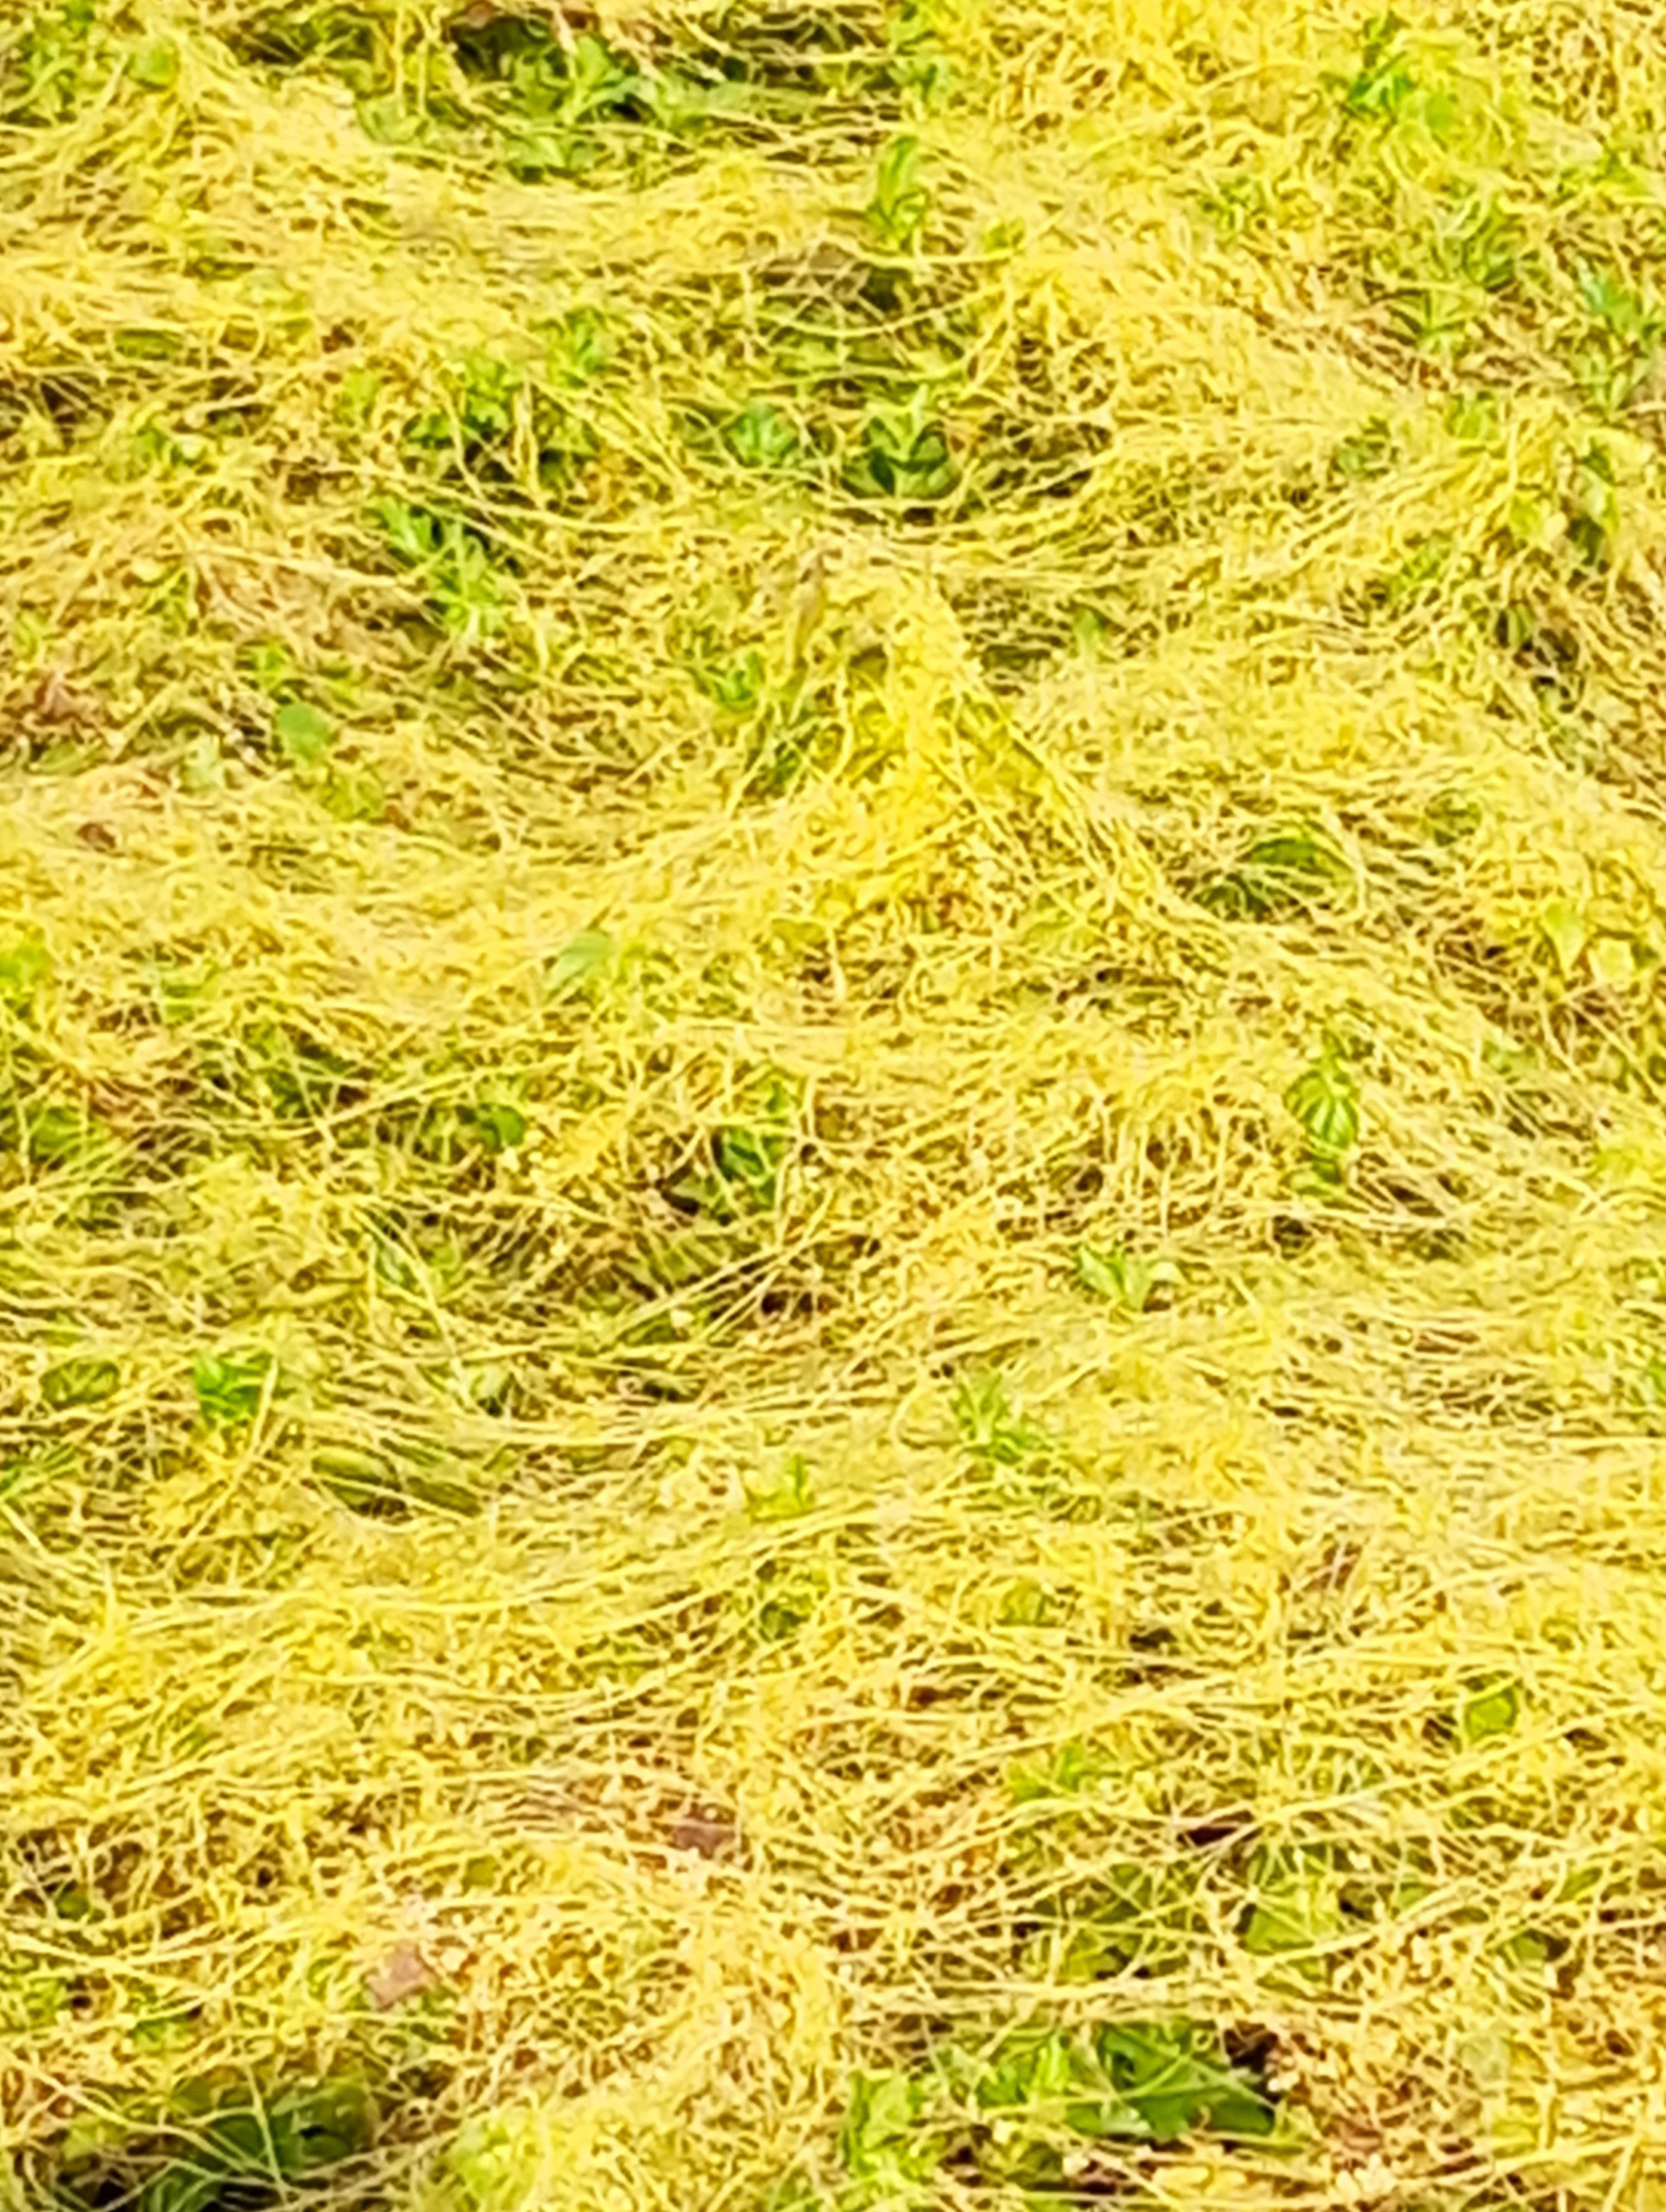
When the parasitic plant Dodder (genus Cuscuta) appears in the garden, it is easy to imagine that someone has dropped a package of yellow drinking straws, or that sprites in the fairy garden have been playing with spray cans of Silly String. The random threads of yellow or orange remind me of those nylon cords used to tie hay bales or pine needle bales. Dodder does not contain chlorophyll and must obtain all its nutrition from another plant, thus defining itself as a parasite. While some parasitic plants barely damage their hosts, Dodder can weaken or even kill a host plant by sucking away its moisture and nutrition.

Dodder starts life as a seed. Once it sprouts, this relative of the common morning glory goes seeking a sugar daddy. When a victim plant is targeted (ten days or less from germination), Dodder inserts a feeding tube, known botanically as a haustorium, to extract sustenance from the host. Once the feeding tube is in place, the roots detach from soil and it becomes completely dependent on the host. It twines around the food source, attaching new feeding tubes as it grows. The stems appear leafless, although tiny leaves are hidden along the rope-like stems.

Dodder has difficulty invading a woody companion, so most of its victims are soft stemmed, herbaceous plants. Several years ago, I spotted a vacant field of kudzu that had been covered with Dodder. It had spread from plant to plant, ensnaring the entire field. It looked like a bizzare mixed-media artwork. Preferred target plants range from clover to dahlias, petunias to potatoes.

Despite its pleasantly unique appearance (I mean, who doesn’t love Silly String?), if you see this plant anywhere in your garden, you should hasten to remove it by pruning away the affected branches of the host plant. This is a viciously competitive pest. If the host has been invaded in numerous places, the entire plant may need to be removed. There are no herbicides that will kill Dodder without killing the host plant as well. The tiny white or yellow flowers appear in late summer to early fall. The blooms produce pea-like fruits that contain four seeds.

Freezing temperatures kill Dodder, so it is less of a problem in locations with winter cold. In frost-free areas, it grows unchecked. In temperate areas where Dodder has grown in the past, be vigilant in spring to remove any new plants that germinate from last season’s seeds.

Dodder forming a net on host plant. Photo By Orangerind - Own work, CC BY-SA 4.0, https://commons.wikimedia.org/w/index.php?curid=124687004

An infestation of Dodder, entirely covering an area of plants of unknown variety.

By Salil Kumar Mukherjee - Own work, CC BY-SA 4.0, https://commons.wikimedia.org/w/index.php?curid=148639645

Marvelous Mondo

Mondo grass (Ophiopogon, pronounced oh-fee-oh-POH-gon) has always been my preferred groundcover choice for shady areas. Less than a foot tall at maturity, it forms a thick evergreen blanket that chokes out weeds. This low-maintenance plant is hardy in zones 6-10. It is salt-tolerant, accepts limited foot traffic and will grow in any well-drained soil. Deer leave it alone.

Also known as Dwarf Lilyturf, Mondo’s white or pale lavender flowers are typically concealed by the foliage. This is unfortunate, because the flowers mature into pretty cobalt blue berries. I like to use Mondo under Crepe Myrtles because it hides their fallen leaves and will protect the Myrtle’s tender bark from damage by string trimmers or mowers.

While it is undemanding, Mondo will look best when it is grown in neutral to slightly acidic soils and irrigated during extended dry spells. The leaves are not bothered by the fungus that sometimes causes Liriope leaves to develop spots and streaks, necessitating a late winter cutback.

Black Mondo planted in a face container

Two Mondos are worth seeking. Ophiopogon planiscapus ‘Nigrescens’ is commonly called Black Mondo. The strappy leaves are truly black. They make an eye-catching addition to planters containing pink, blue, or chartreuse partners.

Crystal Falls® Ophiopogon japonicus differs from all others. Sometimes known as Giant Mondo, its leaves reach up to thirty inches in length, although they arch so much the plant height is usually about twenty-four inches. The white flowers are more evident than standard Mondo, and they produce similar metallic blue berries.

My experience with Crystal Falls® (Ophiopogon jaburan 'HOCF' PP17430) has indicated that it does not like to be divided and relocated too often. Select a location where it can spread without invading the territory of other plants. I have successfully grown it in a container, too, but after three years the roots grew so much that it broke the flimsy ceramic pot.

Use any of the Mondos as groundcovers, edger, or in containers. If used as a bed edging, its spread by underground rhizomes must be contained to restrict its reach into flower beds.

Used as a groundcover, this Giant Mondo (Crystal Falls®) will absorb the spent flowers, seed pods, and leaves shed by the Crepe Myrtle in the center of the clump.

Mondo Grass used as an edger. Photo by Jim Robbins. Used under CC BY-NC-ND 4.0

Closeup view of the brilliant blue berries of Ophiopogon. Photo by Jean. Used under CC BY-NC-ND 2.0

Sadly, the blue berries are almost concealed by the foliage. Photo by VanLap Hoang. Used under CC BY 2.0

New, Well-Behaved Butterfly Bushes

My favorite flowering shrub (currently, anyway) is Buddelia, commonly known as Butterfly Bush. Before you start criticizing this choice as invasive and non-native, let me tell you that all eight of mine are sterile, in the Pugster® family, hybrids from Proven Winners. I have the blue, which is really a shade of blue-purple. The small size makes them compatible with the perennials in my mixed beds. The ones in the pollinator bed near my orchard are four years old, and have not exceeded the labeled height of three feet.

The positives: Butterflies, bees, and hummingbirds adore the flowers. Plants do not require deadheading, but will look better if the spent flowers are removed. In my zone 8 garden, they are semi-evergreen, retaining enough leaves to avoid looking naked in winter. In colder zones, top growth may die back to the ground in winter and should be removed but spring growth is rapid. Deer and rabbits leave them alone. Shrubs bloom throughout the entire summer and into fall. The conical flower panicles of the Pugsters are unique, resembling a tightly packed lilac. Buddleias tolerate heat, humidity, and drought. They are hardy in zones 5 – 9, and are not picky about soil but do require full sun. For all types and cultivars, spring planting is preferred to fall planting.

The negatives: While butterflies swarm the flowers for nectar, the caterpillars that produce those beautiful insects will not dine on the foliage. Other food sources must be provided for the larvae. Plants flower on new growth, so an occasional cut-back is needed for maximum flower power. Older cultivars are NOT sterile and produce so many offspring they are listed as invasive in nine states. Standard Buddleia varieties can be much taller, up to twelve feet. If the sight of dead brown blooms is offensive (I get it, I’m a bit compulsive in that regard), regular removal can be a twice-weekly chore.

Buddleia is sometimes spelled Buddleja but in both cases is pronounced bud-lee-uh. The leaves have an attractive grayish cast that contrasts with brighter companions. Flowers are lightly fragrant.

The National Garden Bureau has named Buddleia as the 2024 Shrub of the Year. Of particular interest is Baby Buzz®, a dwarf cascading form that can be used in a hanging basket. In addition to the sterile Pugster series mentioned above, Lo and Behold® series and the Miss series (Miss Molly, Miss Ruby, Miss Violet) are sterile and the Chrysalis™ series is low seed set and also small enough to be used in hanging baskets and containers. The Cascade Collection is low seed set on a large plant for a flowering backdrop. Gold Drop and Butterfly Gold have either variegated or golden foliage.

Look closely and you can see: spicebush swallowtail, Eastern swallowtail, Gulf fritillary, a tiny silver-spotted skipper, and a bumble bee.

A Tall Coneflower for Masses of Flowers

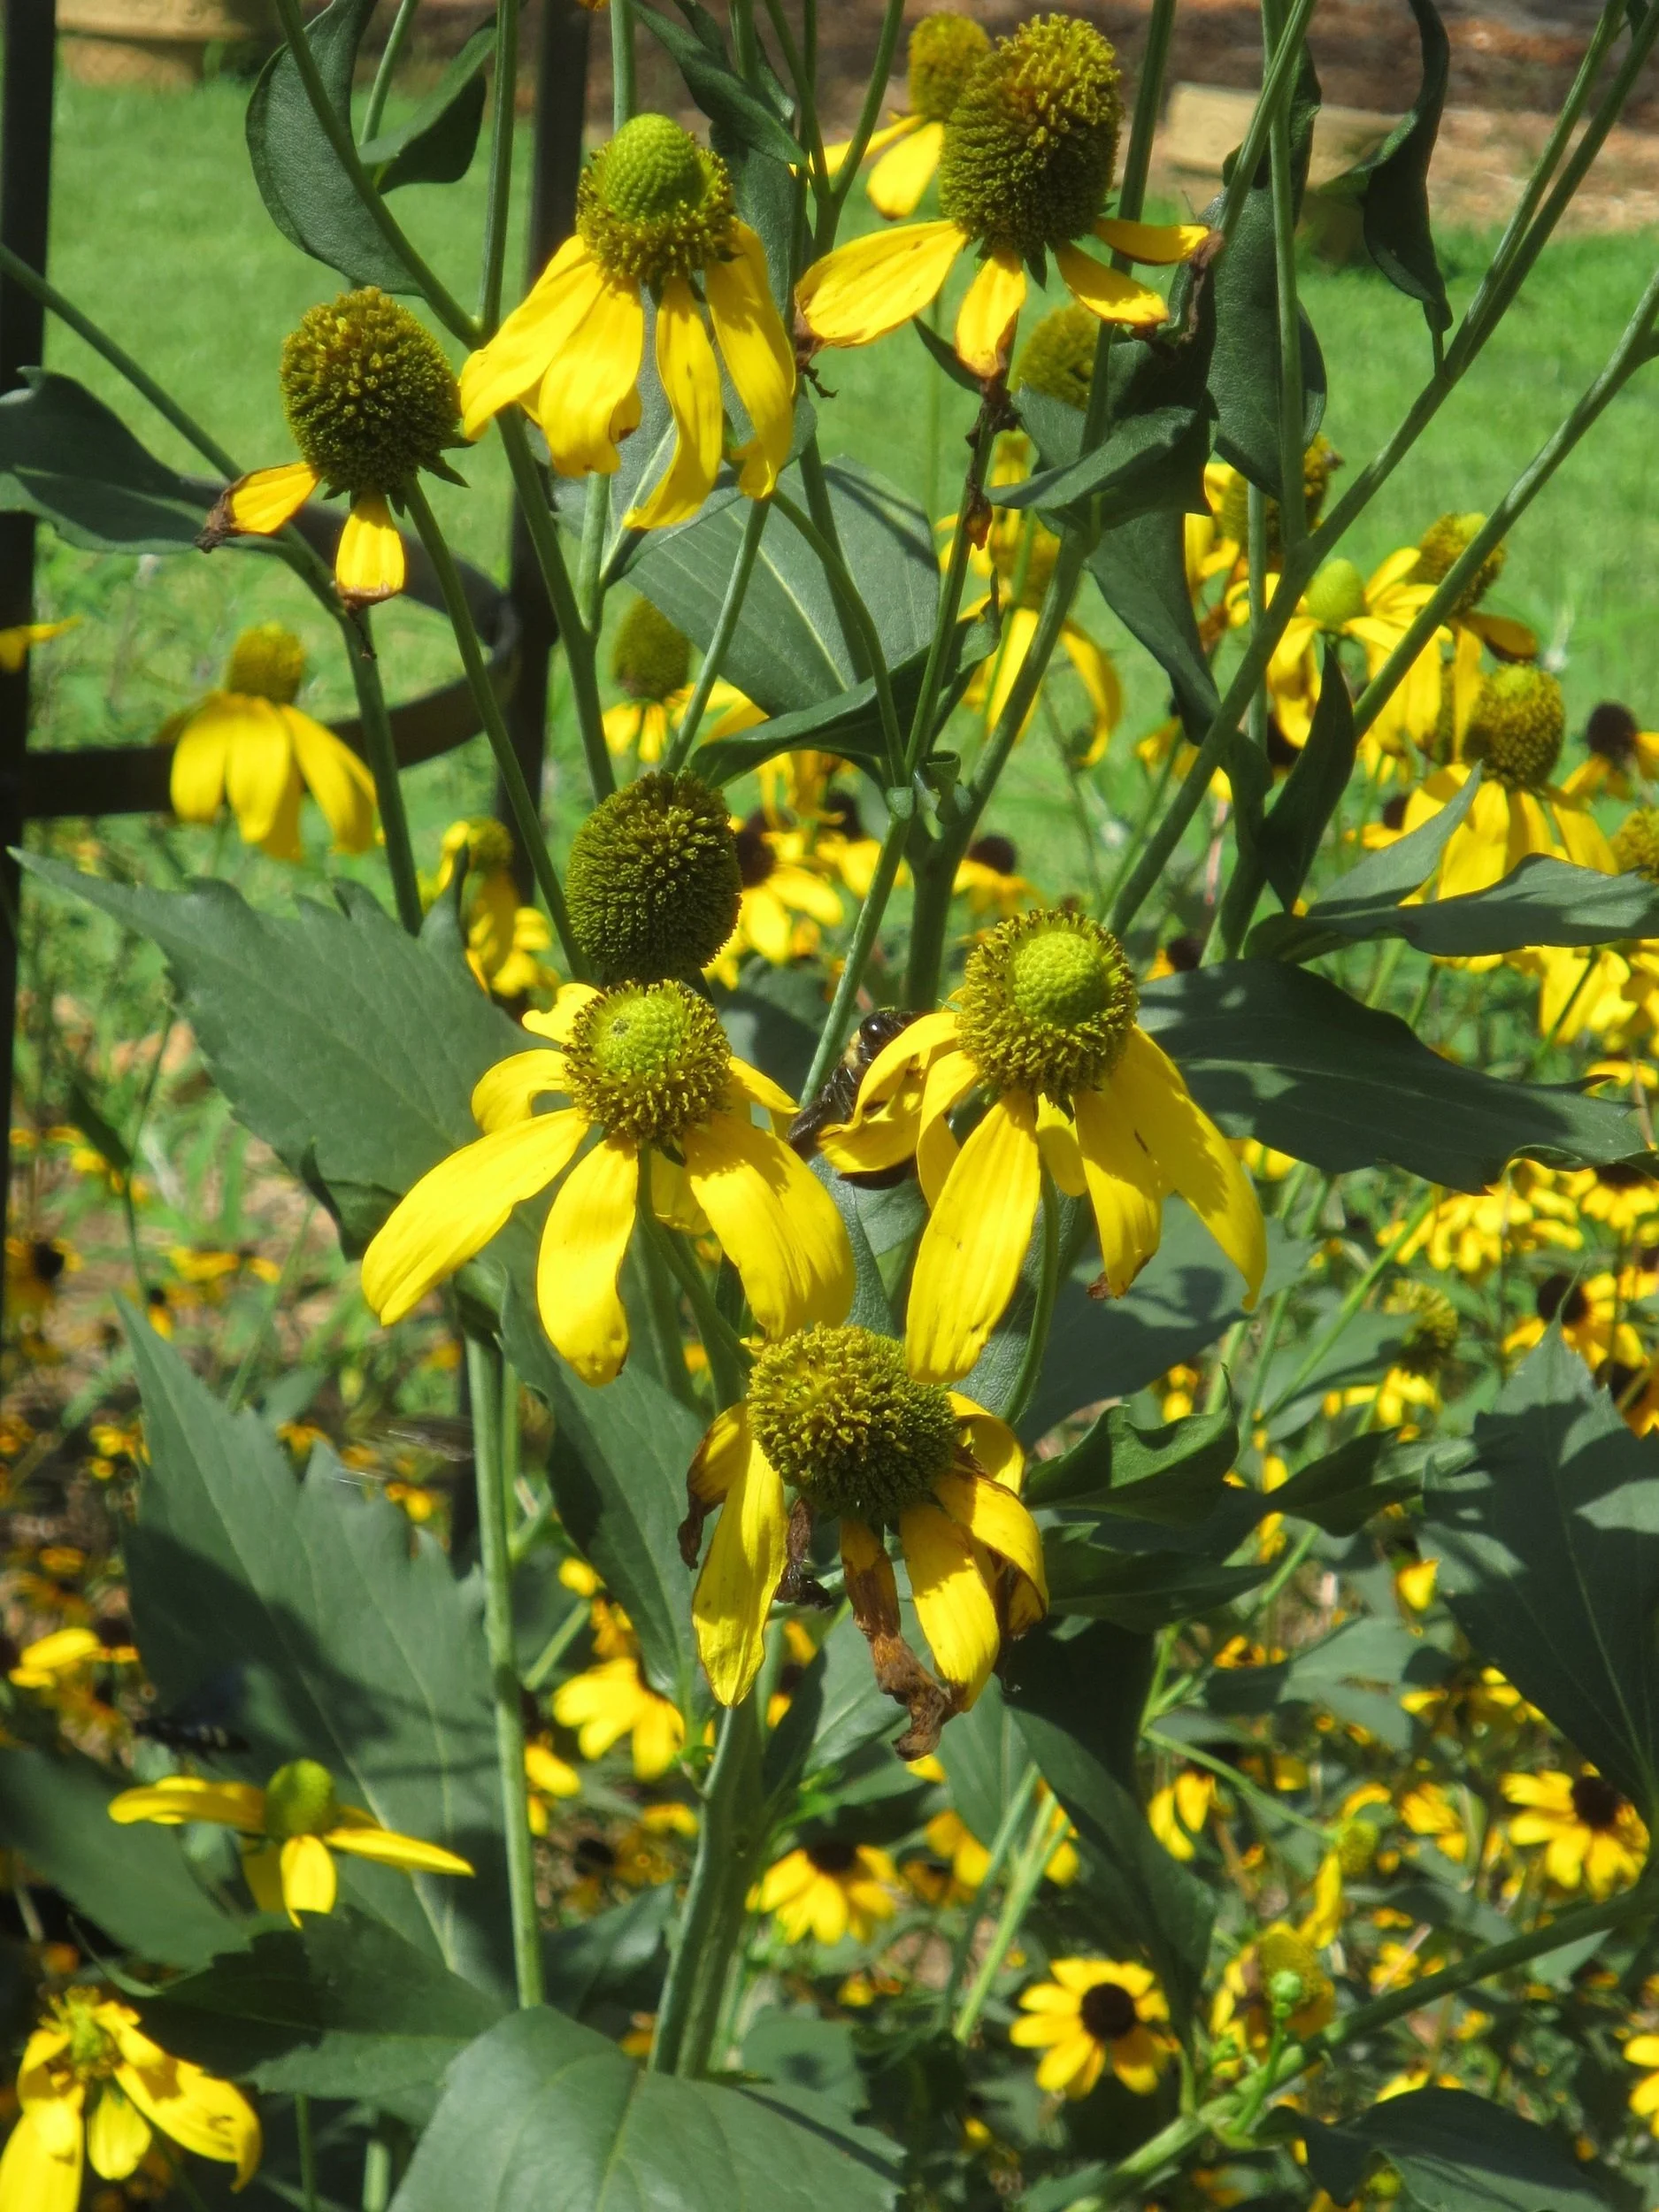
Say “coneflower” to most gardeners, and they mentally picture purple coneflower, Echinacea purpurea. Purple coneflowers, and all the other colors, are beloved by gardeners for their heat tolerance, ease of culture, and pollinator attraction. In the case of Cutleaf Coneflower, also known as Green Headed Coneflower, this image is completely wrong. Despite the common name, this golden-flowered giant is a Rudbeckia, not an Echinacea. Rudbeckias are widely known by the common name, black-eyed Susan. Like Echinacea, Rudbeckia tolerates heat, humidity, and moderate drought.

I received my first Cutleaf Coneflower, Rudbeckia laciniata ‘Herbstonne,’ from a friend who divided hers. She told me that it was a tall plant that started flowering in early summer and continued blooming until frost. The first year mine reached a height of three feet. Every year thereafter it grew to at least six feet, and one year (lots of rain) even topped out at eight feet tall. True to reputation, this plant produces enormous numbers of yellow flowers from May to frost. It is hardy from zones 3 to 9. It will grow in any soil type and any pH level, in full sun. Stems die to the ground with the first freeze, leaving a collar of green basal foliage at ground level.

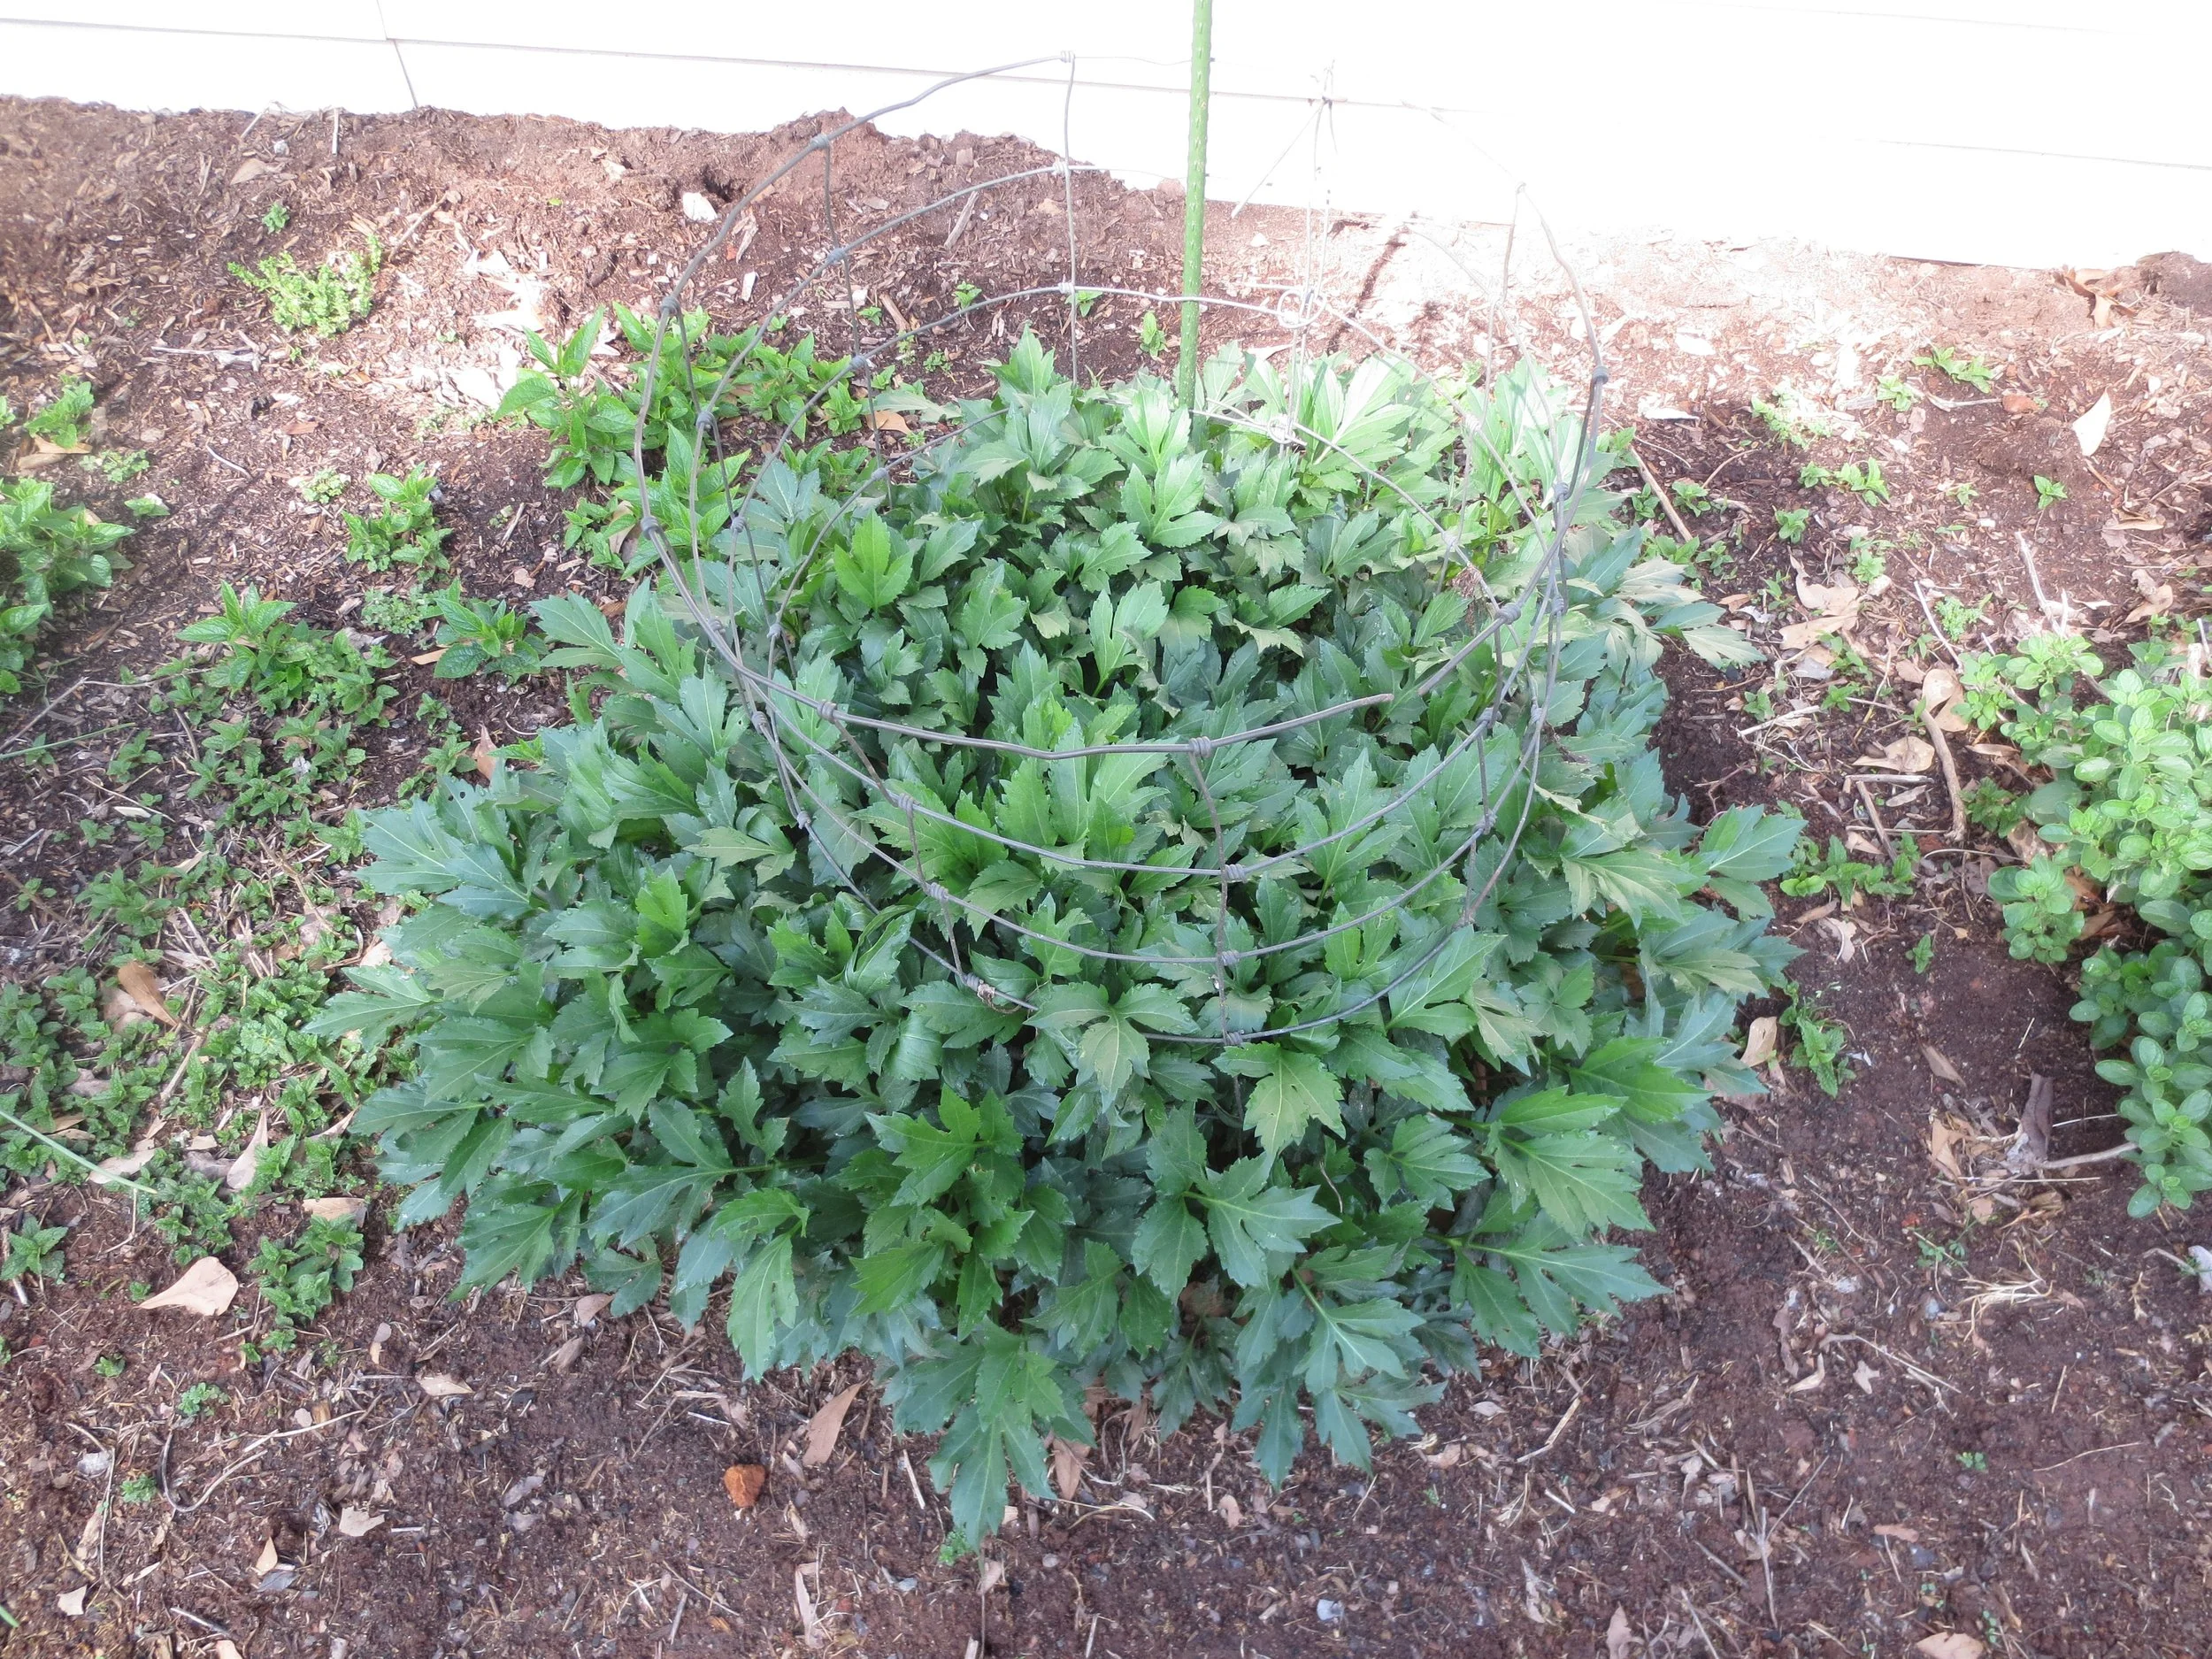
I learned that Cutleaf Coneflower’s tall height paired with numerous flowers results in spraddling, a most inelegant way to describe sprawling stems. I experimented with cutbacks early in the season, and discovered that two cutbacks, a tip pruning when stems reach a foot tall, and then a cutback of several inches when they reach two feet tall, will result in a shorter, stockier plant. I used cages fashioned from scraps of fencing to surround each plant, further supporting the stems and giving me a visual reminder when it is time to divide.

Plants spread by underground runners. With time, they will become so congested that the middle will die out. I have included two photos, taken a year apart, as plants emerge in the spring. The need to divide is evident in the second photo. I only irrigate during the worst droughts. Water restriction helps slow down spread by roots, reducing the need for division.

Apart from division every third year or so and the removal of dead stems in spring before new growth starts, there is little maintenance required. I remove the dead flowers from most of my perennials, but not this one. You could remove flower heads once the petals drop to force more flowering, but I allow most spent heads to remain on the stems. The bare green heads are not unattractive and they bring in bird visitors, especially goldfinches. Deer ignore mine, which is an added bonus.

Tall Cutleaf or Green Head Coneflowers at the back, with typical Black Eyed Susans in the foreground.

Prominent green heads are surrounded by slightly-drooping yellow petals.

Hummingbirds Fight Over This Plant

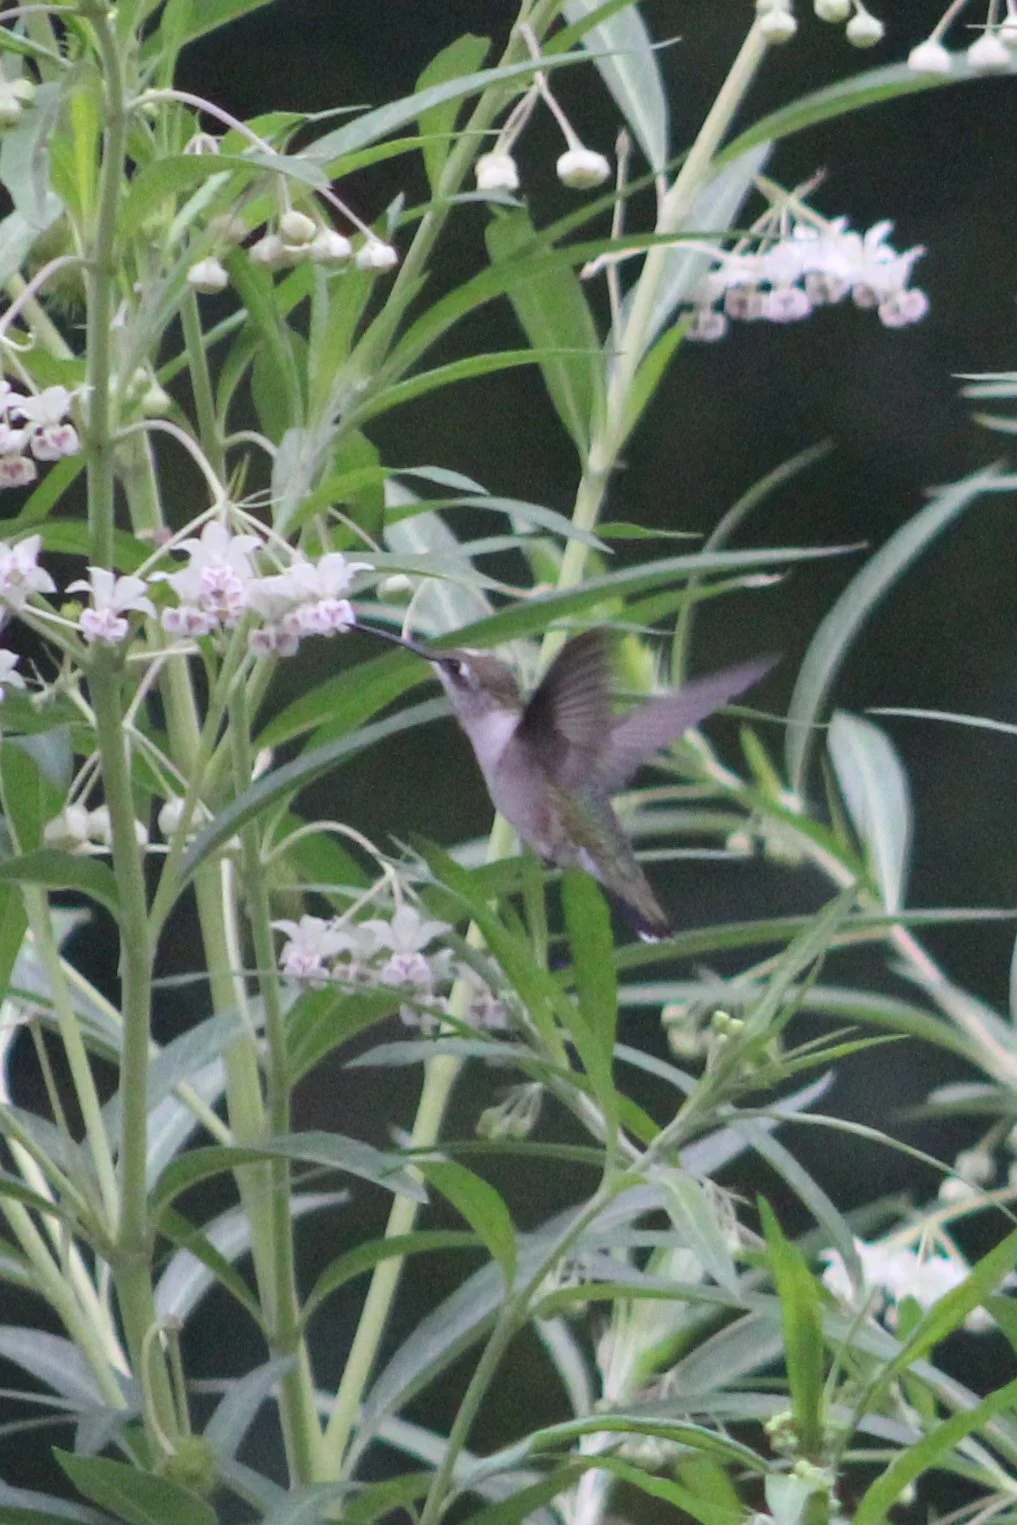
The Snoddy garden is hosting a hummingbird competition that looks like a fusion of Ben Hur and olympian gymnastics. These tiny birds dive bomb each other in a demonstration of jealous rage as they compete over a gangly, strange-looking plant commonly known as Fuzzy Balls, Hairy Balls, or Balloon plant. It is a form of milkweed, formerly known as Asclepias physocarpa, renamed to Gomphocarpus physocarpa (pronounced gom-fo-KAR-pus fy-so-KAR-puh). Fuzzy Balls plant has clusters of small, white, bell-shaped flowers with a pleasant fragrance. The blooms are easily overlooked. The golf ball-size seed pods, however, draw a lot of attention. They are light green to yellow, with dark hairs.

Fuzzy Balls are grown as annuals, but may overwinter in zones 8 and 9, especially in a mild winter. They need full sun to rise to their potential, and are both heat- and drought-tolerant once established. Mature plants can reach six feet in height and are prone to being flattened by summer thunderstorms, so pinch them back several times in early spring to keep plants shorter and create stronger stems. I use a tomato cage around mine for extra insurance. Planting a group of several seedlings close to each other allows for easier caging or staking of the mature plants.

Stems with seed pods can be cut for inclusion into flower arrangements. Their unusual appearance is certain to inspire comments. Cut stems will last a long time in the vase, but seed capsules will rupture once they are completely dry. Left to mature on the plant, ripe seed pods will burst open. Each balloon will have numerous seeds and each of those seeds will have a silken hair attached, for ease of wind dispersal.  I have read that these plants can be invasive in the parts of the deep south, but I have not seen this in zones 7-8.

Plants contain a milky sap that may irritate sensitive skins. They are moderately resistant to browsing by deer. Like other milkweeds, they attract butterflies, including Monarchs.

This speedy girl spent many minutes sipping from Fuzzy Ball flowers.

Ripening seed pods. You can see the reason for the common names, Fuzzy Balls or Balloon Plant.

Why Soil Prep and Plant Maintenance Matter

If you have ever wondered about whether soil preparation was really critical, or if that was just an “in a perfect world” condition, let me share my personal experiences. This spring, I started a new planting bed in an area that had been compacted by construction equipment. In some areas, I carefully dug and amended before planting. Other areas (I got tired and impatient), I just chiseled holes in the sticky red clay of upstate SC and plopped in seedlings. Thankfully, the holes of shrubs and perennials were all loosened and amended. The annuals did not receive the same care because, well, they are annuals.

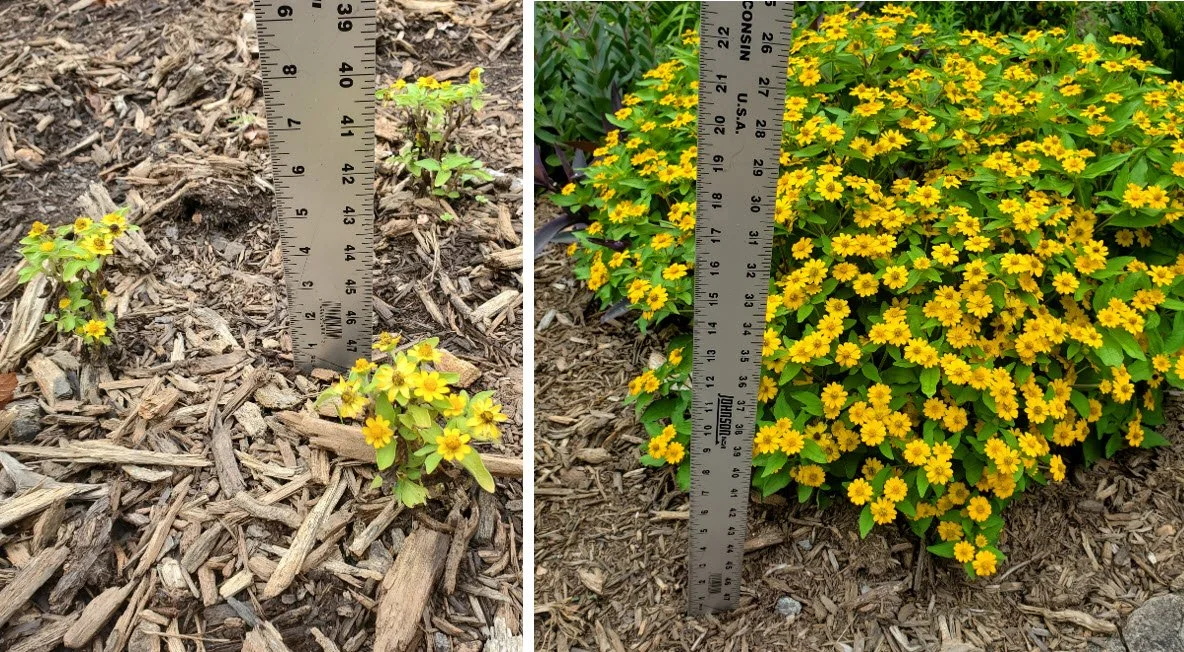
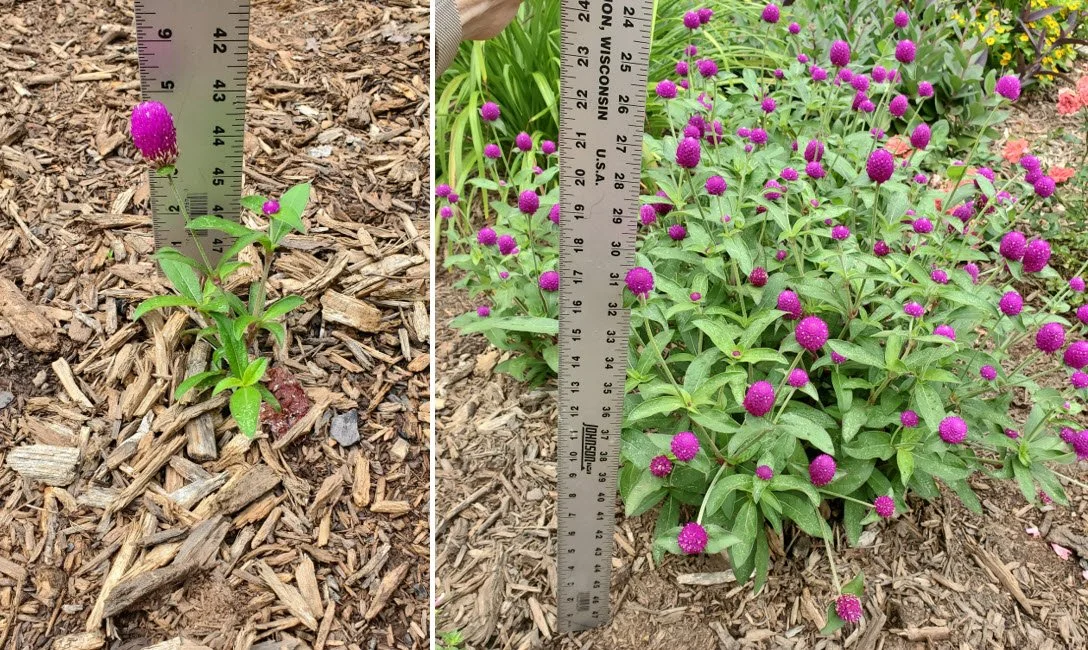
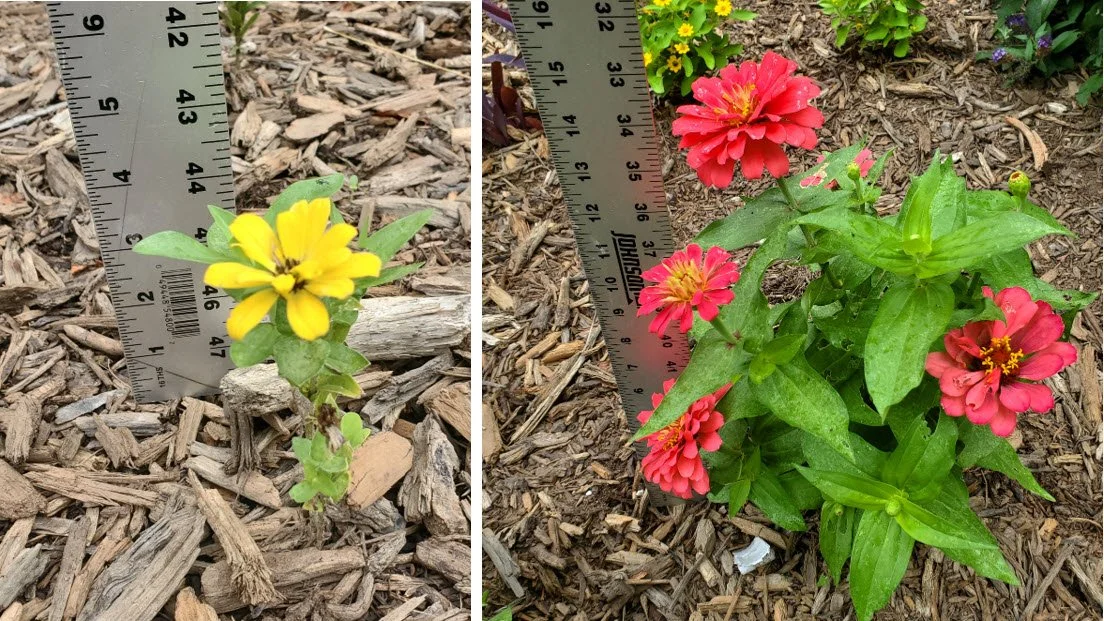
Here are three examples demonstrating the difference that soil preparation can make. I have not fertilized the plants in these photographs.

Seedlings of the puny trio of Melampodium on the left were placed into unprepared soil three months ago. The trio on the right was installed in loosened and amended soil. They are twenty-two inches tall. These plants came from the same package of seed, were installed the same day, and are only a few feet apart, so they get the same sun exposure.

These Gomphrena seedlings were started from the same seed pack and placed in the ground the same day, three months ago. The plant on the left was placed into unprepared soil. It is five inches tall. The plant on the right was placed into soil amended with a shovelful of soil conditioner. It is twenty-two inches tall. These plants are in the same bed, a few feet apart.

Just like the examples above, these Zinnias were started from the same seed pack and seedlings were planted out the same day, only a few feet apart. The one on the left, placed in unamended soil, is a single stem, four inches in height. The one on the right, planted into amended soil, is well-branched and fifteen inches tall. I feel guilty every time I see the runts.

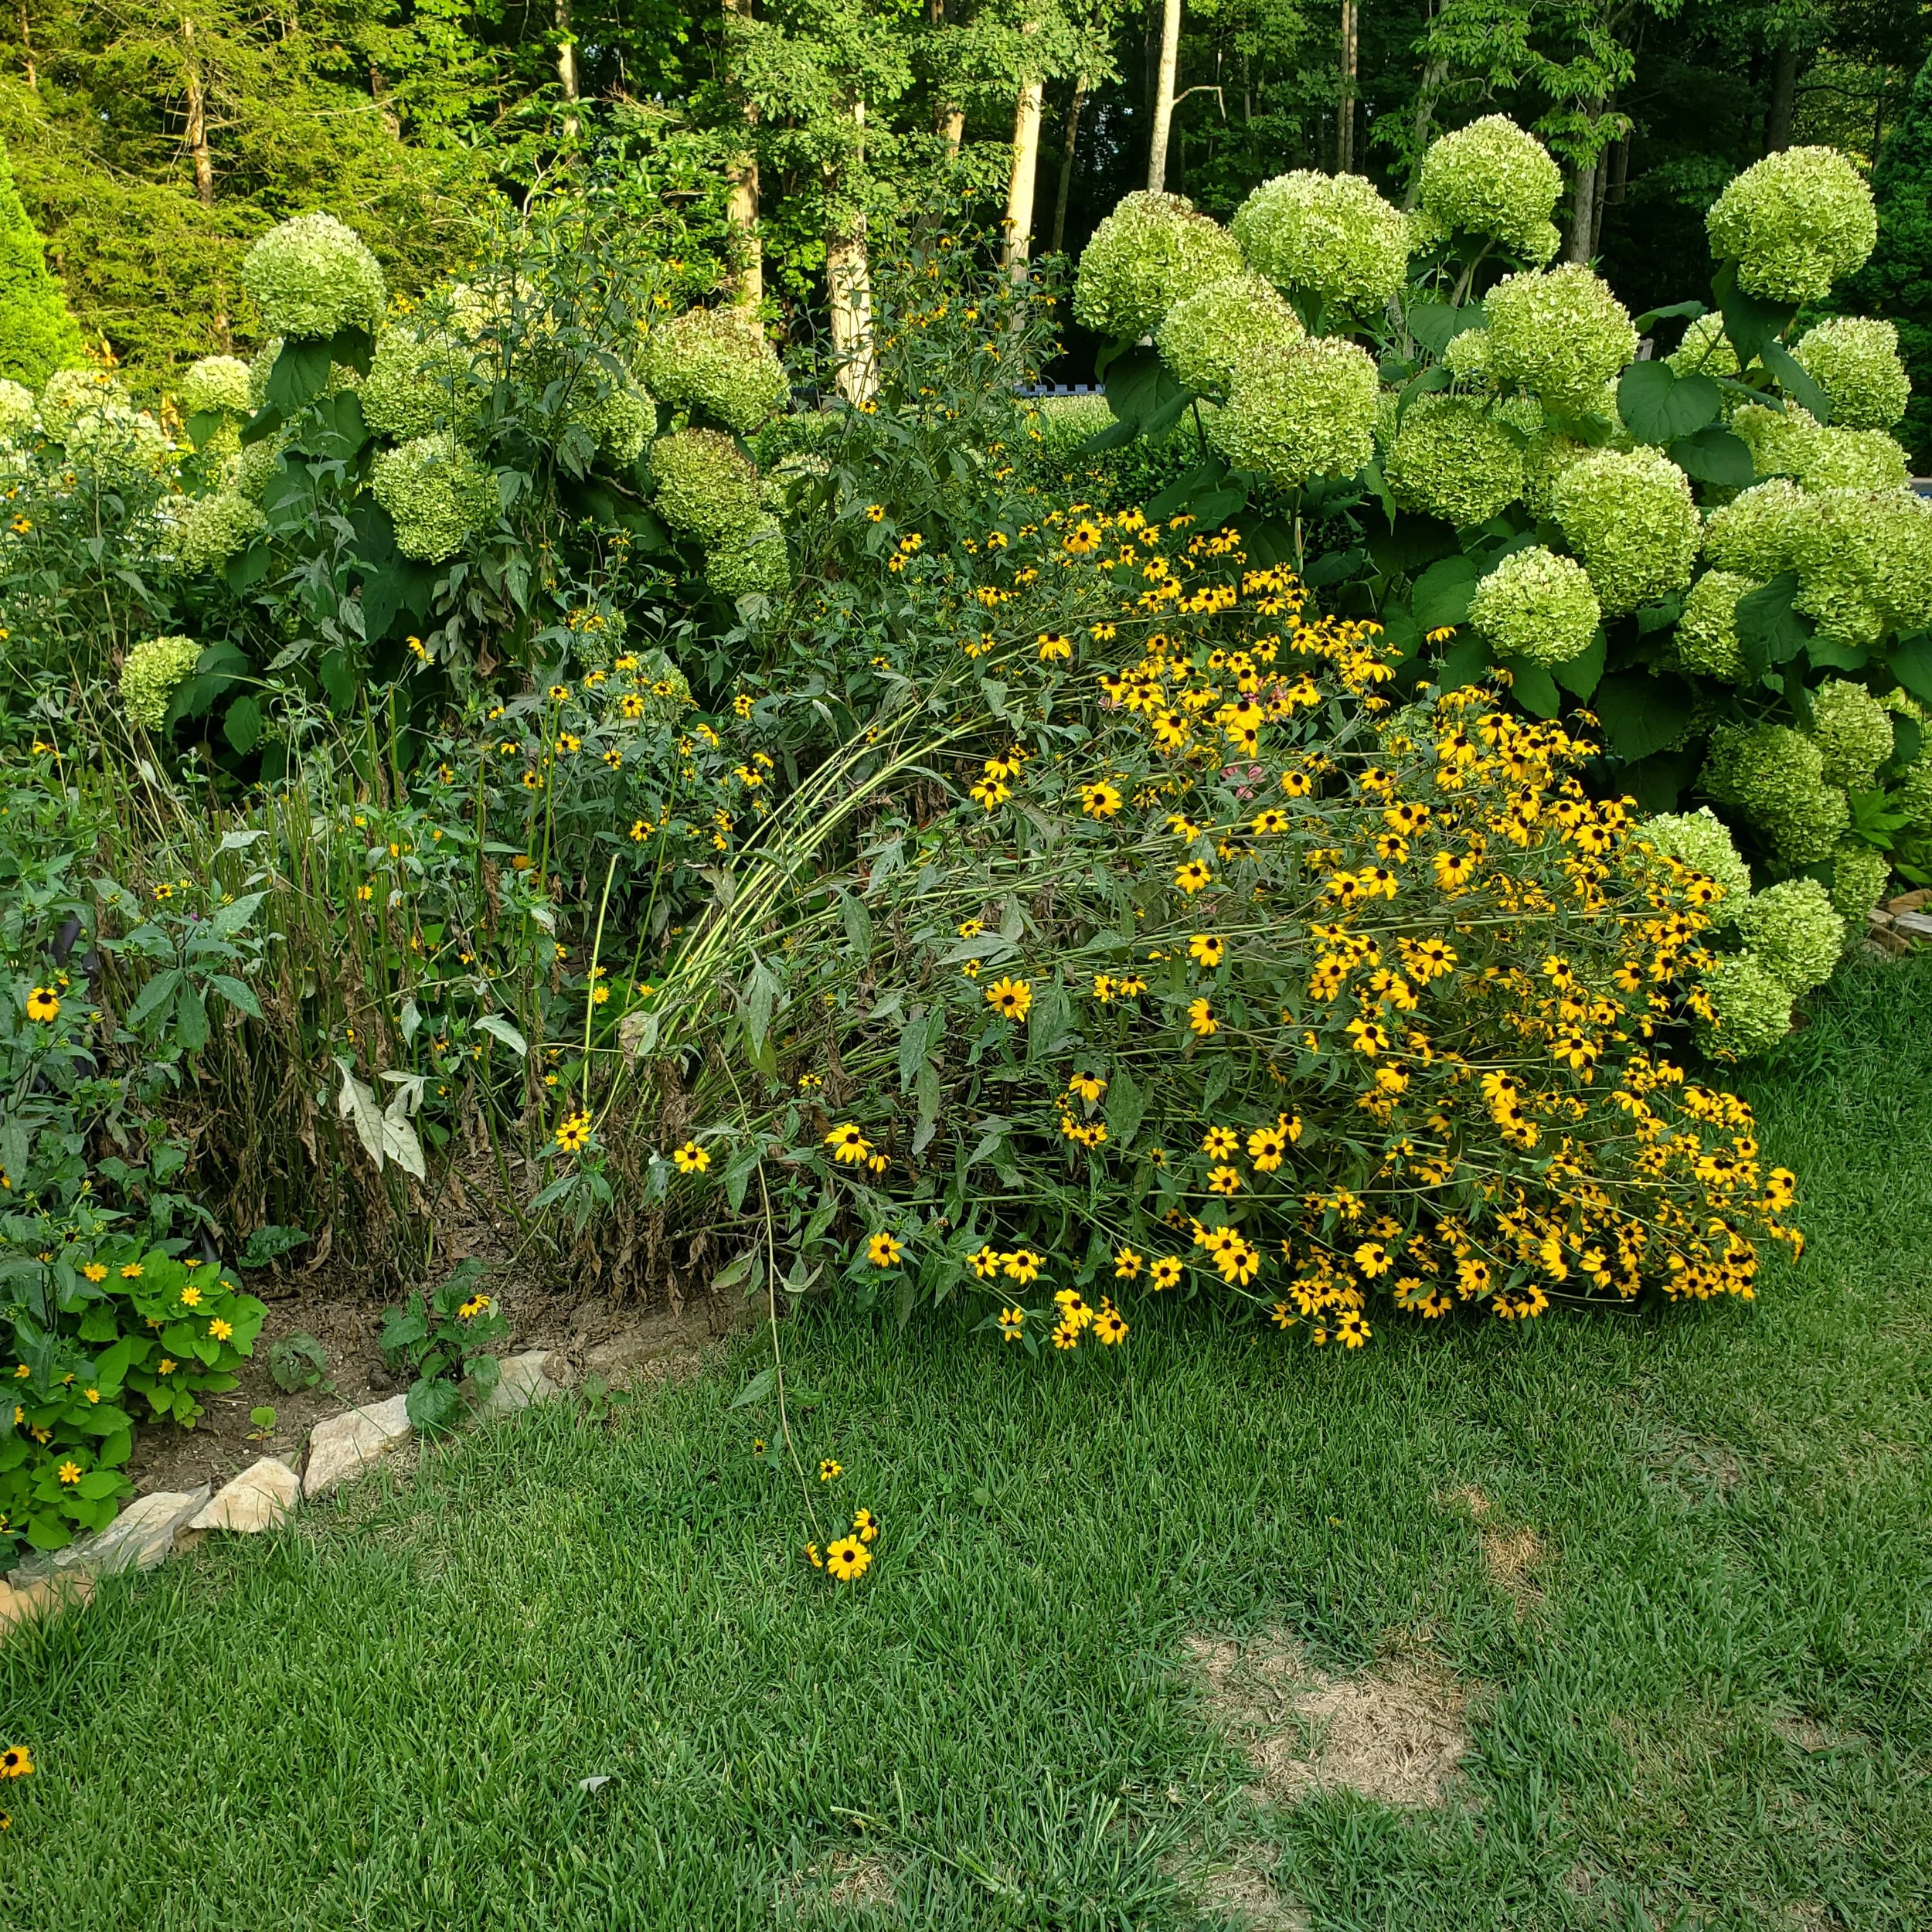
The final photograph, below, shows what happens when maintenance is ignored. Certain tall plants are prone to “spraddling” later in the season, especially after a hard rain. In early spring, I tip-pruned my Mexican Salvia and Joe Pye Weed. They branched obligingly, and are about two-thirds the height they would have been without the cutback. Joe Pye flowers are starting to open, and the Mexican Salvia will flower in another six weeks or so. I neglected to cut back the Brown-Eyed Susans (Rudbeckia triloba) and last week a thunderstorm took the flowers to the ground, where they remained. I was forced to cut plants back to about a foot. They will recover and produce a few late flowers, but I lost the exuberant show and strong stems that an early cutback would have produced.

These Brown-Eyed Susans were forty inches tall, in full bloom. Then the rain came, and down they went.

The message of this blog: Take whatever time is necessary to properly prepare soil before installing plants. Heavy clay can be improved with soil conditioner, compost, or leaf mold. When you backfill the holes with amended soil, just firm it by hand enough to ensure good root-to-soil contact. There is no need to stamp it like you are angry with Mother Earth. Plant roots need oxygen to thrive.

"Lite" Choices: Perlite vs Vermiculite

The large bag should last a long time.

I finally broke down and bought the mother of all bags of horticultural vermiculite. A whopping four cubic feet, it filled the entire back seat of my small car. In past years, I have purchased standard-sized bags found in home improvement garden centers or big box stores. During the coronavirus pandemic, the product was scarce. I had to make do by recycling media that had already been used for rooting or using smaller containers.

I do a lot of home propagation because I’m too cheap to buy full-size plants at the nursery. Vermiculite is my product of choice when it comes to propagation from cuttings. (If you want the complete details, please see my YouTube channel on small-scale home propagation using a Forsyth pot: https://www.youtube.com/watch?v=KsBv12O17MY ). The supersize bag should last a couple of years. Why don’t I use perlite instead, which is available at most garden centers? Are perlite and vermiculite interchangeable? Well, yes and no. Let’s compare these two products.

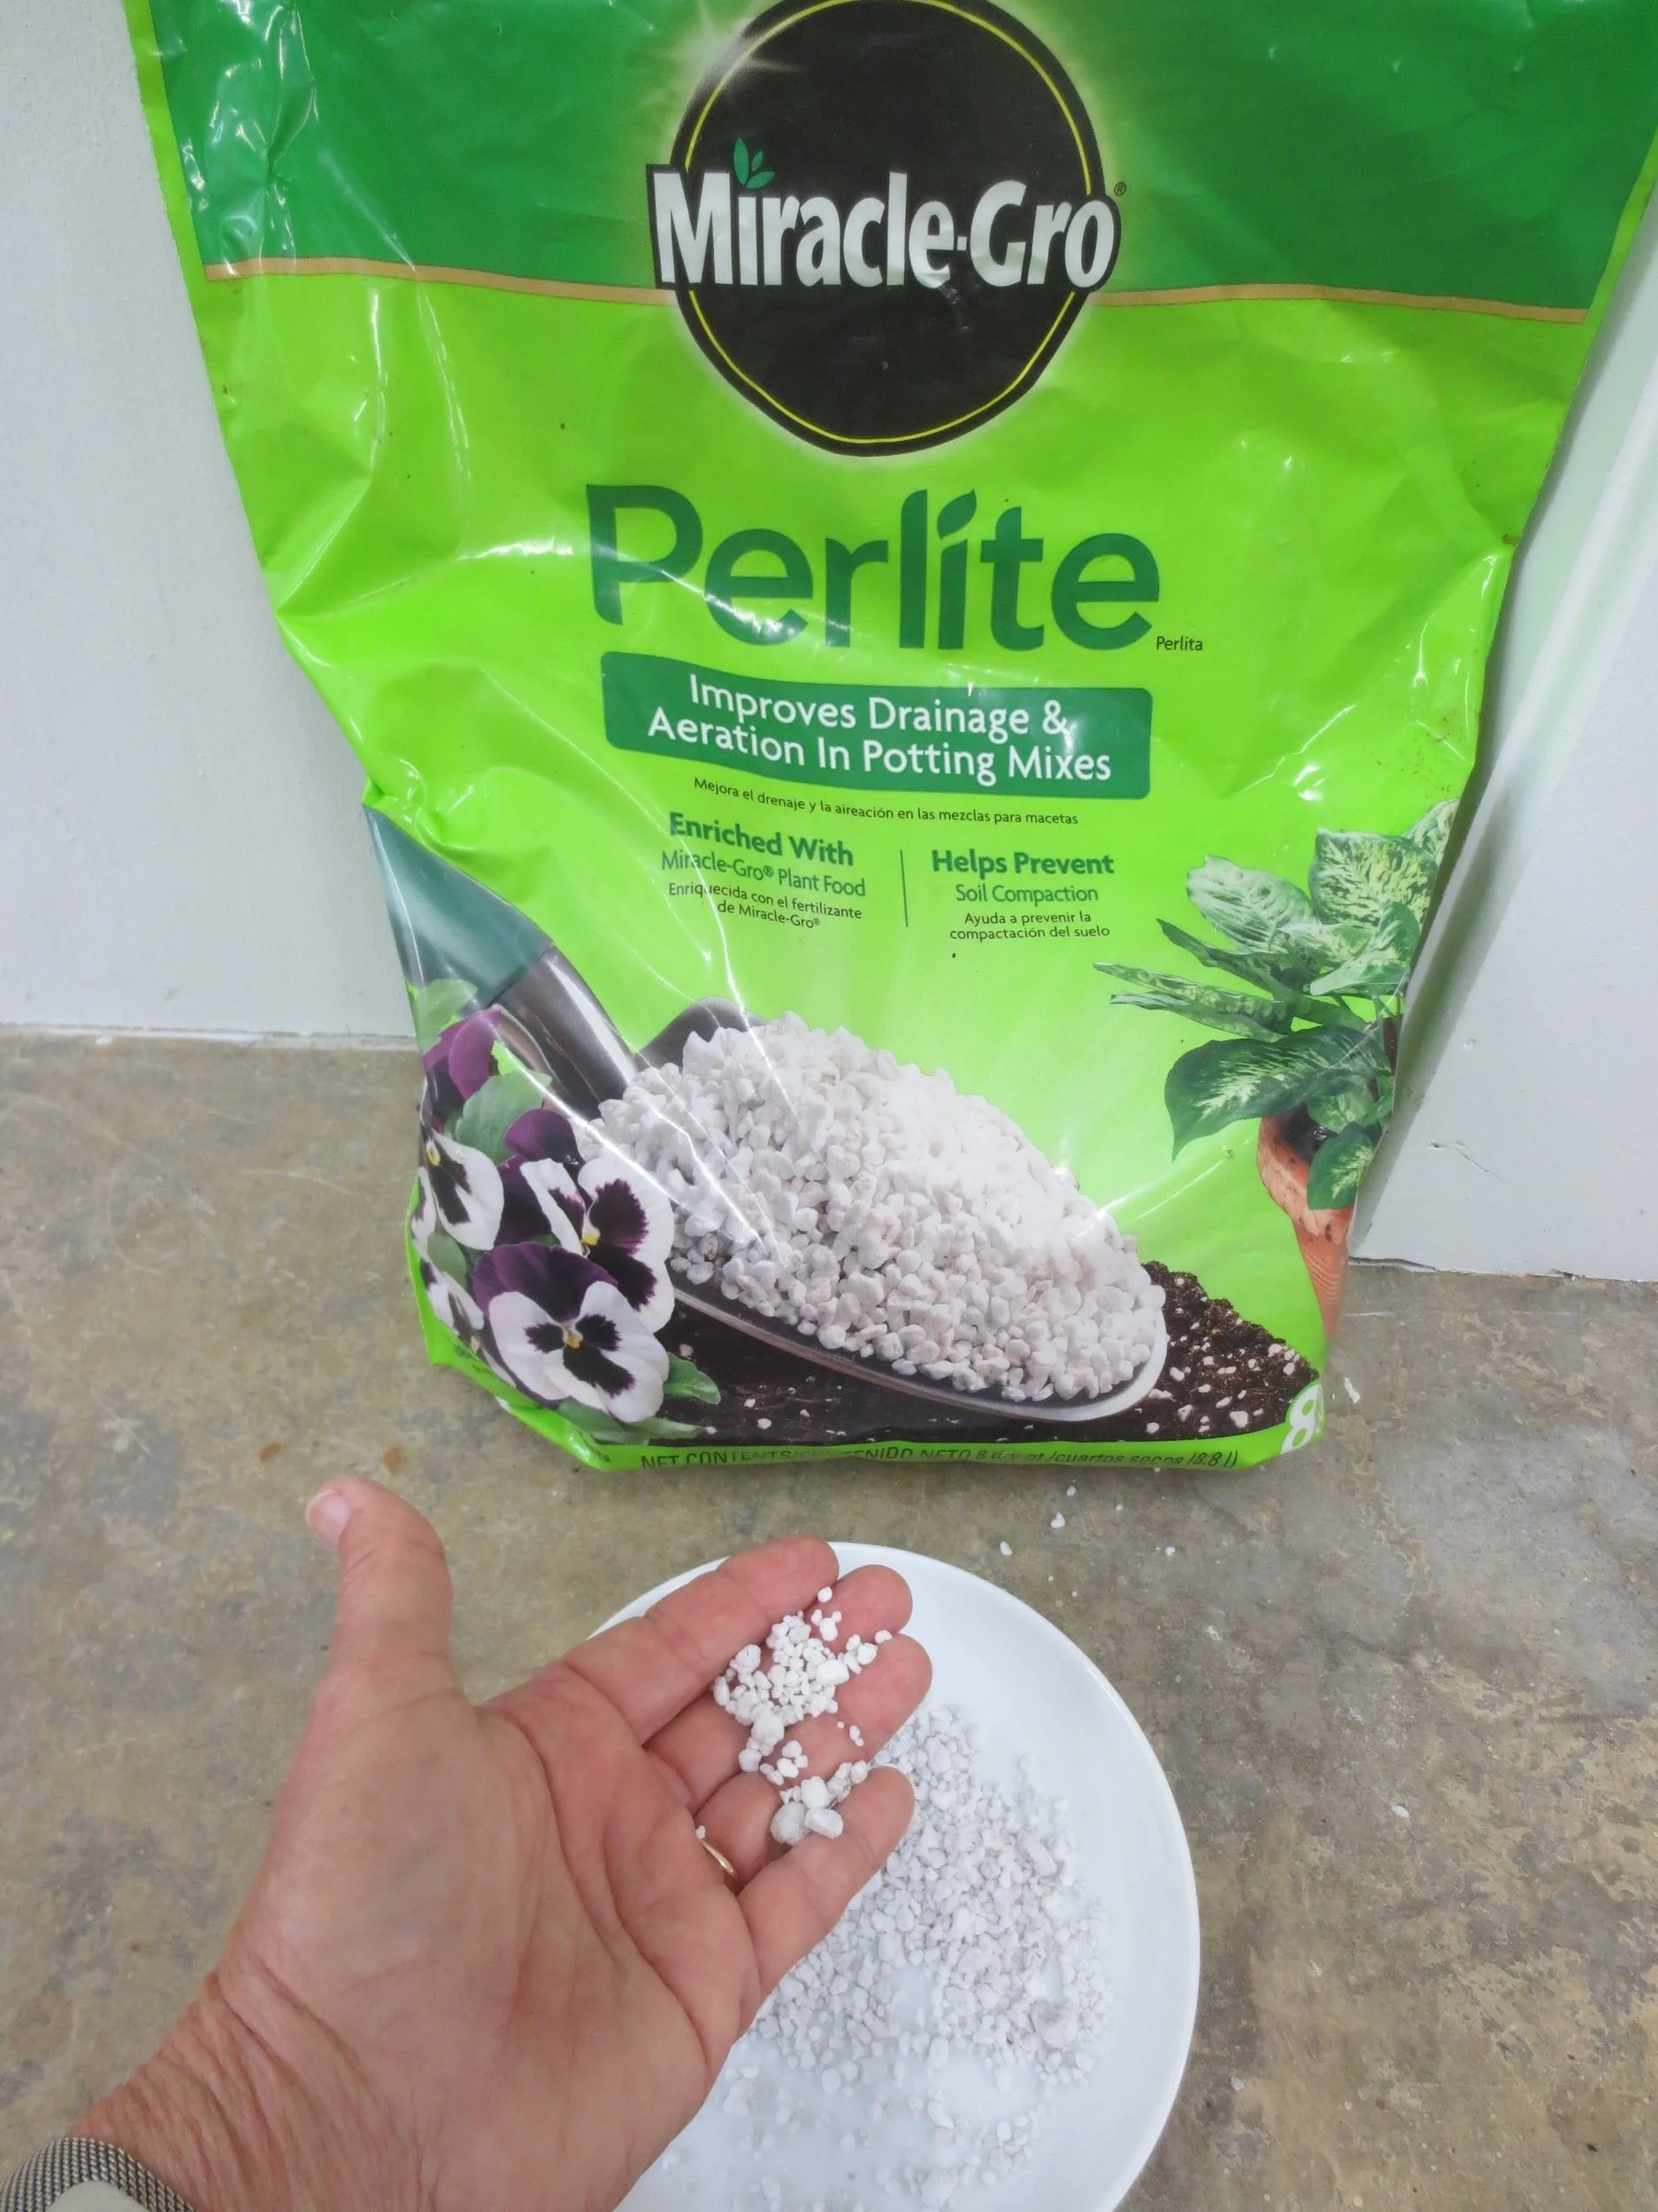
Perlite is volcanic rock which has been crushed and then heated until it explodes like popcorn. The small, rounded particles look like particles of Styrofoam, but it is unrelated. Styrofoam is manufactured from a petroleum-based product, styrene. Perlite is a renewable resource, assuming that earth’s volcanoes will continue to erupt. It is added to potting soils to make them more porous and can be mixed into heavy soils to reduce compaction. It is neutral to slightly alkaline in pH, odorless, non-toxic, won’t mold, and is easy to handle. It will retain approximately three times its weight in water. While it contains no fertility in its original state, I have noticed several bags that indicate a fertilizer has been added. Perlite is an ideal product for cactus or succulents, usually mixed with some form of potting soil or coir, a replacement for peat moss.

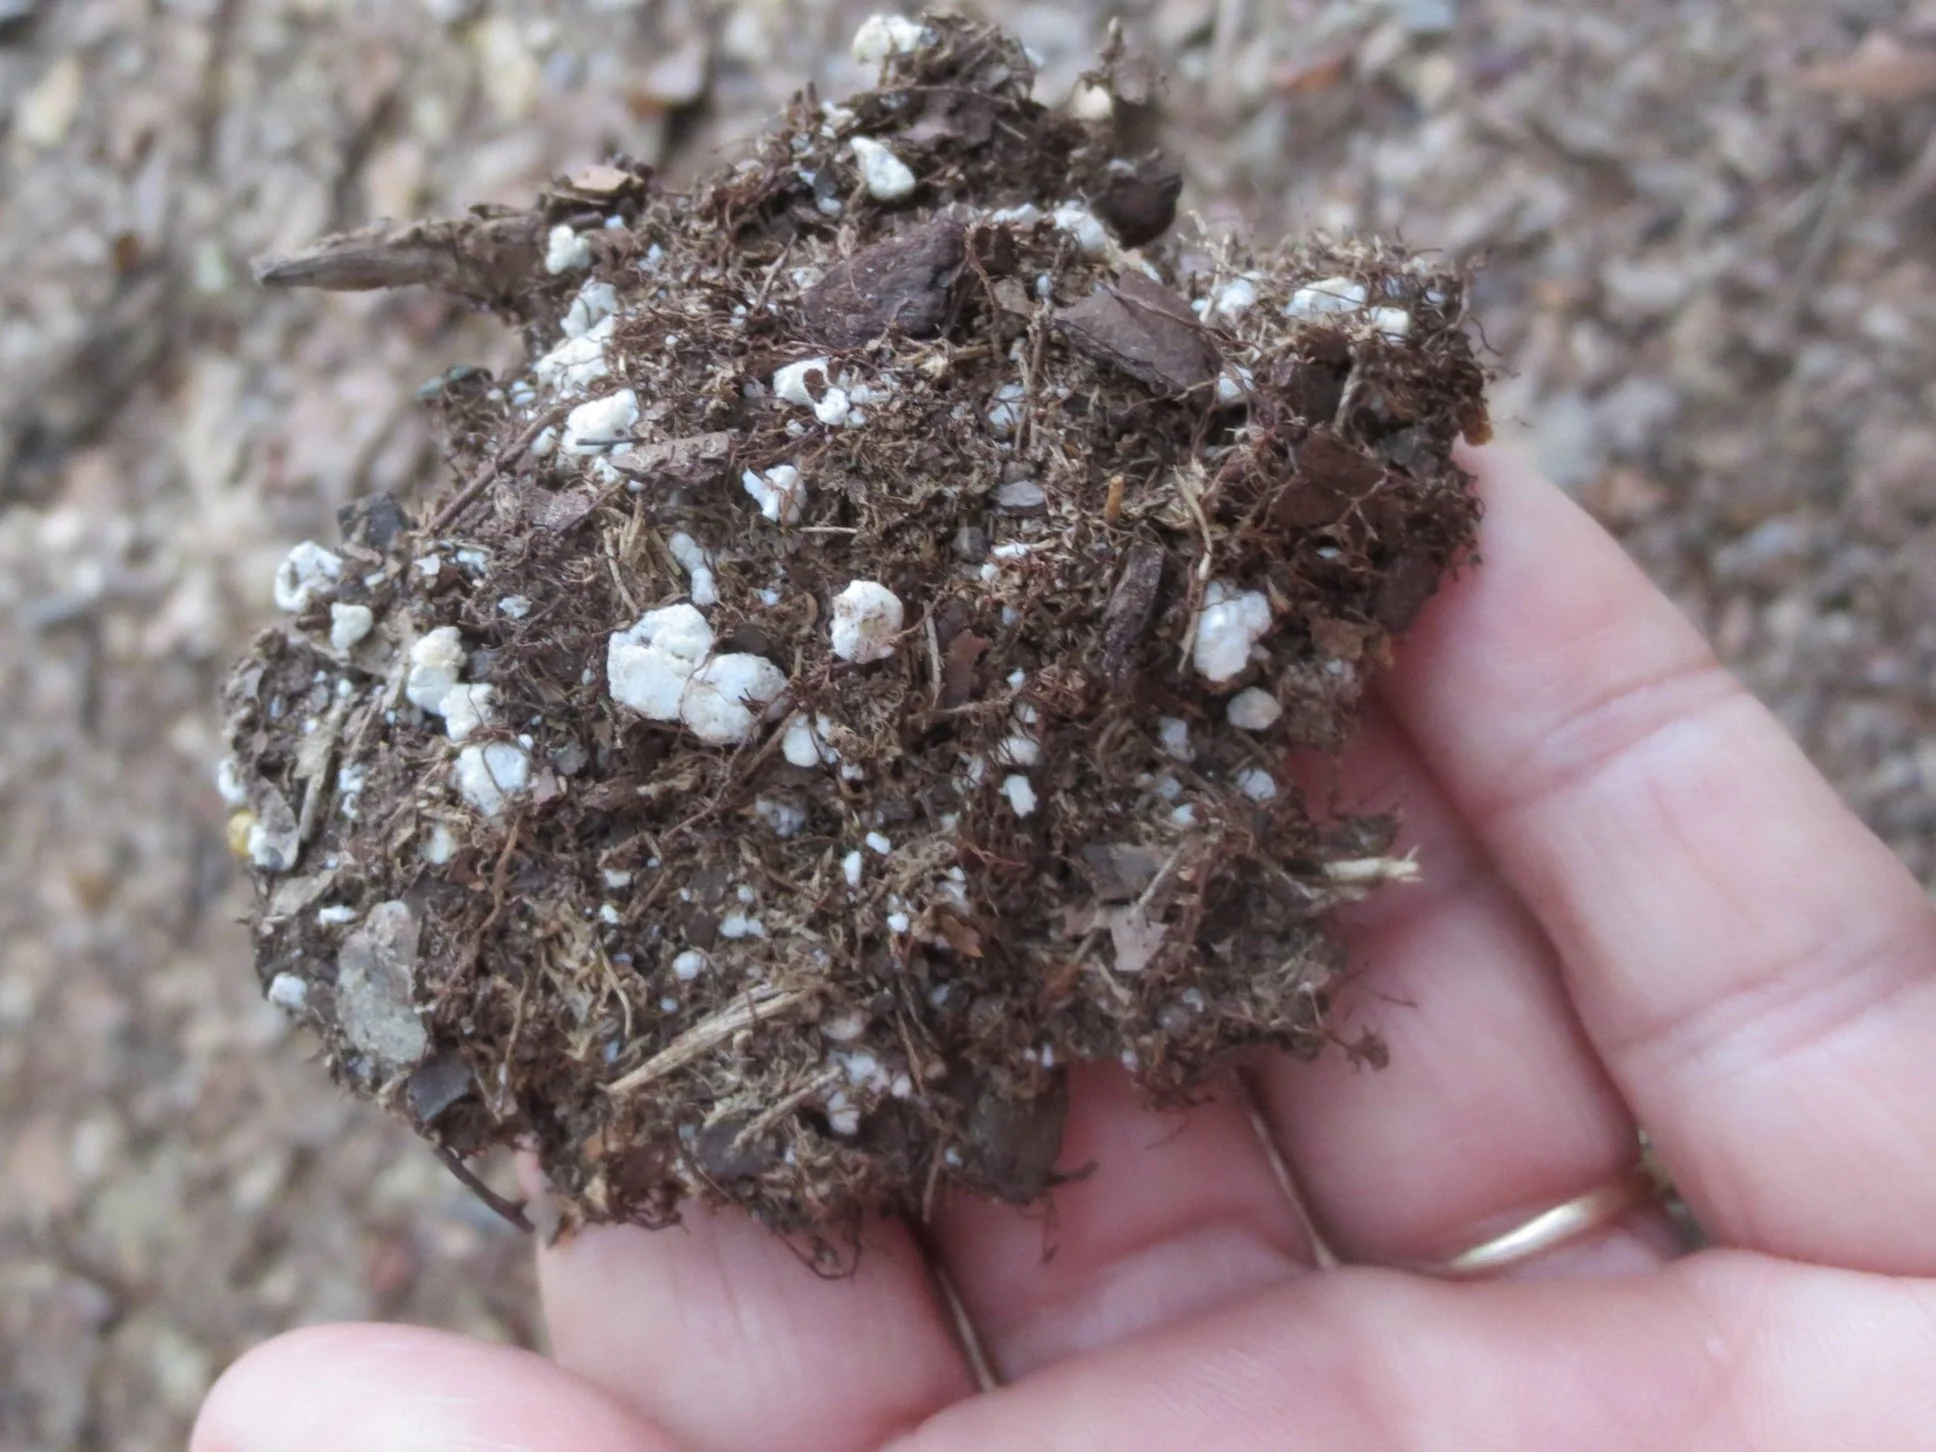
Perlite particles are evident in potting soil.

The downside of perlite, and the reason I avoid it, it that it is so light that it floats. If you have purchased six-packs of annuals grown in a soil mix that contains perlite, I’m sure you have seen what happens when those little plants are installed in flower beds or containers. After rain or irrigation, the white particles float to the top. I find those ghost-white balls unsightly and unnatural looking. That is a personal opinion, so feel free to differ.

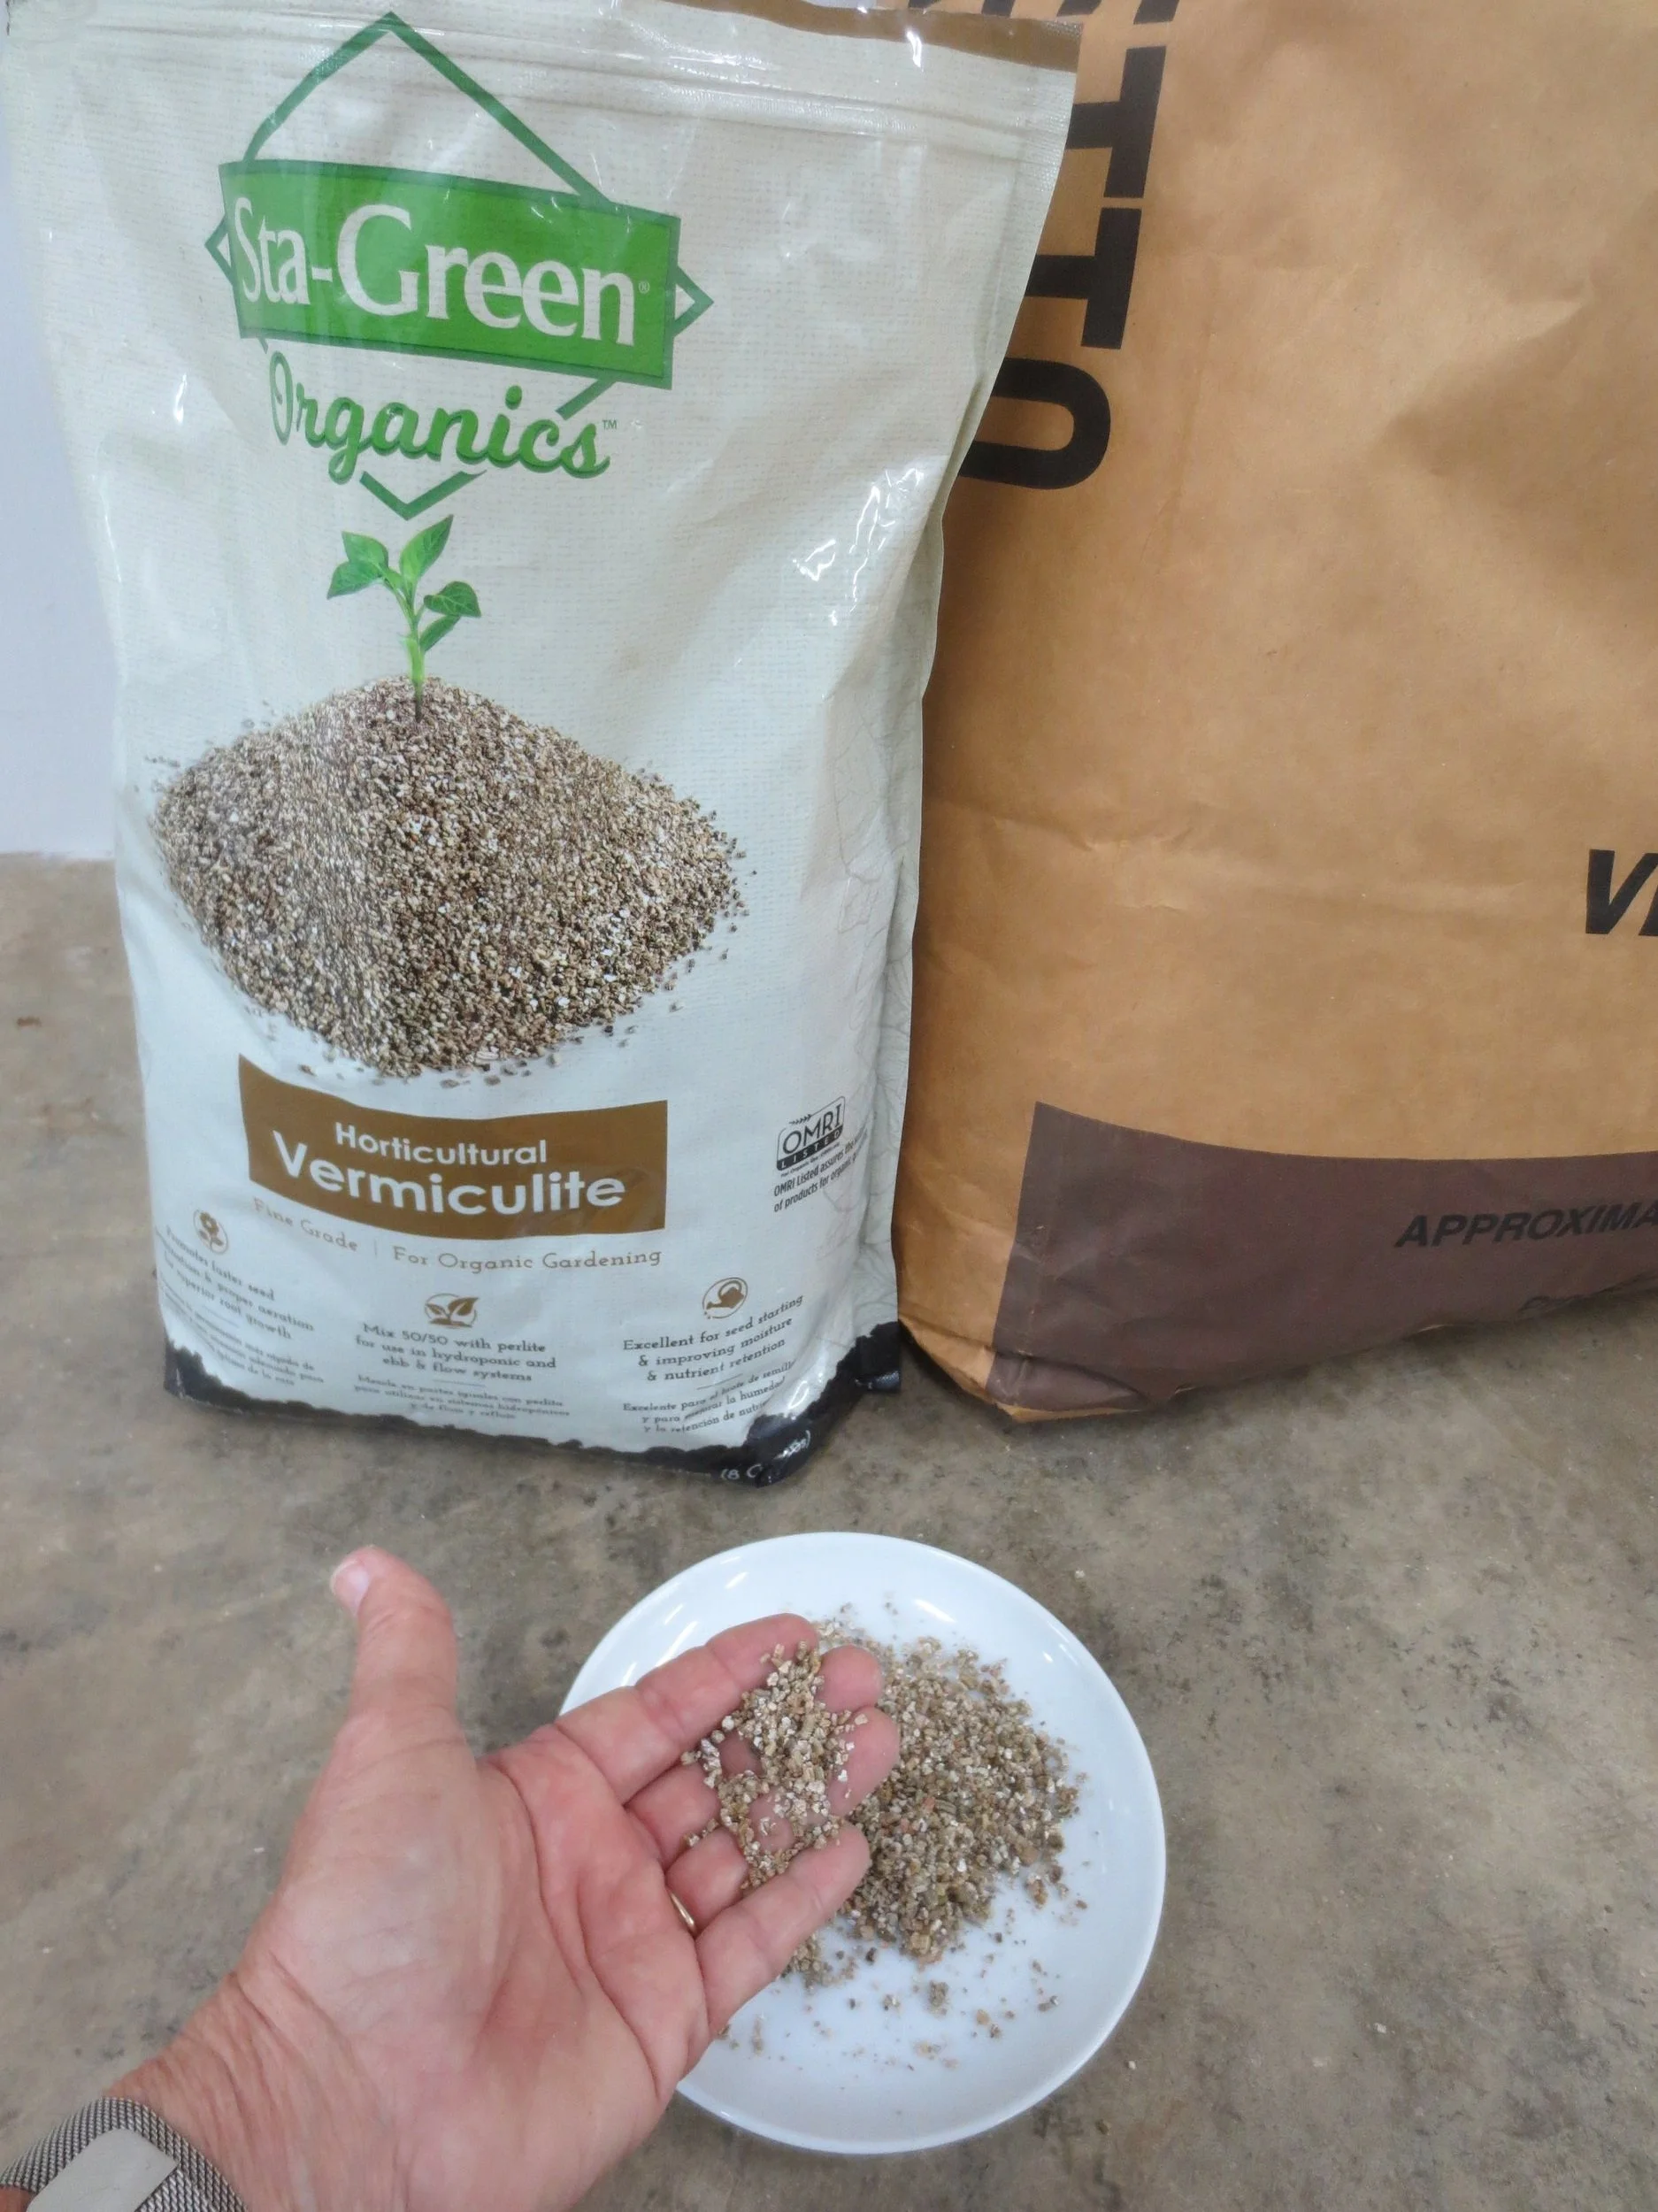
Vermiculite is (get ready for a mouthful) magnesium aluminum iron silicate. It is 100% natural, and looks like someone threw a handful of mica into a blender. The product comes in fine, medium, or coarse textures. I prefer the fine-to-medium size, but again, that is personal preference. Vermiculite has a neutral pH. It retains both water and fertility. Mixed into heavy clay soil, it will make the soil more porous and less prone to compaction. I start each new growing season by dumping my propagation pots into my garden beds and mixing it in with the soil. If you plan to use it to lighten clay soil, the coarse grade works best.

Vermiculite retains more water than perlite, so it is preferred when the cuttings or potted plants need a bit more moisture. Perlite drains so quickly that it is not ideal for plants with high water demands.

When I asked a professional propagator his preference, he said that he uses a perlite/peat mix for cutting propagation and vermiculite for seed starting. I’m transitioning away from peat moss use, but a perlite/coir combination should work well. At seed-starting time, especially when starting tiny seeds like begonia, petunia or the like, I place the seeds on top of sopping wet vermiculite, then sprinkle with the very lightest application of dry vermiculite. I only bottom-water, to avoid displacing the seeds. Emerging seedlings have little problem in pushing their way through to sunlight.

Fig Season is Here

Fig season is approaching in the Snoddy garden. I grew up eating fresh figs, and as an adult was surprised to find that not everyone loves them. The sweet, gritty flesh is an acquired taste, like coffee, dates, olives, or beer. For some, the flavor is fine but the texture is unpleasant.

Figs are nutritional powerhouses, containing fiber, antioxidants, minerals, vitamins. Figs consist of 55% natural sugar, making them one of the sweetest fruits available. They can be eaten fresh or dried, plain, stuffed with cream cheese and drizzled with honey, or wrapped in bacon and baked. Figs makes a great canned jam, or they can be combined with raspberries, oranges, and grapes to make FROG jam.

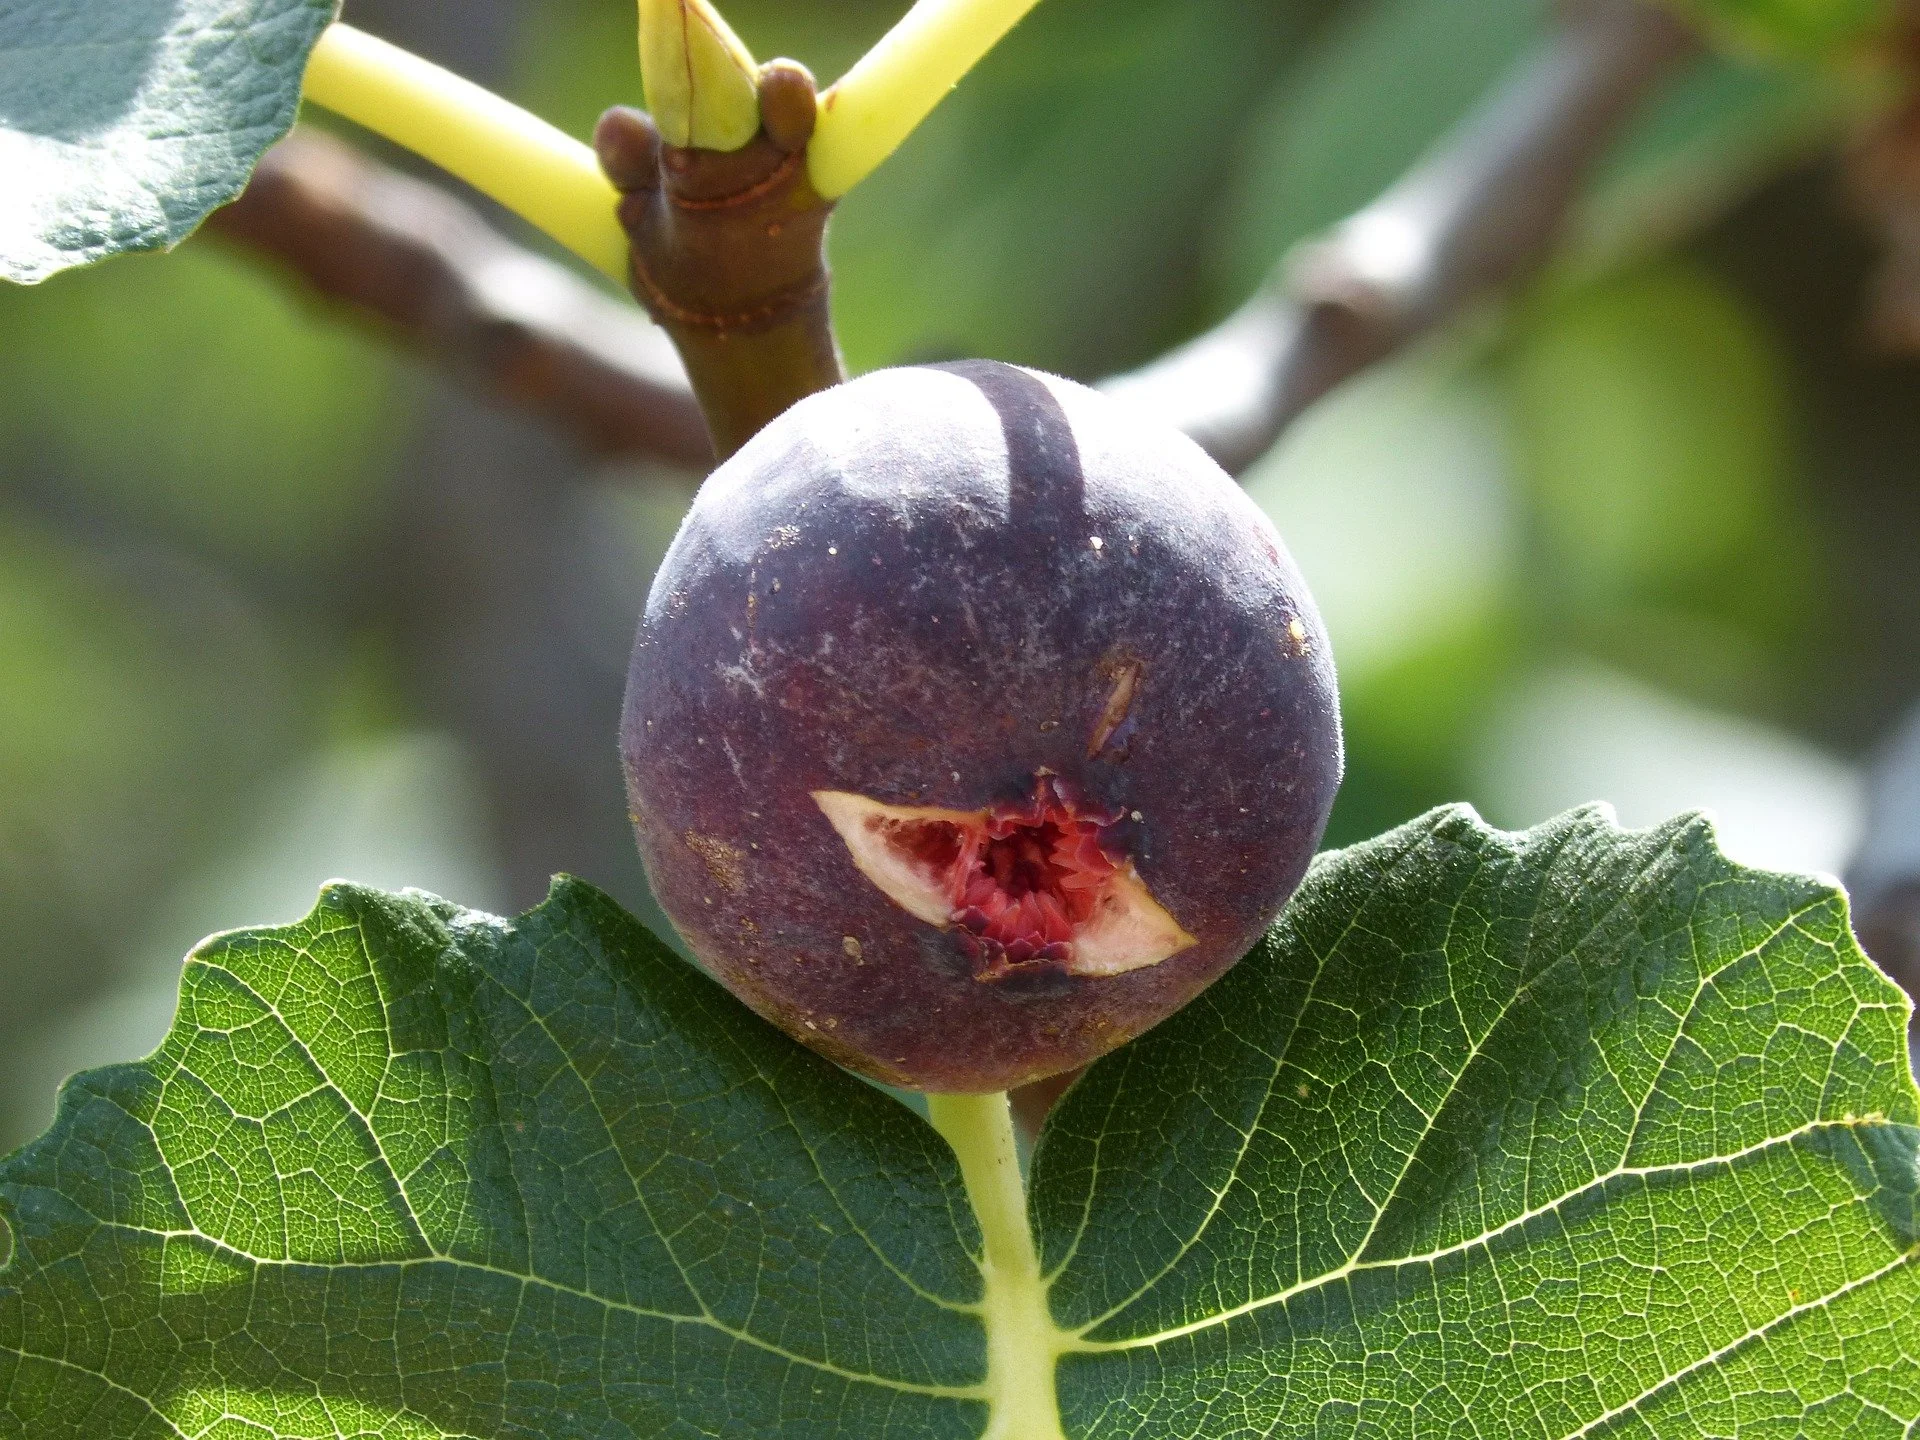
The unique thing about the common fig (Ficus carica) is that what we think of as the fruit is actually the flower. The yellow, green, or purple mature fruits are what is called an “enclosed inflorescence” because the male and female flower grow inside what we consider to be the skin or peel, also called an infructescence. Figs are one of the few fruits that can develop without external pollination (“parthenogenesis”).  A type of wasp enters the fruit through a tiny hole at the base of the infructescense, pollinates the fruit and dies. These entryways are easily seen on the ripe fruit, opposite the stem. The fig interior contains an enzyme called ficain that dissolves and absorbs the wasp, so you aren’t munching on a wasp cadaver as you eat one. Some types of commercial figs have been bred to develop without pollination. If the wasp thing freaks you out too much, buy packaged fruit marked “California figs” or packages that indicate the fruit was raised without insect pollination.

Grow figs in full sun to part sun, in neutral to acidic soil. For best results, plant is humus-rich soil that is moist but well-drained. The plants are tolerant of neglect once established, but light pruning in winter can force the formation of new branches. Fruits are borne on new growth, so a cutback increases fruit yield. With time, plants can become too dense, so prune out a few of the oldest stems each year to increase air circulation. Figs are cold hardy in zones 7-10. Plant them in a protected area in the coolest parts of zone 7. Plants are easy to propagate from cuttings.

Figs are self-fruitful, so you only need one to have a crop. Be aware that these shrubs can grow quite large – thirty feet or so, and up to ten feet wide. Figs live a long time, usually thirty years or more. In my part of the southern US, most home plants are one of three varieties: Celeste, Brown Turkey, or LSU Purple. These have purple to brown fruit. If you decide to try one in your home landscape, consult your Extension agent to determine which varieties do best in your particular zone.

The small hairs on fig’s leaves can cause itching, so wear long sleeves when harvesting. Avoid the milky sap, too, as this can cause skin problems for some people. Don’t feed figs to dogs, cats, or horses. Be aware that birds and varmints will harvest some of the fruit for you. You can drape smaller shrubs with netting to exclude birds, but this is more difficult once the shrubs gain size. I always leave mine undraped and just pay the critter tax of shared fruit.

The entry hole is evident at the bottom of this ripe fruit.

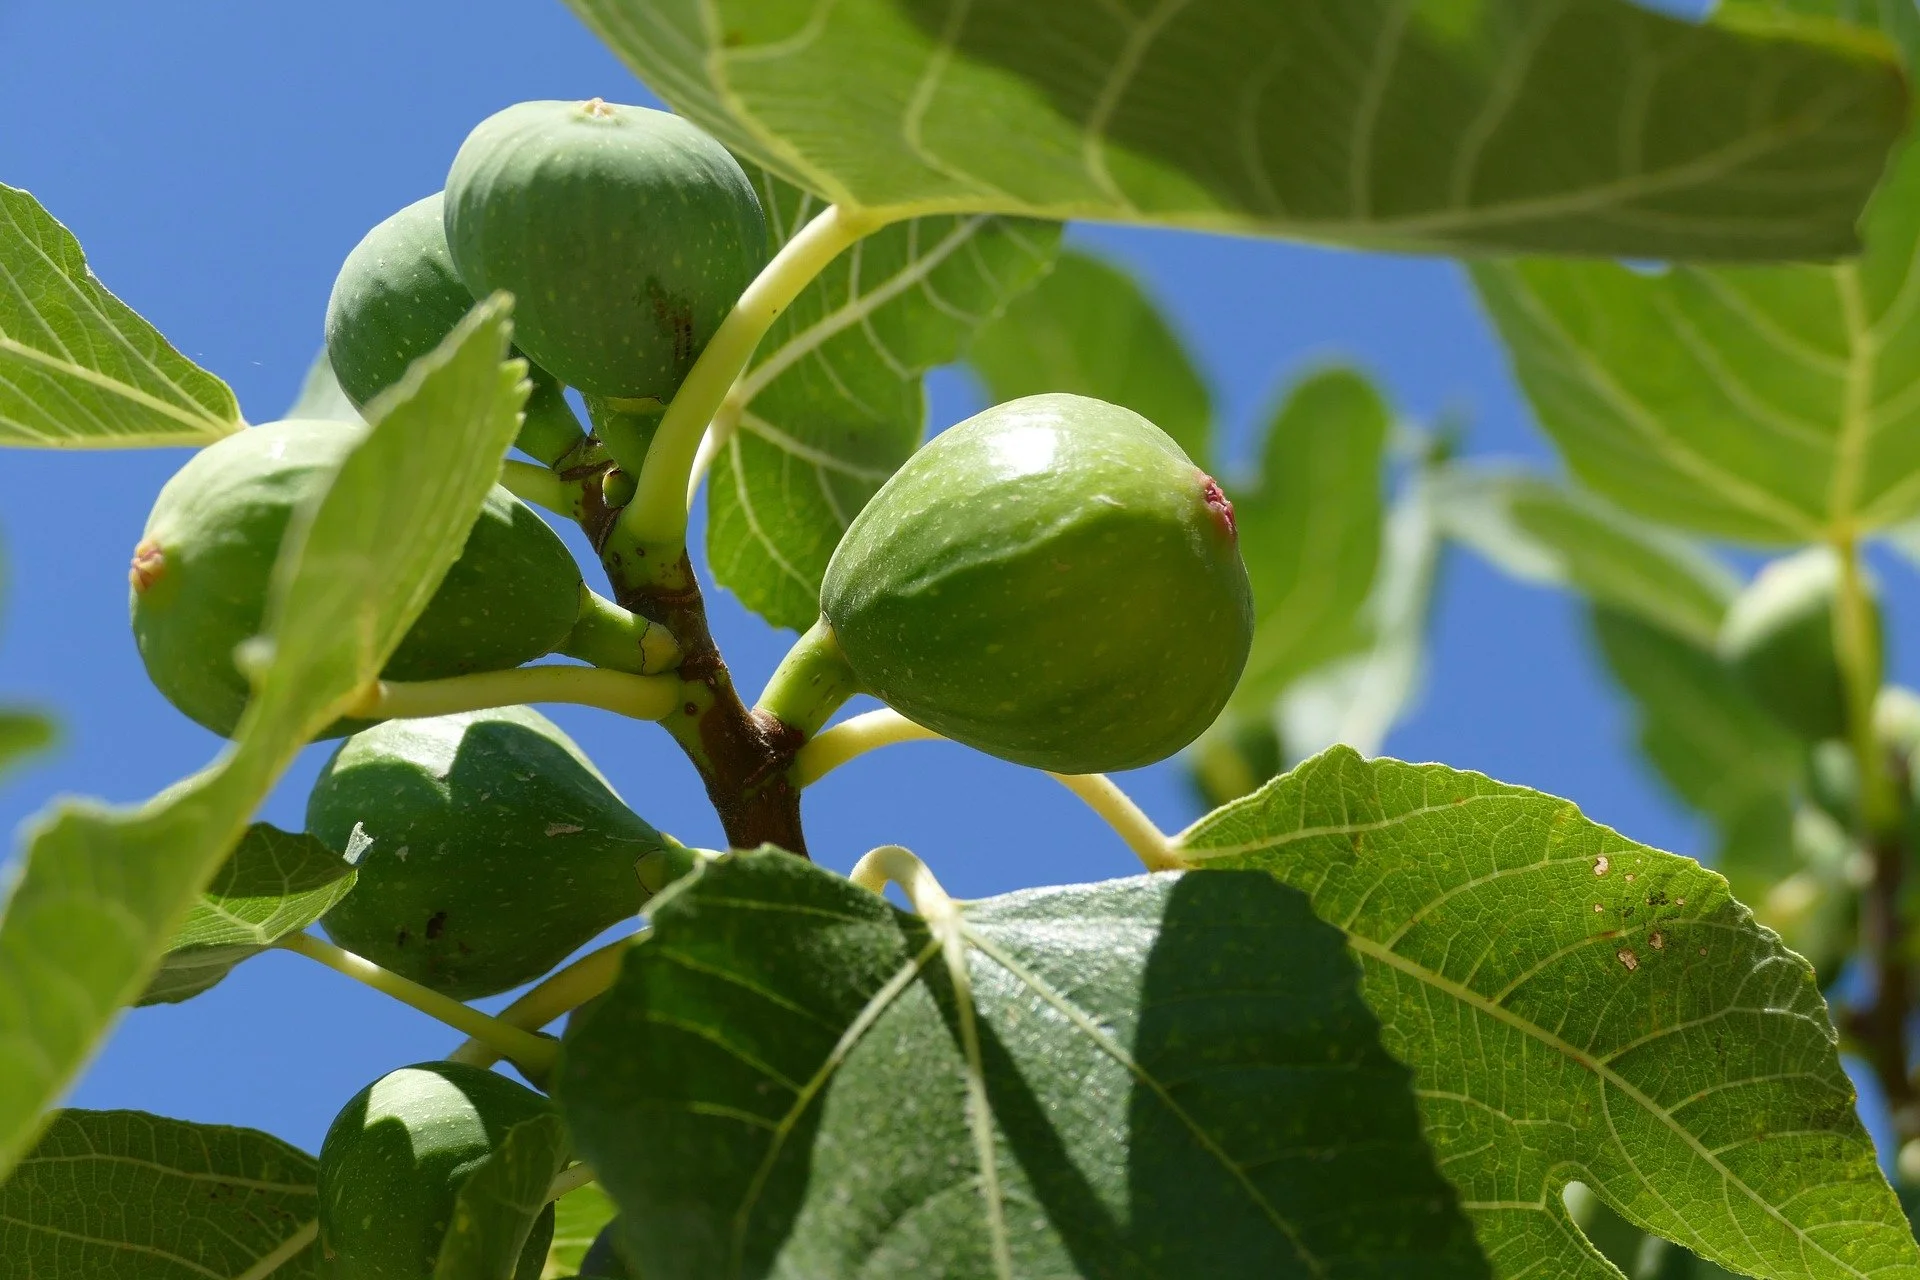
A cluster of unripe fruit. Fig leaves are large.

Small Gardens Mean Fewer Colors

To keep a small garden from looking chaotic, show restraint with the number of flower colors. Smallish gardens can look fabulous with only two colors. This is not to say only two types of plants. Yellow and purple flowers pair well and give the gardener a large number of choices. Repeating the same flower colors but using different sizes of blooms and leaf forms provides attractive contrasts. Because flowers bloom on their own timeline, the use of different plants with the same bloom shades will keep the garden colorful even if some of them are taking a blooming siesta.

For my own small courtyard garden, I decided all perennials and flowering shrubs would be in shades of yellow, coral, and purple. To lure pollinators, I included yellow goldenrod (Solidago) and brown-eyed Susans (Rudbeckia triloba) in the dryest area, and yellow rain lilies in the damp areas near the drainage catch basin. For coral shades, I used Drift roses (small, shrubby, lower maintenance than most roses), coral penstemons, a dwarf Red Hot Poker (Kniphofia ‘Poco Red’) which is more coral than red, and a couple unknown varieties of daylily. For the purples, I chose sterile, dwarf Pugster® butterfly bushes (Buddleia), purpleheart (Tradescantia), purple coneflowers (Echinacea purpurea), and lavender-flowered Society Garlic (Tulbaghia violacea). All these plants attract numerous butterflies and hummingbirds.

I wasn’t certain that the Cuphea ‘Candy Corn’ that I planted last year would overwinter, but they did and now the yellow and orange flowers look right at home between the corals and yellows. The Gaillardia ‘Spin Top Red’ I planted last fall is more red than coral, but it has bloomed so lavishly that it will remain. Several varieties of Calla lilies in the chosen colors have not begun flowering yet.

This being a first-year garden, there were a number of empty holes in the layout, so I started annuals from seed to fill in the gaps. Next year, those gaps will be smaller as the shrubs and perennials gain size. By year three, annual use will be at a minimum. For now, yellow Melampodium, coral Zinnia, coral Salvia, purple Gomphrena and purple Salvia are providing abundant color. These were chosen not only for their hues but because they flower like mad all summer long and require little in the way of maintenance, other than the occasional removal of spent flowers (Zinnia and Salvia).

My past gardens have never featured coral shades, but I’m loving this color in the new beds. Plans are underway to add peachy/coral shades of Yarrow, Alstroemeria, Lycoris (“Hurricane Lily”), and Chrysanthemum to extend the chosen color palette into autumn. I’m including a few photos of the coral plants.

Testing a Deer Repellant Method

I have been experimenting with ways to keep deer from eating my precious garden plants. Native wildlife habitats are being transformed into new housing developments to accommodate the tremendous population growth in the southeast. Sightings of deer, turkeys, raccoons, possums, bears, and skunks are becoming common, even in city locations. I live in a rural area, where the deer seem to believe that I have prepared a buffet for them. They have a pronounced appetite for my hydrangeas, daylilies, hostas, and sunflowers.

Fencing my acreage would be cost prohibitive. I have tried several repellant tactics that worked only for a week or two: human hair and stinky soap. The birds like the former. The nests in my birdhouses looked like dolls’ wigs. And the deer liked the latter. They gnawed on the bars of Irish Spring hanging in my precious fruit trees. I tried a motion-activated radio (they danced) and a motion-activated water sprinkler (they showered, using Irish Spring, I assume). I also tried the bad smelling deterrents based on pigs’ blood or coyote urine (gross!) and the bad tasting ones based on rotten eggs or hot peppers. These worked until diluted by rain, but smelled so rank that I couldn’t tolerate their use. I refuse to reapply expensive products after every rain, so I have planted strong-fragranced plants like rosemary, society garlic, chives, and catnip throughout my beds. This has been successful in some areas, not in others.

I am a Master Gardener, and only present science-based information, but I feel compelled to share the results of my current deer discouragement experiment involving Milorganite. Milorganite is a mild fertilizer (6-4-0, slow release), in the form of small gray pellets. It is a sterile product manufactured from dried, processed microbes used to break down the intake of the Milwaukee Metropolitan Sewer District. Don’t be squeamish: It is NOT dried poop. Click here to get the real story on what it is and how it is manufactured. It has a pronounced fragrance, but humans must be a few inches from the product to detect it. Milorganite is not labeled as a deer repellant, but many people recommend using it for this off-label purpose. I decided to give it a try. Like the repellants above, it needs to be reapplied after every rain to be effective.

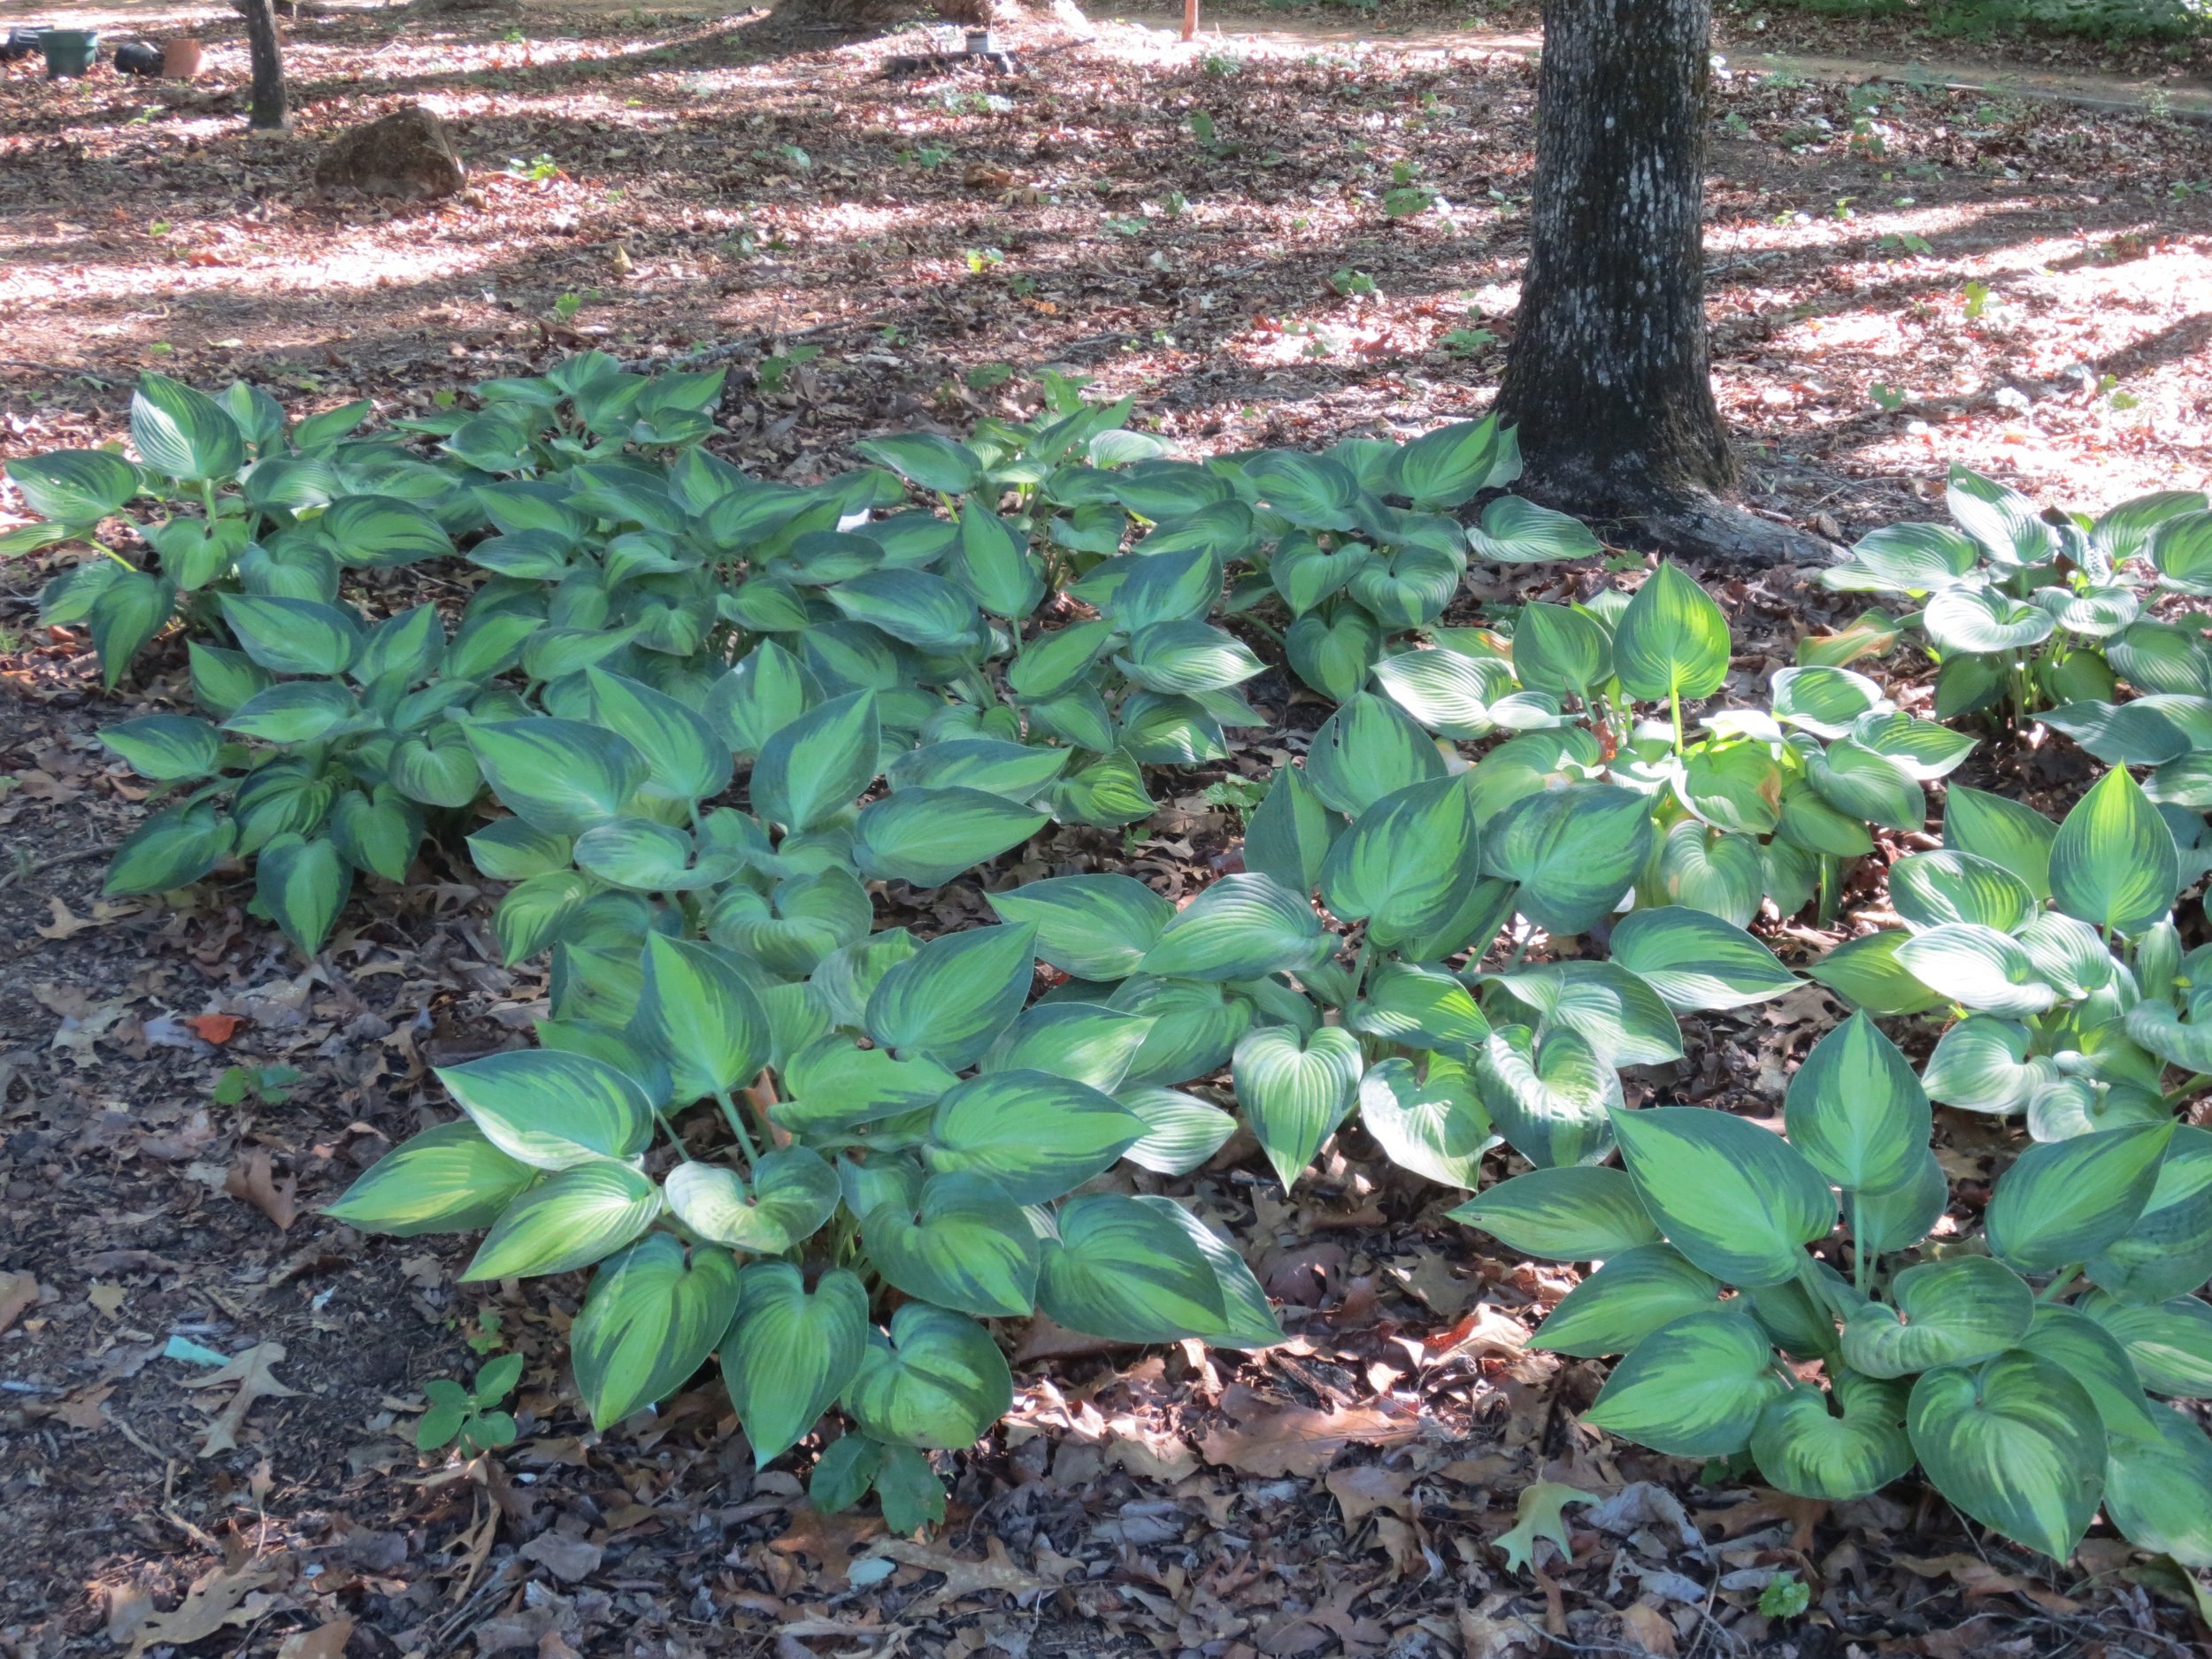
Call me thrifty or call me lazy, but I decided to develop a means of keeping the product dry from rains or irrigation while still allowing the odor to permeate the protection area. I use small, plastic food storage containers (Amazon) with snap-on lids. I used a regular, hand-held hole puncher to make a series of odor-escape holes around the upper part of the container, filled the containers half-full of Milorganite, and snapped the lids on to make a waterproof “sachet.” I nestled the transparent containers near the base of my hydrangeas and under the leaves of my hostas, where they are almost invisible. Through rain and irrigation, the pellets inside the container remain dry. For eight weeks now, no deer have munched on my plants although I have seen several small herds walk by. I am labeling this experiment a success. I’ll update you, readers, if things change.

Chaos Gardening, a recent trend

I try to stay informed on current gardening trends, so when I heard the new-to-me term “chaos gardening” I went into sleuth mode. Chaos gardening has recently gone viral on TikTok. One site describes it thus: “… letting go of the strict rules that come along with gardening and letting mother nature do the work instead” and “a haphazard and laid-back approach to gardening in which rules and meticulous garden planning are thrown out the window.”

Condensed version: Gather seeds packets, mix them together, and throw them on prepared (tilled, and raked if that is your choice) soil without a plan. Just writing that last sentence made me uncomfortable. I like plants to be arranged in groups of threes or fives, growing into each other in a lush tapestry that is casual but meticulously planned. A random jumble might sound romantic and low maintenance, but tall plants will shade out the shorter ones. Aggressive plants will overtake their delicate neighbors. Weeding will be difficult in the garden’s early stages, because desired plants cannot be distinguished from the undesirables. Seeds vary in their proper planting depths, so some may perish if they are sown too deep or too shallowly. And some seeds need light to germinate, while others need darkness. The advocates of chaos gardening always say, “some seeds won’t come up, and that’s okay.” Maybe for others, but not for me.

I start scrutinizing seed catalogs in late winter, planning new color schemes and flower bed expansions. I allow my imagination to run wild but I reel it in before ordering. By mid-spring, my catalogs are dog-eared and well worn from being thumbed through frequently. Some folks have elegant coffee-table books. My version is the current Baker Creek’s The Whole Seed Catalog, 532 colored pages of luscious heirlooms and recipes that makes me consider turning one of our pastures into a food plot. Then the temporary insanity fades and I return to a more restrained approach. My seed choices are intentional, purposeful, and not part of a random mix.

Chaos gardening is not the same as guerilla gardening, where one spreads seeds onto property they don’t own, like vacant lots or public areas. The intent is to beautify waste places or provide pollinator habitat. Don’t mistake chaos gardening for cottage gardening, either. Cottage gardens may be an informal mixture of annuals, perennials, grasses, herbs, and edibles but they are carefully planned, not random.

If the idea of chaos gardening appeals to you, start with a small area first and select seeds that germinate easily, have similar light requirements, and are not overly aggressive in their growth habits: cosmos, zinnias, marigolds, echinacea, celosia are good for sunny areas. Keep notes of what you sow so that you have an idea of what is emerging. Send me photos of your successes!

Proven Perennial Selections

Thanks to pleasantly warm temperatures and plentiful rains, my garden is thriving right now. So are the weeds, meaning that much of my outdoor time is spent in uprooting little monsters before they become big monsters.

Recently, I have received numerous inquiries from new gardeners, asking for plant recommendations. Every one of these gardeners has told me that they want to plant perennials only and no annuals. I get it. Annuals need to be replaced yearly, a recurring expense and effort. Yet, gardens benefit from the additional of a few annuals to add a lush appearance while the perennials are becoming established. Annuals tend to bloom throughout the season, while most perennials have a short flowering window. In my opinion, the most attractive gardens have it all: trees, shrubs, perennials, annuals, bulbs, vines, groundcovers.

If you are one of those who adamantly insist on perennials to the exclusion of all else, I am listing the Perennial Plant Association’s “Plant of the Year” winners for the last 27 years. Select from this list as you design your garden and you are likely to have a good experience. Finicky perennials don’t land here. I’ve killed a couple of the other featured plants (2020 and 2018), and removed a couple I didn’t cherish (2015, 2008, 1995). I am growing 2019’s Betony for the first time, and I am loving it so far. It is covered with pollinating insects from dawn to dusk.

2024 Phlox paniculata 'Jeana' (phlox)
2023 Rudbeckia ‘American Gold Rush’ (black-eyed Susan)
2022 Schizachyrium scoparium (little blue stem)
2021 Clinopodium nepeta subsp. nepeta Calamint
2020 Aralia cordata 'Sun King' Japanese spikenard 
2019 Stachys monieri 'Hummelo' Betony
2018 Allium ‘Millenium’ (ornamental onion)
2017 Asclepias tuberosa (butterfly milkweed)
2016 Anemone x hybrida ‘Honorine Jobert’ (windflower)
2015 Geranium ‘Biokova’ (dwarf cranesbill, hardy geranium)
2014 Panicum virgatum ‘Northwind’ (tall switch grass)
2013 Polygonatum odoratum var. variegatum (Solomon’s seal)
2012 Brunnera macrophylla ‘Jack Frost’ (Siberian bugloss)
2011 Amsonia hubrichtii (blue star)
2010 Baptisia australis (blue false indigo)
2009 Hakonechloa macra, ‘Aureola’ (Japanese forest grass)
2008 Geranium ‘Rozanne’ (cranesbill, hardy geranium)
2007 Nepeta racemosa ‘Walker’s Low’ (catmint)
2006 Dianthus ‘Firewitch’ (cheddar pink)
2005 Helleborus x hybridus (Lenten rose)
2004 Athyrium niponicum var. pictum (Japanese painted fern)
2003 Leucanthemum x superbum ‘Becky’ (shasta daisy)
2002 Phlox paniculata ‘David’ (tall phlox)
2001 Calamagrostis x acutiflora ‘Karl Foerster’ (feather reed grass)
2000 Scabiosa ‘Butterfly Blue’ (pincushion flower)
1999 Rudbeckia fulgida var. sullivantii ‘Goldsturm’ (black-eyed Susan)
1998 Echinacea purpurea ‘Magnus’ (purple coneflower)
1997 Salvia x sylvestris ‘Mainacht’ (aka ‘May Night’) (wood sage)
1996 Penstemon digitalis ‘Husker’s Red’ (beardtongue)
1995 Perovskia atriplicifolia (Russian sage)
1994 Astilbe ‘Sprite’ (dwarf astilbe)
1993 Veronica ‘Sunny Border Blue’ (speedwell)
1992 Coreopsis verticillata ‘Moonbeam’ (threadleaf coreopsis)
1991 Heuchera micrantha var. diversifolia ‘Palace Purple’ (coral bells)
1990 Phlox stolonifera (creeping phlox)

Bumblebees LOVE the purple, bottlebrush flowers. Early in the morning, I find several fat bumblebees who have fallen asleep which visiting the flowers.

This trio of Stachys monieri ‘Hummelo’ sits next to a deck. The purple flowers have strong stems and the bright green foliage brightens the area.

Garden Fencing for Privacy and Safety

Why fence your garden? As population growth booms in the southeast, so does the need for housing. Many modern developments of single-family, standalone homes in our corner of the world feature smaller lots than in past decades, putting neighbors closer to each other than before. No matter how fond we are of our neighbors, sometimes we feel the need for more privacy. Homeowners Association Covenants usually have specific rules on height, type, and placement of fencing. Even those that prohibit “front yard” fencing usually are more lenient in back yards.

Back yard fencing can benefit the gardener in several ways. It provides a visual backdrop against which plants take center stage as distracting views of the neighbors’ yards are blocked. It can also offer security. As the old adage states, “out of sight, out of mind,” so solid fencing can help reduce theft of garden furniture, art, containers, or even plants by hampering views of your valuables from passersby.

Fencing helps in preventing the neighborhood children or pets from accidentally trampling our prized specimens. It won’t deter squirrels and raccoons from visiting, but may help with preventing hungry rabbits from sampling your tasty plants. While jumping deer can easily clear most standard-height fences, they generally do not jump into an area they cannot see into. Since deer are creatures of habit, disrupting their regular travel paths with fences can redirect them away from the garden.

Fences give the gardener privacy from viewers. I don’t mind someone observing me relaxing in a lawn chair with a cold beverage while I enjoy watching the hummingbirds and butterflies in my garden, but I’m self-conscious when a surprise visitor catches me wearing mismatched clothing with muddy knees as I water and weed, usually in a most unflattering, bottoms-up posture. I don’t dress to impress in the garden – I just grab whatever is atop the pile of clean laundry. It tends to be the same baggy sweats and floppy t-shirts, over and over. Near the completion of our recent renovation project, I learned that the construction crew members who didn’t remember my name called me Mrs. Red Sweatpants.

Select fence materials that suit the style of your home. Rustic homes look comfortable with rustic fences, while more formal architecture looks right with iron or PVC fences. Keep in mind that all types will need maintenance sooner or later. Leave enough space between plants and fence so that you will have access for painting, staining, or cleaning.

Rather than growing vines directly on fences, I recommend that you position a trellis near and parallel to the fence. Secure the trellis to the fence (nylon tie-wraps are my preferred anchor) to prevent tilting. When fence access is needed, remove the anchor or cut the tie-wrap and tilt the trellis away from the fence until the maintenance is complete, then resecure the trellis to the fence. Done properly, this can be done with no damage to the vine.

Containers can be mounted directly on fences, adding another dimension or beauty. Keep in mind that elevated containers will need frequent watering in hot weather, and that water will eventually cause damage to wooden fences.

An unsung benefit of fencing is the extra level of weather protection it provides, blocking harsh winds. A tightly spaced development retains more heat in winter. Often that degree or two of warmth makes it possible to grow tender plants that might die in more exposed locations.

One critical item to consider: all fencing should have at least one gate so that the enclosed area can be accessed by lawn equipment. A double-width gate makes vehicular entry possible. This may not seem important initially, but when it is time to spread fresh mulch, you will appreciate the ability to spread directly from a truck or trailer rather than pushing mulch or new plants into the secured area one wheelbarrow at a time.

Nasturtiums peek through an open-weave fence

An open slat fence pairs with shrubs to offer as much privacy as a solid stockade fence.

Fencing can save delicate plants from rowdy pups.

Hellebore Black Death Disease (Virus)

Lenten Rose or Hellebore is one of the easiest, most reliable groundcovers for shade gardens and woodlands. So, I was surprised to receive three inquiries in the past month about dead or dying plants, with pinched stems and black-spotted leaves. My first guess was boggy soil. We have enjoyed plentiful rains this spring, so clay soils in poorly drained areas may be swampy enough to encourage root rot. A little more digging, though, uncovered a new, previously unknown (to me) culprit:  the virus Helleborus Net Necrosis Virus (HeNNV), also known as Black Death.

The virus presents with blackened, stunted or deformed leaves and can include a strange netting pattern around the leaf veins. Young, tender growth is usually first to be affected. Stems and flowers can also show signs of the virus. One of the earliest signs is puckering of the leaf surface around the veins. Don’t confuse HeNNV with fungal diseases like Hellebore Leaf Spot, which presents with rounded red or brown spots on leaves, usually seen in autumn and treatable by removing the damaged leaves. HeNNV is viral, not treatable.

The New York Botanical Garden LuEsther T. Mertz Library has a great article on Hellebores. Here is what they say about the Net Necrosis Virus: “The black death virus has been observed in Europe since the early 1990’s. Studies of the disease by Washington State University, examining strains found in the United States, determined that this disease is a Carlavirus, a group of viruses transmitted by insects for which plants serve as hosts and distinct from any previously encountered viruses. The insect vector for this disease has been assessed to be the hellebore aphid, which proliferates on hellebores. Not all aphid species are able to transmit all viruses and other aphid species have not yet been demonstrated to transmit this disease. It is believed to be carried on the feeding parts (stylets) of aphids but is not internalized (non-persistent transmission), thus the disease is carried for a period no longer than a few minutes.

Because the virus is transmitted on the feeding parts of aphids, preventing feeding is the most promising management technique in nursery greenhouse settings. There are systemic insecticides that are licensed for these settings in some states. Use of insecticides on home gardens to deter aphids, however, would not be effective or practical as a very short-interval repeat of application in an open environment would be needed.” A photo of a virus-stricken plant is included with the article.

Strong-growing plants may show more resistance to the virus. Humus-rich, well-drained soil and good air circulation help keep plants healthy. I have read that a fertilizer heavy in potash, applied once or twice a year, will help keep Lenten Rose a rich, healthy green. I have not tested that myself nor have I read university research on this topic, so consider that as “maybe” information only. Potash is the K in NPK on fertilizer bags. Many fertilizers that are labeled specifically for tomatoes contain an elevated amount.

What do you do if you spot a troubled plant in your own garden? Dig it up, bag it, and send it out with the trash. Do not add diseased plants to the compost pile. If you catch the problem early, you may be able to prevent its spread to surrounding Hellebores.

Thus far, I have only developed one suggested alternative plant as a Hellebore replacement. That plant is Evergreen Solomon’s Seal, Disporopsis pernyi. Hardy in zones 6-9, it has arching stems that resemble a very short Leucothoe. It has tiny fragrant flowers in spring, spreads rapidly, and is deer resistant. While they are both in the Asparagaceae family, Evergreen Solomon’s Seal is not in the Polygonatum genus of deciduous Solomon’s Seals. If evergreen foliage is not important to you and your garden, please also consider Polygonatum humile, Dwarf Solomon’s Seal. It reaches nine inches in height and makes a lush groundcover in woodland areas, hardy in zones 5-9. I have ruled out Pachysandra as a good replacement (too slow, too temperamental) but Sweet Woodruff, Galium odoratum, is still under consideration.

Winter sun backlights this healthy Hellebore.

Stinkhorn Mushrooms Live Up to the Name

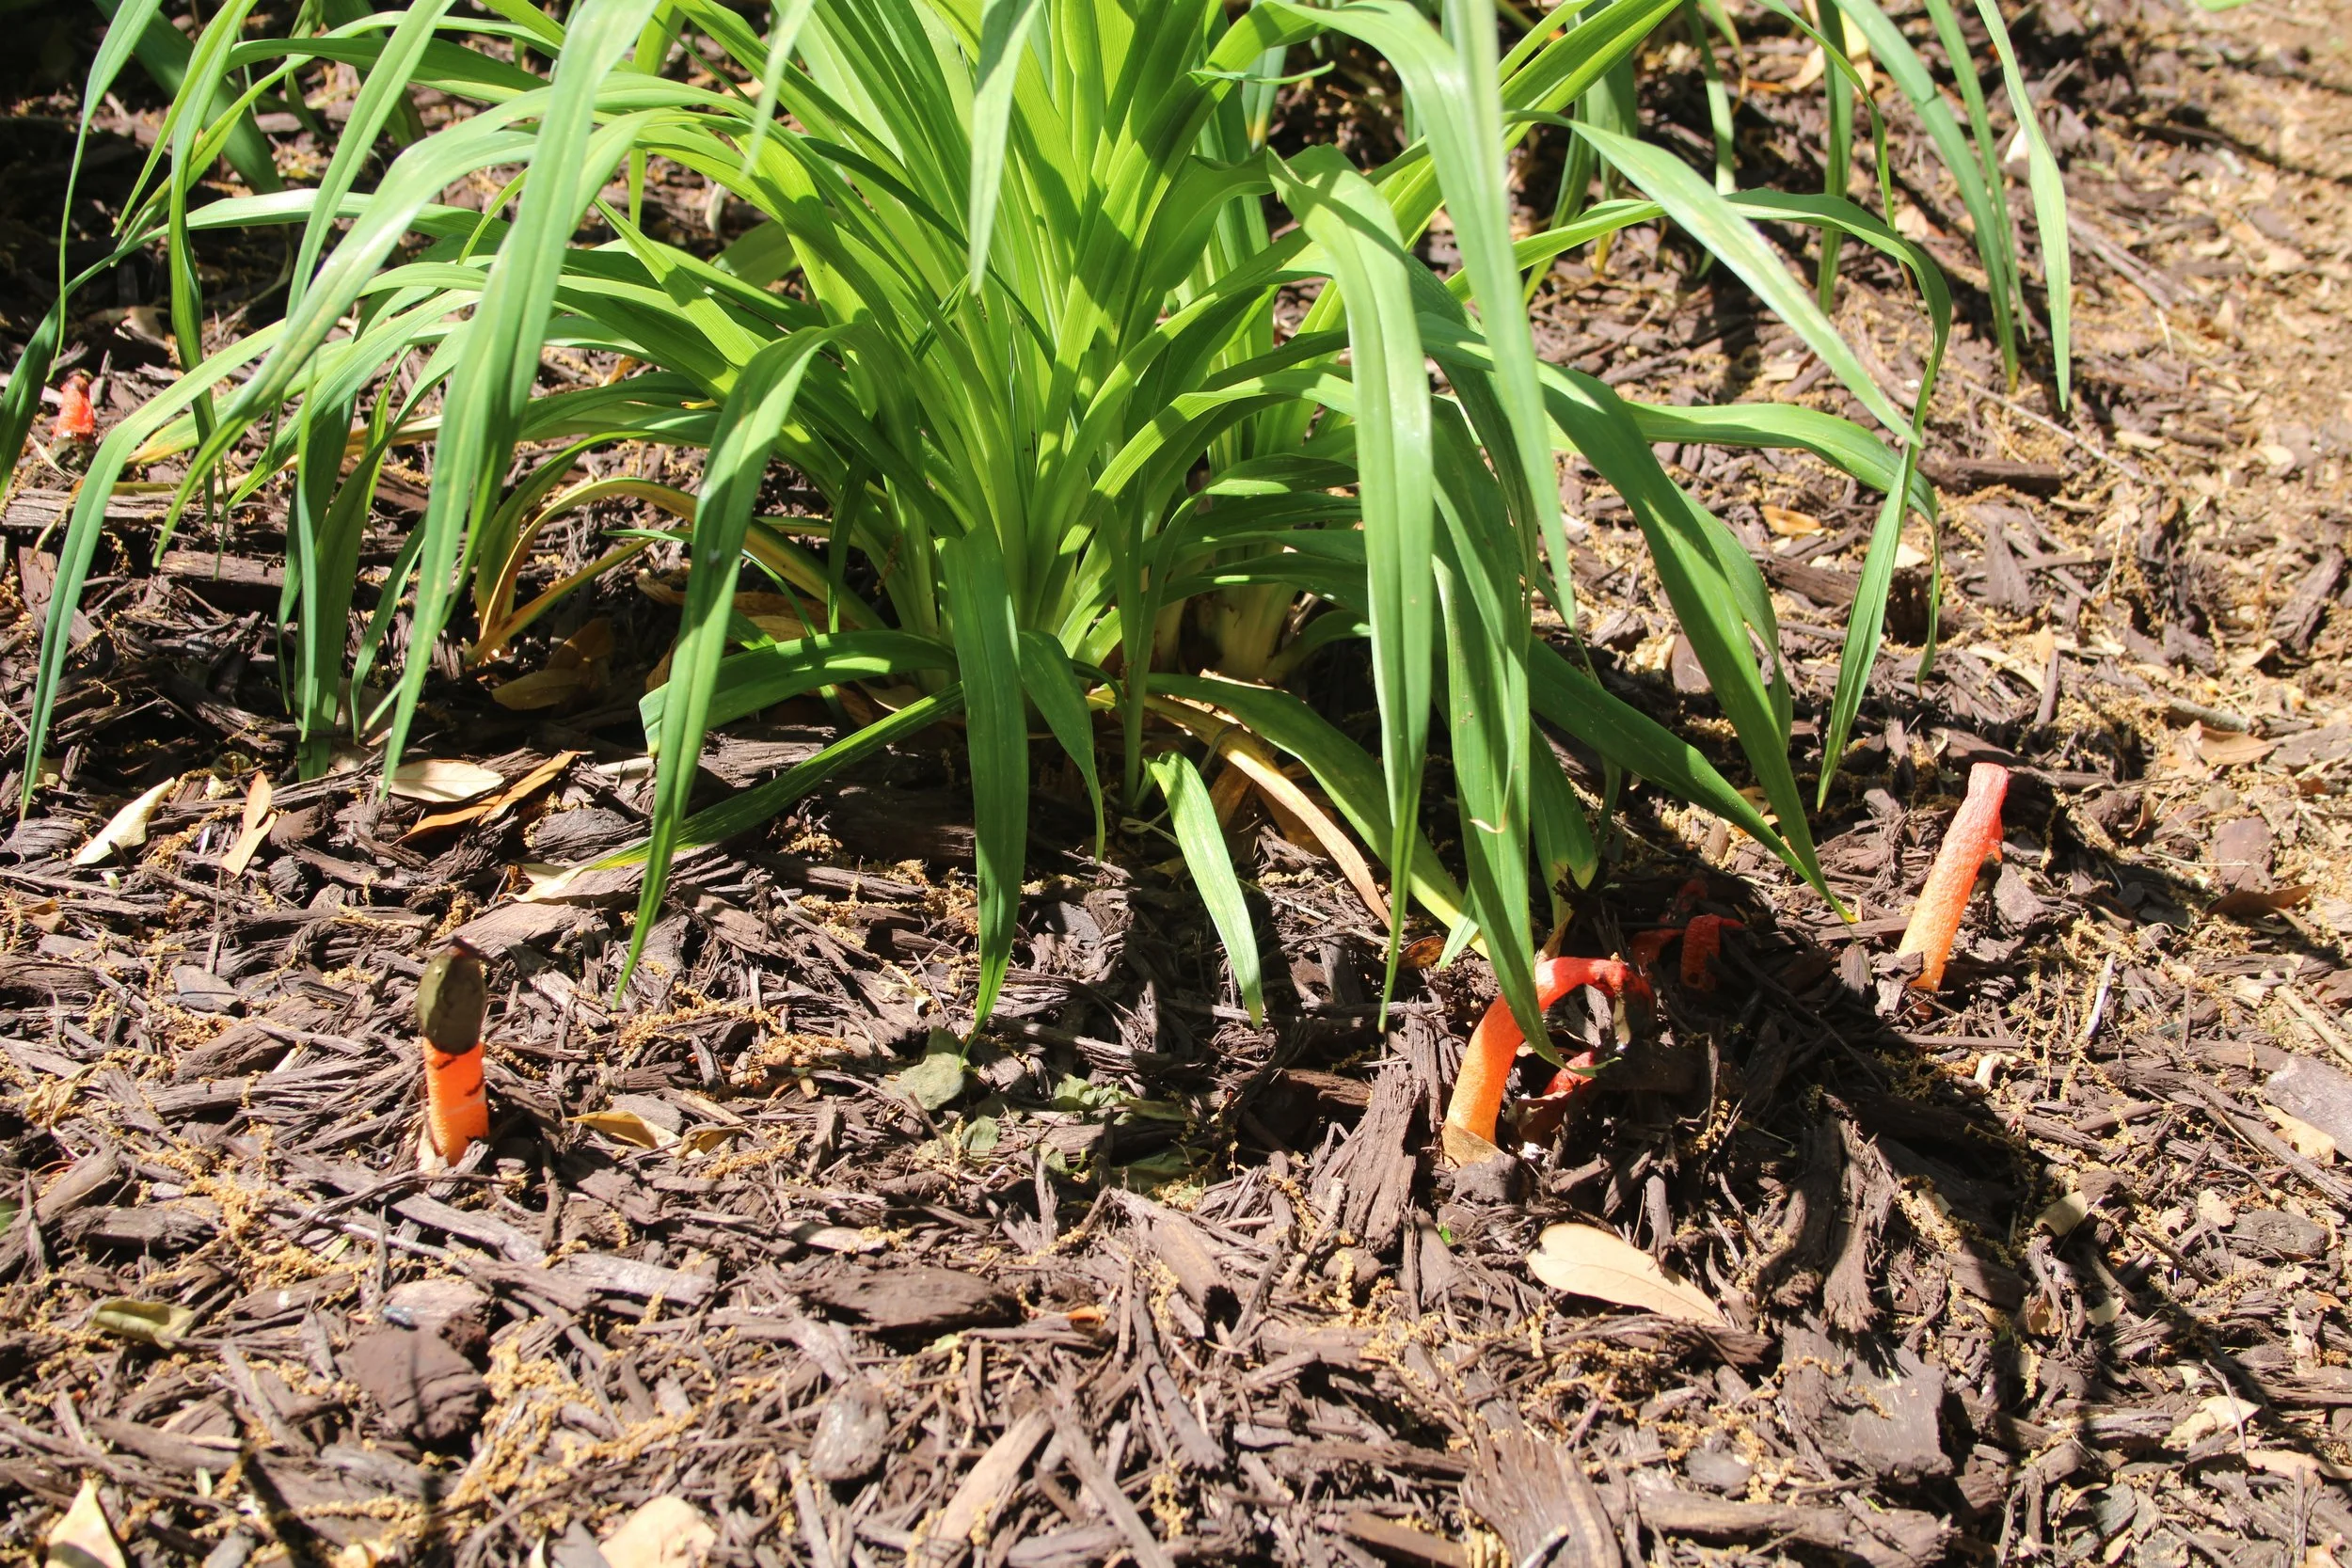
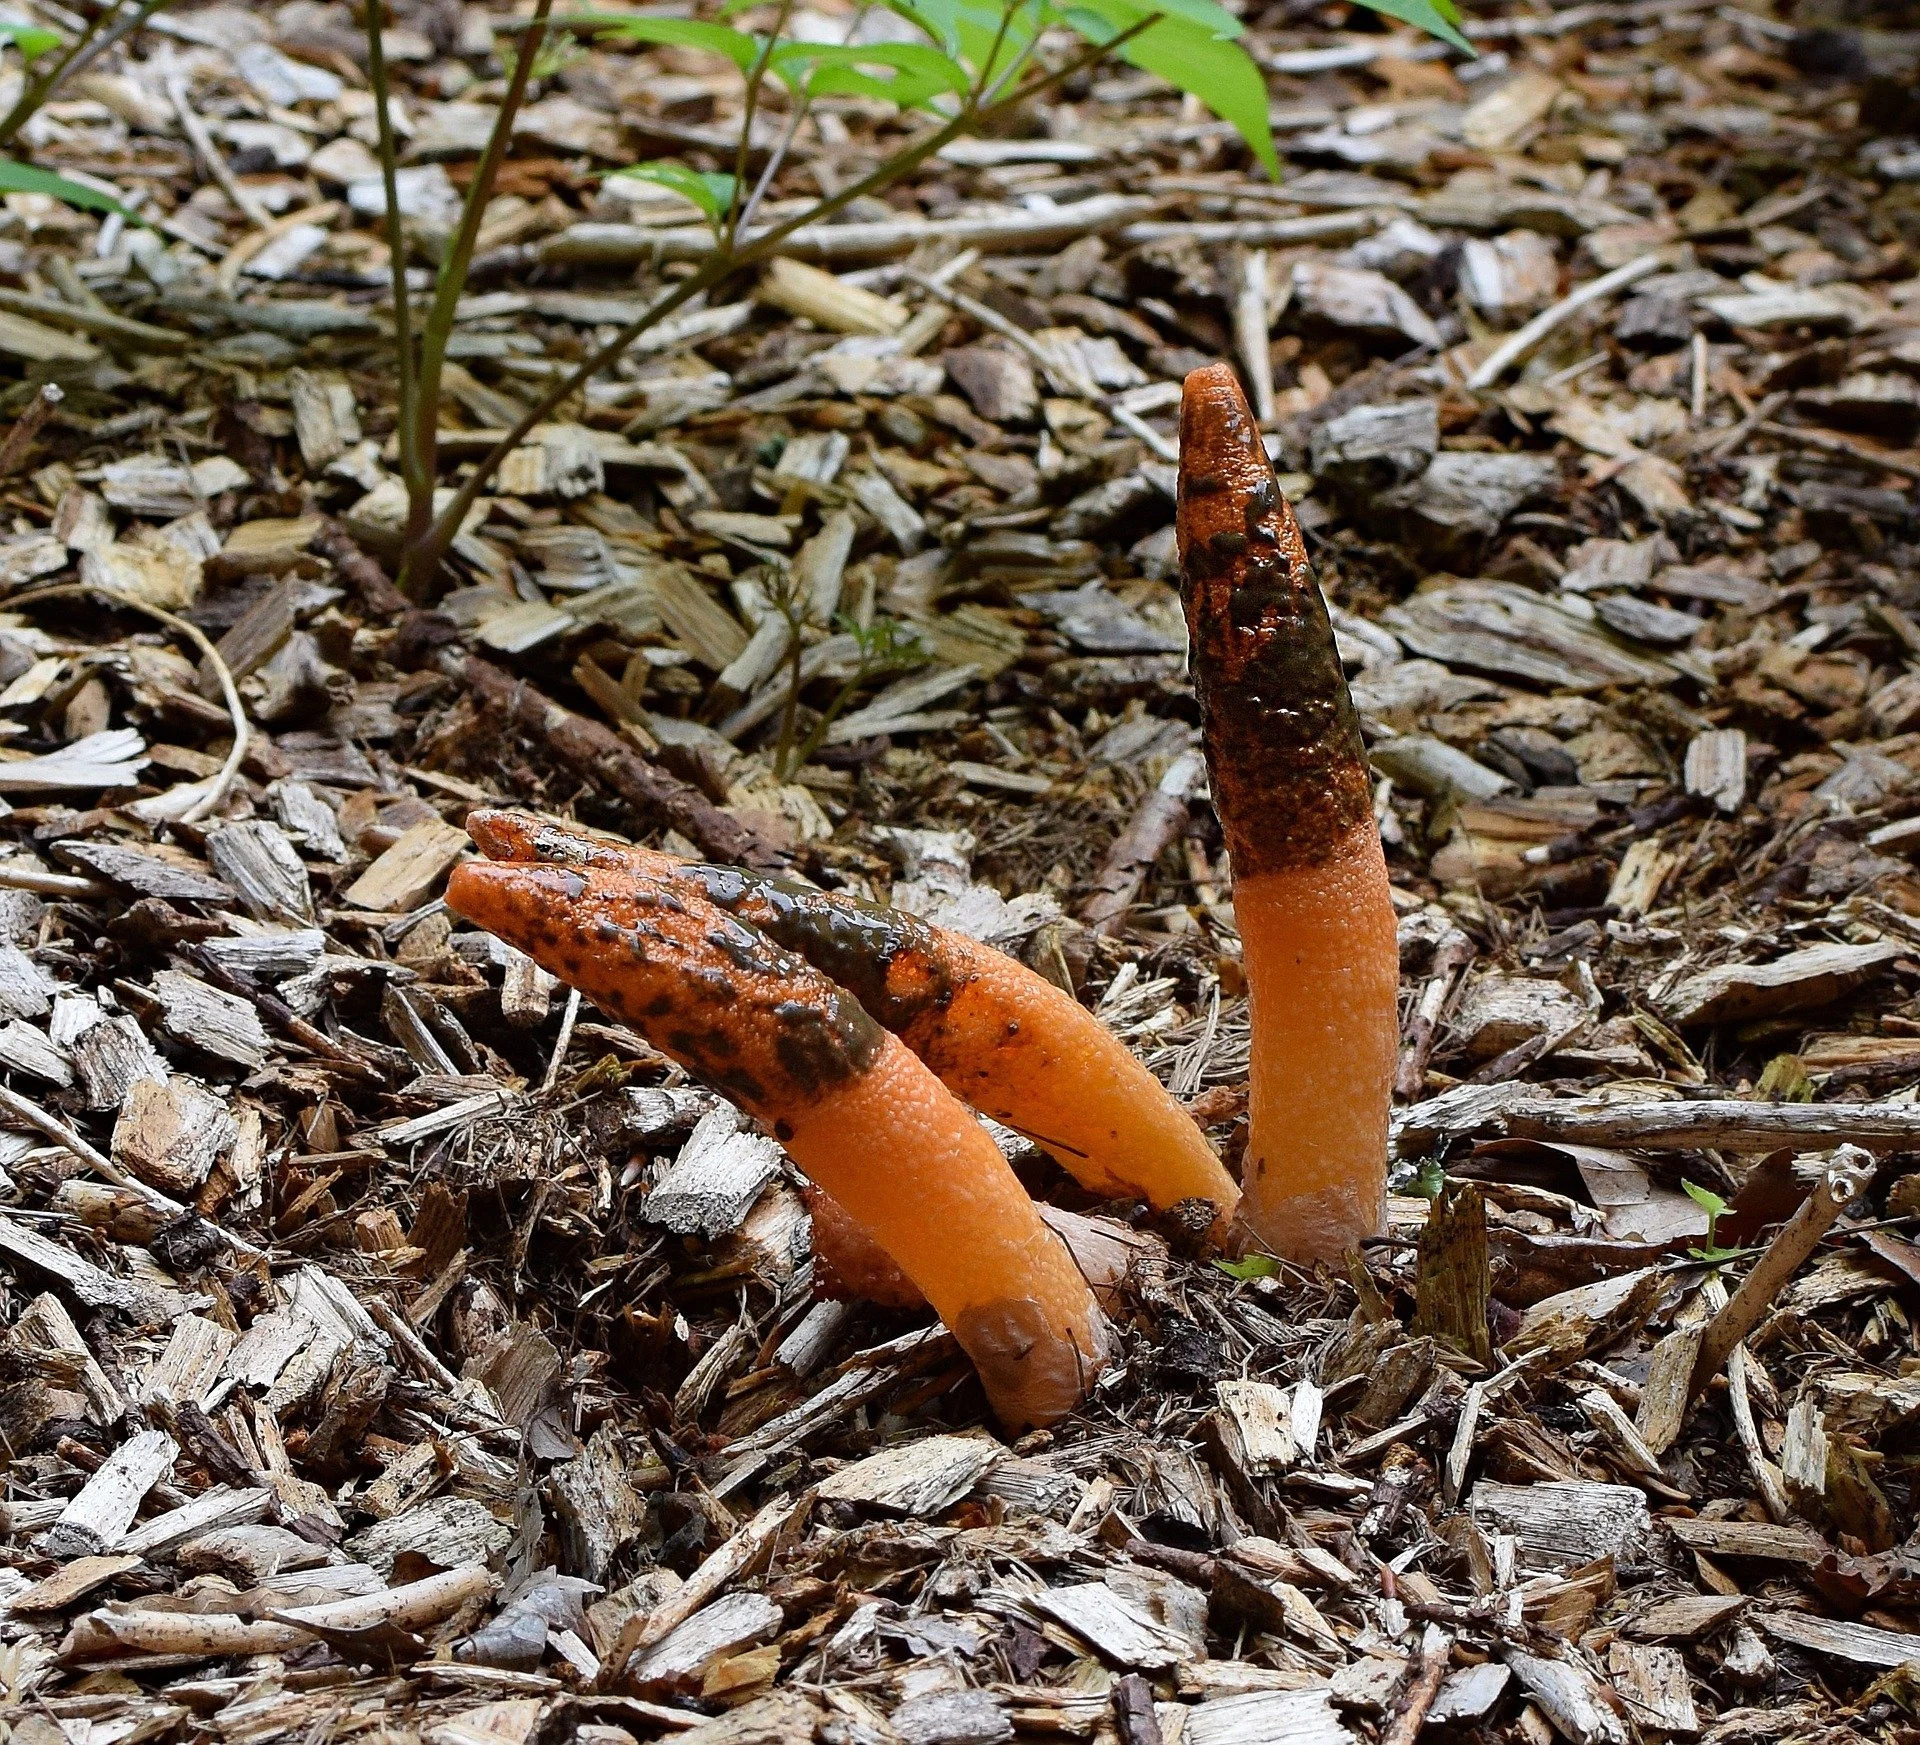
A crowd gathered in the garden of a friend recently. I assumed they were admiring a new plant, so I hustled over to share in the appreciation. But no, this was no new perennial. Emerging from the mulch was a group of orange finger-like growths wearing dark brown caps. Their slightly naughty appearance spurred a lot of jokes. When I bent down to take a closer look, the nasty odor caught me by surprise. My brain churned a minute until I was able to dredge up its proper identity: Stinkhorn Mushroom. There are several forms of the stinkhorn fungus, ranging from rounded to those in front of my group, shaped like something you would see for sale in the classified section of an adult magazine. Common names for stinkhorn mushroom include Devil’s Dipstick (my favorite), Demon Fingers, and Dog Stinkhorn.

Stinkhorn mushrooms grow on rotting wood – decaying stumps or mulch, for instance. They can be found across the US, usually after a period of damp weather, The dark cap on top of the horn is a slimy mass of reproductive spores. This is where the “stink” in stinkhorn arises. The smell is described as sewage-like or compared to rotting meat. Unlike a normal fungus whose spores are spread by wind, the stinkhorn’s brownish cap atop the pinkish-orange horn contains a gooey collection of spores. These spores hitch a ride on insects who spread them about. The stench helps lure pollinators (those with a warped sense of smell, I assume) such as flies, ants, beetles, or bees. Insects who consume this odd mushroom then excrete the spores to begin a new generation.

Despite their evil appearance, stinkhorns are not poisonous and they do not transmit diseases to plants. If they appear in your garden, please leave them alone. They should not be treated with antifungals or herbicides. They are excellent decomposers. They only feed on dead plant tissue, so do not pose any threat to live, healthy plants. Stinkhorns are short-lived and offer amusement to garden visitors. Just don’t stand down wind.

These stinkhorns made a surprise appearance in a friend’s garden, just in time for a garden club meeting.

Agapanthus or Lily-of-the-Nile for Containers or Ground

Agapanthus (pronounced ag-ah-PAN-thus) or Lily of The Nile makes me think of Allium, but the leaves are more substantial and the bloom appears more robust. Given a choice between the two, I would choose exotic-looking Agapanthus. I attempted to grow this plant many times in the past. My plants would last a year or two, and then would dwindle away or even die outright during a cold, wet winter. New cultivars are on the market now, with enhanced cold tolerance, so I am trying again. Some varieties are evergreen while others are deciduous. Check the label to know what you are buying.

Agapanthus is a fleshy rhizome that hails from South Africa. Another common name is African Lily. It prefers at least a half-day or sun or more. The labels indicate cold hardiness from zone 8 through 11. If you live in a cooler area, you can grow Agapanthus in containers and bring them indoors when winter arrives. Be careful to avoid overwatering in winter.

Most Agapanthus flowers are in shades of blue, but purple and white forms are available also. Individual leaves grow to three inches wide and 12 to 24 inches in length. Dwarf forms are available. The flowers are umbrels, clusters of individual flowers that appear as a single flower atop a sturdy stem. Each small flower has six petals; most have a darker stripe down the center of each petal. A fully opened flower is approximately the size of a tennis ball. This year, I paired a white cultivar with blue flushes (‘Indigo Frost’) with a white-flowered Mandevilla vine in a container with an added trellis.  I have high hopes for this combination. The Mandevilla has not started to climb its trellis yet, but I think it will be an ideal paring. Ultimately, the Mandevilla vine will serve as a windbreak and a visual backdrop for the Agapanthus flowers.

Agapanthus likes a well-drained, moist soil of neutral pH. It will not tolerate constantly wet soil. For best flowering, fertilize in early spring and again after flowering concludes.

Be patient with Agapanthus. It takes a year or two for it to reach its full potential. Rhizomes will enlarge and plants will spread over time. The seeds of spent flowers can be harvested and will germinate but it takes several years for seed-grown specimens to begin flowering. Propagation by division is a faster method. Plants bloom best when rootbound, so don’t be quick to separate. Use care when dividing ground-grown plants, as the thick feeder roots spread widely and shallowly. It is best to divide congested plants in autumn rather than spring.

Agapanthus leaves are toxic if eaten and the sap can cause skin irritation. This does not impact hummingbirds and other pollinators, who love visiting the blooms, but it deters nibbling from deer.

This newly planted pairing will be beautiful once the white-flower Mandevilla starts to cover the trellis.