Summer is winding down, and it is time to start thinking about next year’s garden. One of the smartest things a gardener can do is to submit a soil sample to the nearest extension office. For a nominal fee, a University lab will evaluate your soil and provide a list of recommendations on amendments.
Why test soil now instead of next spring? Many southeastern beds, borders and lawns need an application of lime (limestone) to adjust the pH of the soil. Without a correct pH, plants cannot efficiently absorb available nutrients. Lime works slowly. Obtain your recommended application rate now, apply it after the end-of-summer cleanup, and allow fall season rains to carry it into the soil where the adjustment process will take place during winter.
Because my gardening beds are not located near each other, they have different needs. I select three areas each year for soil testing. Recommendations are geared toward the plants grown in the test area, so my blueberry beds will have one set of recommendations, my shade garden (hostas and ferns) will have another, and the perennial beds on a rocky southwestern slope will have yet another. Next year I will select three different areas for testing. While you could test annually, I find that once every three years is sufficient.
Fortunately, the University-generated amendment recommendations are spelled out in terms almost anyone can understand. For instance, here is the recommended zinc application for new pecan trees: Use 1 pound of 16-4-8 or 1½ pounds of 12-6-6 fertilizer distributed in a 25-square-foot area around the tree. Make this application immediately after planting and again in June or July. The following February, apply 4 pounds of 16-4-8 or 5 pounds of 12-6-6 fertilizer for each inch of trunk diameter (measured 1 foot above soil surface). Pretty clear, yes?
There is one item on the soil analysis which is confusing. There is one number for Soil pH and another number for Buffer pH. The two numbers are not the same. What is the difference? Simply put, Buffer pH measures a soil’s resistance to change. A soil with high clay content will take a different quantity of product (lime, sulphur or aluminum) to effect pH change than a soil with high sand content. The soil pH meters sold in garden centers can provide a measurement of soil pH, but they cannot give an application rate based on soil structure.
Don’t waste time and money with guessing. I learned this the hard way. After applying 10-10-10 fertilizer to my beds for years, my first soil test indicated a phosphorus level that was off the chart. (I like to blame Martha Stewart’s garden book recommendation for Triple SuperPhosphate, but the fault is all mine. Her Connecticut soil needed phosphate. My South Carolina soil did not.) Out of balance soils take time to correct. It took several years before my excessive phosphorus dropped to a normal level. Before I knew better, the addition of 10-10-10 always made my plants look better short-term as they took up the available nitrogen. Nitrogen leaches out quickly, so as soon as the first flush of growth subsided, plants looked a little unhealthy and I added more 10-10-10 or 17-17-17, making the imbalance worse. While it seems that a fertilizer “with added micronutrients!” should be superior, it is only better if your soil actually needs those micronutrients.
Following the instructions provided, gather a soil sample and stick to the resulting recommendations. It is important to follow good sampling technique so that the resulting recommendation is accurate. As a side note, it is usually unnecessary for homeowners to pay extra money for a lab-generated Organic Matter Test. It sounds like it should be useful, but this measurement is used by farmers to calculate how much herbicide they need for crop treatment.
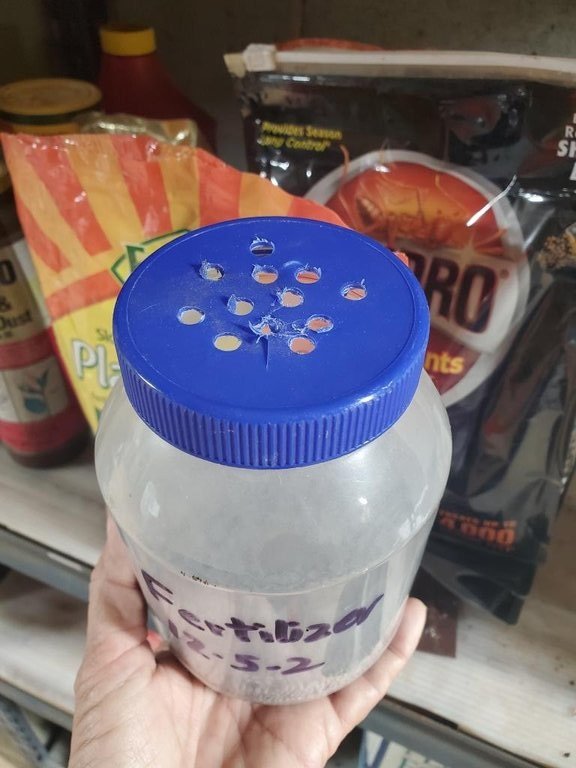
When spreading lime or fertilizer in a narrow bed, perhaps one surrounded by lawn or patio, it is difficult to use a mechanical spreader without getting the product where you don’t want it. Spreading by hand can be uneven and tiring if your beds are large. Here is my method: Take a clean, empty plastic quart container (mayonnaise jar is perfect). Remove the top and use an electric drill to make holes in the lid. For fertilizer, I use a 3/8” bit and make a lot of holes. Adjust your hole size and quantity to the product you are spreading. Fill the dry container with fertilizer or lime, attach the lid and you have a giant “salt shaker.” The light weight of the container makes for easy application. I keep one of these homemade spreaders in every bag of fertilizer, ant bait or pelleted insecticides. If you measure the correct amount of fertilizer for the given space into the jar, it is easy to avoid applying too much.