It’s time to start considering how to fight the horrible garden invader, nutsedge. Today’s guest blog is written by Skip Richter, Horticulturist & Host of GardenLine Radio on KTRH 740. He received his master’s degree in horticulture from Texas A&M University, “the source of all earthly knowledge”, and has served as a county horticulturist with Texas AgriLife Extension for 34 years in Montgomery, Travis, Harris, and Brazos County, advising home gardeners and the green industry on research-based horticultural practices. He has served as the National Gardening Association’s regional horticulturist for the southeastern U.S. and is a contributing editor to Texas Gardener magazine. He was selected as a Regents Service Fellow by the Texas A&M University System Board of Regents.
You can connect with him via:
Website: Gardening with Skip
Instagram: gardenlinewithskip
Facebook: GardenLineKTRH
YouTube: @skiprgarden

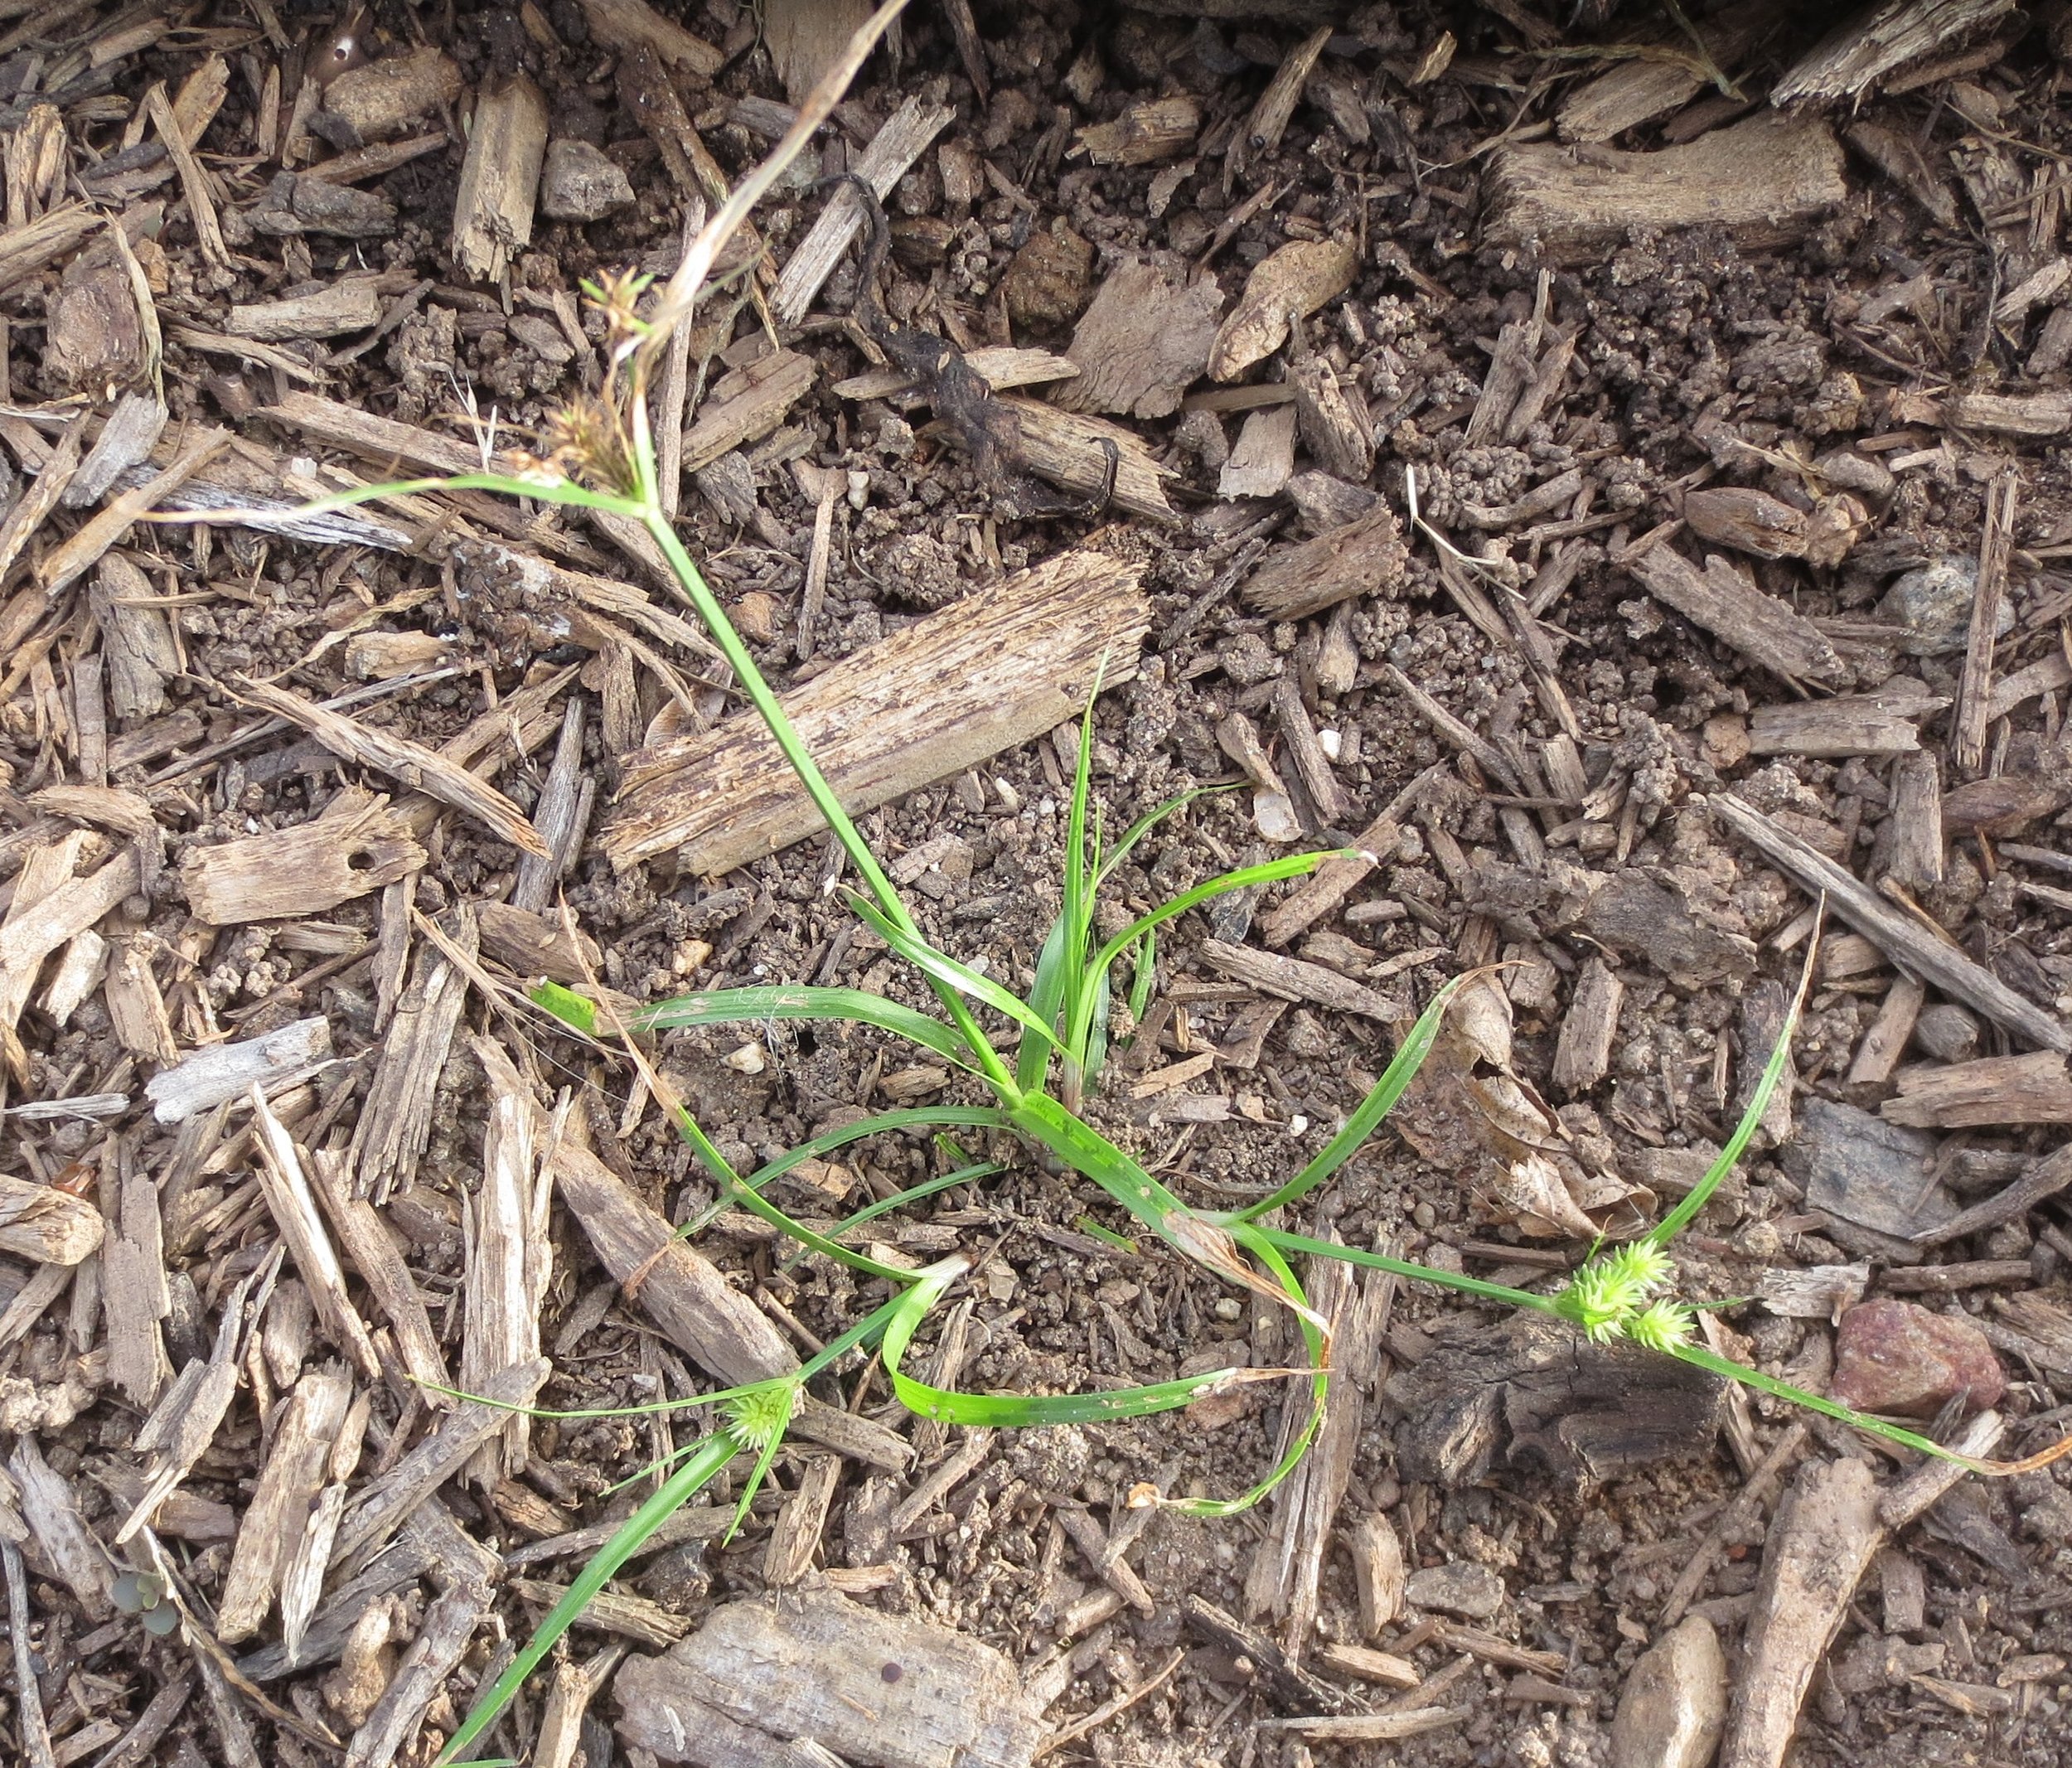
Nutsedge (aka “nutgrass”) is not a grass, but rather a member of the sedge family. Listed as the #1 most-troublesome weed in the vegetable, turf and the ornamental categories by the Weed Science Society of America, to know nutsedge is to hate it.
Before we delve into how to control this weed from hell, let’s take a closer look at some important facts about nutsedge. There are two common types of nutsedge: purple nutsedge (Cyperus rotundus) and yellow nutsedge (Cyperus esculentus). They each have key differences that influence which control effort will be effective against them.
Can’t beat ’em? Eat ’em!
There is a form of yellow nutsedge (known in various parts of the world as chufa, earth-almond and tiger nuts) that’s popular as a snack or mashed food. It is often used to create a sweet, milk-like beverage known as horchata de chufa. The tubers have even been found in Egyptian tombs dating to 3,000 BCE. I think that taking nutsedge with you to the grave is going a bit too far.
I once ordered and grew some chufa nuts (please don’t tell anybody) in my garden to compare them to our regular local yellow nutsedge. They produced tubers that were a bit larger but weren’t very impressive to the palate.
Tubers of our wild yellow nutsedge are also technically edible, with a mild almond-like taste. After chewing awhile, you give up and remove a bit of “sawdust” from your mouth. I’ll note here that edible and palatable are not synonymous. My favorite culinary assessment of yellow nutsedge tubers comes from a National Public Radio story, in which a taste-tester said of nutsedge tubers, “It doesn’t taste terrible.” High praise indeed.
Nutsedge development
Nutsedge often arrives in gardens, lawns and landscapes along with plants, topsoil and/or sod. New plants arise primarily from underground tubers rather than from seeds. Most tubers are found in the top eight inches of soil. But depending on the soil type and the nutsedge species, some tubers will be deeper.
Wet soil conditions wash a substance that inhibits sprouting from the skin of yellow nutsedge tubers, allowing them to sprout. This is one reason why yellow nutsedge proliferates and thrives in wet areas of a lawn or garden.
Nutsedge shoots emerge like pointed missiles from the ground and the leaves emerge from their protective sheath when each shoot reaches sunlight. This protective covering enables them to easily push up through soil or mulch, and even to poke through plastic sheeting and most landscape fabrics when these products are stretched tightly over the soil surface. Once the shoot reaches sunlight and the leaves emerge, and the plant is no longer able to punch through surface coverings.
When a nutsedge shoot reaches sunlight, the plant forms a bulb at its base that produces horizontal underground stems (rhizomes) with new tubers. These tubers can form additional tubers, as well. In one test, a single yellow-nutsedge tuber produced 6,900 tubers by fall and 1,900 daughter plants the following spring. This is one reason this plant is so difficult to control. Diligent efforts to prevent or greatly limit new tuber production are key to controlling nutsedge infestations.
Cultivation and hand-hoeing
Each tuber has approximately seven or more viable buds. So, any attempt at control (such as the ol’ garden hoe) chops off only one shoot; the tuber merely sends up another (after laughing hysterically at the gardener’s efforts). However, tubers expend stored energy to send up new shoots, so prompt removal of new shoots multiple times will weaken tubers and can decrease development of additional tubers.
For hoeing/hand-digging/tillage to be effective, one must remove plants before they have developed more than three-to-five leaves. If left longer, the plants will begin restoring the tuber’s spent reserves. Tubers expend a little over half of their stored energy to develop their first above-ground plant. Therefore, I cannot overstate the importance of constant surveillance and prompt digging or spraying to prevent tubers from replenishing their reserves.
Diligent efforts at frequent cultivation can outlast a tuber’s ability to regrow, but this type of diligent, prompt continual effort is seldom maintained. Control is further complicated by the fact that some dormant tubers are usually present to sprout over time. So, continue to look out for newly emerging nutsedge plants.
Combining control methods
Now that the nutsedge beast sounds impossible to defeat, let me say that it is not invincible. Difficult, yes; but not impossible. You can manage nutsedge, if you use a combination of practices and are consistent with prompt follow-up.
Non-chemical reduction of nutsedge in landscapes and garden beds involves the following practices. While all are not always possible, the more you can do, the better your results will be.
1. Avoid overwatering/saturated soil conditions, which stimulate yellow-nutsedge proliferation.
2. Hand-dig tubers, beginning when the shoots first emerge in spring. If you wait until mid- to late May to begin, you will likely have almost 10 times the number of nutsedge plants you began with. To be effective, repeat-digging is required whenever new plants have developed three-to-five leaves. If you wait longer, the plants will be producing new viable tubers.
3. Rototill the soil to sever rhizomes and bring tubers to the surface, exposing them to dry out. Rake and remove exposed tubers and rhizomes. Sun-drying is more effective against purple nutsedge than yellow nutsedge. Tilling breaks up the underground chain of the tubers on purple-nutsedge rhizomes, causing multiple dormant tubers in the chain to sprout. If you then promptly dig or spray the new sprouts, you can significantly reduce the infestation.
4. Cover future garden beds from spring to fall with a very dense, water-permeable landscape fabric to block out all sunlight. Don’t pull the fabric tightly over the soil surface or else new nutsedge shoots will puncture it. Keep soil moist to promote growth beneath the fabric, which depletes the tuber’s stored reserves.
In a study I conducted in Houston on purple nutsedge, plots were shaded with a loose covering of dense landscape fabric for the summer season. Shaded plots had a 24% decrease in tuber counts, while plots ex-posed to full sun had a 2,400% increase. Also, the 76% of tubers that remained were likely at least weakened, although we did not replant them to check this possibility. While shading won’t eradicate all tubers, it can significantly reduce the number of tubers and can be a helpful part of an organic regimen to manage nutsedge.
5. Solarizing heats the soil and can destroy tubers in the surface few inches. Temperatures over 112 degrees are lethal to tubers. Solarizing won’t destroy tubers deeper into the soil, but if preceded by deep tillage, the effectiveness of solarization can be increased. The clear plastic used in solarizing must be held above the soil surface to prevent it from being punctured.
6. Spray the plants with a systemic product beginning when the first shoots have three-to-five leaves. After the fifth-leaf stage, viable “daughter” plants will be forming on the rhizomes, which will not be effectively controlled by sprays to the original plant. Repeat sprays three-to-four weeks later as new nutsedge plants emerge and have three-to-five leaves.
Organic “top kill” products containing pelargonic acid, ammoniated nonanoate, plant essential oils and acetic acid (vinegar) will kill the weed’s top growth. But they do not do much to control nutsedge, unless accompanied by hand-hoeing.
Suggestions for using sprays
It has been my experience that sprays of glyphosate (such as Roundup and other examples) may kill back the above-ground parts of nutsedge plants but do not provide significant effective control of tubers. Preemergence herbicides used to prevent weed seeds from establishing new plants are of little benefit because nutsedge plants arise primarily from tubers, not from sprouting seeds.
Several products are available on the market to control nutsedge. Repeat applications will be required for effective control. The addition of a surfactant helps the spray stick to and penetrate the waxy nutsedge leaves more effectively. Note that Sedgehammer Plus already contains a surfactant. Note that some products can take two weeks to provide visible symptoms, so be patient.
Carefully read and follow all directions on the herbicide label. Product formulation and labels can change. The label is the final authority, including over comments made in this article.
Drought stress results in poor nutsedge-control results. Avoid applications of postemergence products to turf stressed by drought or other factors, making it more susceptible to herbicide damage.
Wiper applicators can be helpful
When applying an herbicide product around desirable plants that may be adversely affected, it is best to use a wiper-type applicator to help avoid contact with desirable plants. Wipers apply a small amount of the herbicide directly onto the weed’s foliage, which outcome significantly limits pesticide application rates, environmental concerns and damage to desirable plants nearby. If you’d like to build a simple, inexpensive weed wiper, I have instructions on my website that include product-ingredient names for controlling various types of weeds and trade-name examples.
Nutsedge, although a tough, formidable foe, is not invincible. With diligent, determined, consistent efforts, it can be managed in a home garden and landscape. So, I’ll leave you with these immortal words from the venerated coach Knute Rockne, as they are fitting for the task at hand: “When we get them on the run once, we’re going to keep ’em on the run! … and don’t forget men, today is the day we’re going to win! They can’t lick us, and that’s how it goes! … go in there and fight! Fight! Fight! Fight! Fight!”