Seed starting season is upon us, and I’m receiving “how to” questions. I do not profess to be an expert, but I can share what has worked for me. Here is the Mary Snoddy methodology, refined over several decades of hand-on experience.
Start with high quality seeds. You can purchase new packages each year, or you can use leftovers from last year, as long as the seeds were stored in a cool, dark, dry place. Some seeds will last several years (tomatoes) while others get stale quickly and should be purchased fresh each year (lettuce, parsley). Starting your own seeds offers the benefit of many more choices than are available from transplants at local nurseries. And some plants (corn, beans) are more successful when started directly in the ground (“in situ”) than from transplants.
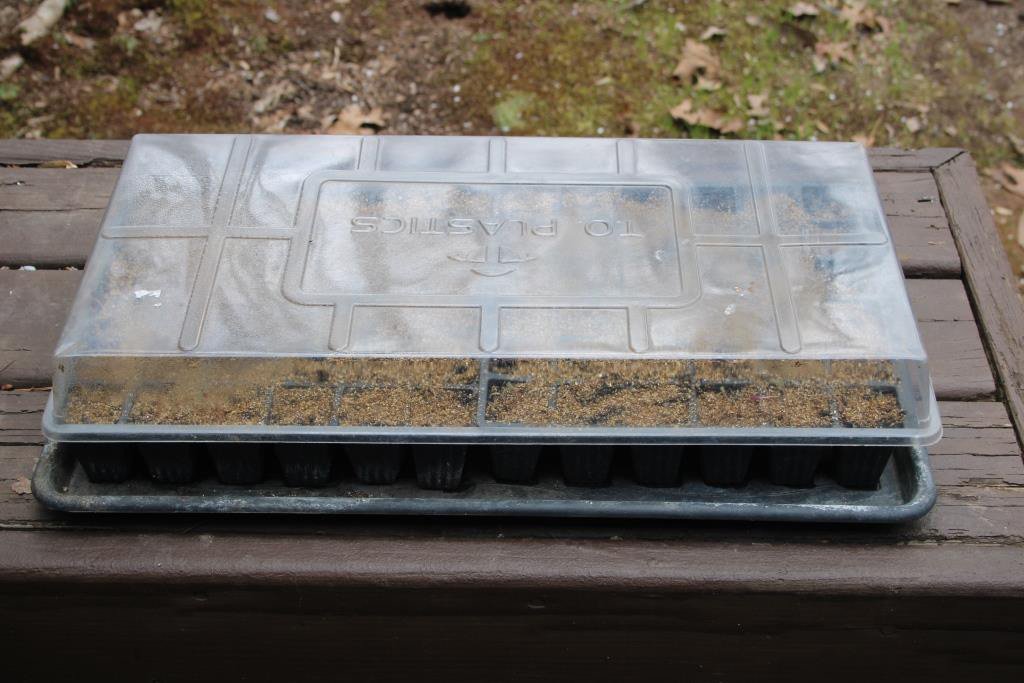
Most big box stores and garden supply stores sell seed starting containers, a waterproof tray that holds six or eight inserts, segregated into four or six sections. A complete kit may include a plastic snap-on lid or dome cover to create a humid environment. It is easy to recycle plastic trays from year to year (I reuse those from plants I purchased) but it is imperative that the recycled trays, dividers, and covers are clean. Before reusing old containers, I soak them for 30 minutes in a five-gallon bucket of bleach water (nine parts water to one part bleach), then rinse well and dry in the sun.
Reusing starter items without sterilizing them may introduce pathogens that will kill off your precious seedlings. It is heartbreaking to see a flat of new seedlings succumb, overnight it seems, to “damping off.” This condition results in stems looking like they have been pinched. Once the stem develops this thin, pinched-looking spot, there is no recovery. Remove the seedling and its soil as quickly as possible, to prevent fungal spores from spreading to healthy plants. Prevent damping off by using clean containers, avoiding overwatering, and providing good air circulation.
Use seed-starting medium instead of potting soil or garden soil. Bags of “seed starter mix” are widely available. This is a very fine, lightweight substance that allows seeds to emerge with minimum effort. It is most efficient to fill the prepared starter trays with pre-moistened starter mix. If the medium seems to shed water rather than absorbing it, either use hot water or add a drop of dishwashing detergent to the water used for dampening the mix. I prefer the hot water method, and usually dump a couple of cups of hot water directly into the bag and wait about 30 minutes for it to absorb, shaking the bag a few times for even distribution. Pack the damp media into the containers, plant seeds at the depth recommended on the package, mist lightly to ensure seeds get wet, and top with a light sprinkle of dry starter mix.
A few seeds need light to germinate, while others need total darkness. These seeds must be exposed to light in order to germinate: African Violet, Ageratum, Artemesia, Begonia, Bells of Ireland, Browallia, Chinese Lanterns, Coleus, Coreopsis (Tickseed), Dusty Miller, Aquilegia (Columbine), Gaillardia, Geranium, Heuchera (Coral Bell), Impatiens, Lychnis (Lamb’s Ears), Nicotiana, Penstemon, Pentas, Petunia, Platycodon (Balloon flower), Poppies, Portulaca, Primrose, Snapdragon.
The following seeds need darkness to germinate: (Don’t confuse germination with seedling growth. ALL seedlings need light to grow. Insufficient light will result in spindly, weak plants.) Armeria, Calendula, Catharanthus (Periwinkle), Centaurea, Delphinium, Echinacea (Coneflower), Gazania, Nasturtium, Tithonia (Mexican Sunflower).
Warm temperatures make seeds germinate. Soil heating mats or cables are available in nurseries that sell seed starting supplies. These work great, but there is no need to get fancy like. I have had excellent success by repurposing a couple of old electric heating pads (the kind used for soothing sore muscles). Just take measures to keep them dry when in use.
Plastic dome covers retain heat and humidity. Once seeds have sprouted, remove any soil warming devices and plastic covers. Cooler temperatures and plenty of light will encourage stocky, strong seedlings. Good air circulation helps keep seedlings healthy. I utilize an old box fan to keep the air moving but do not direct the breeze directly at the seed flats.
Treat seedlings with tender care, giving them enough water to keep them from drying out without the soil being constantly wet.
Gradually introduce your seedlings to the harsh outdoors. This process is called “hardening off.” Place seed flats outdoors in a protected area (away from winds and out of full sunlight) for an hour or two each day, gradually lengthening the time. This is the equivalent of developing a base tan so that your skin doesn’t blister from sudden sun exposure. If a day is especially blustery or unseasonably cool, skip it. There is no place for Tough Love in nurturing seedlings (unless you have sown them too thickly for good air circulation and healthy growth, which is not the topic of this blog).
Check the last frost date in your growth zone, then add a week for insurance before setting your darlings out in the wild world of flower beds, vegetable gardens, or containers. Sometime a stretch of warm temperatures leads us to assume that winter is over. Don’t be misled! It is always better to err on the side of safety than to suffer the loss of time and care invested when Nature has a cold, nasty hiccup.
Why tempt fate? Start only plants that will survive in your zone, soil type, and available light (sun exposure). Plant only vegetables that you and your family will actually eat. It does not matter if you can grow a fantastic bed of eggplant if no one in your family will touch it. Michigan State University has a great chart listing how many row feet to plant per person for various vegetables. Find it by clicking HERE.
Happy Seed Starting! I’d love to see photographs of your successes. Email pictures to mary@marysnoddy.com.
Ready, set, GROW!

These Gomphrena seedlings emerged two days ago, and they are already leaning toward the sun source.

These Zinnia seedlings are growing tall and skinny - a clear sign that they need more light than they are currently receiving.

A moment of silence, please, for this poor seedling that has suffered “damping off” from a fungal attack. The problem was likely caused by too wet a soil, as evident from the sheen of dampness on the starter mix.