Catnip As A Mosquito Repellant

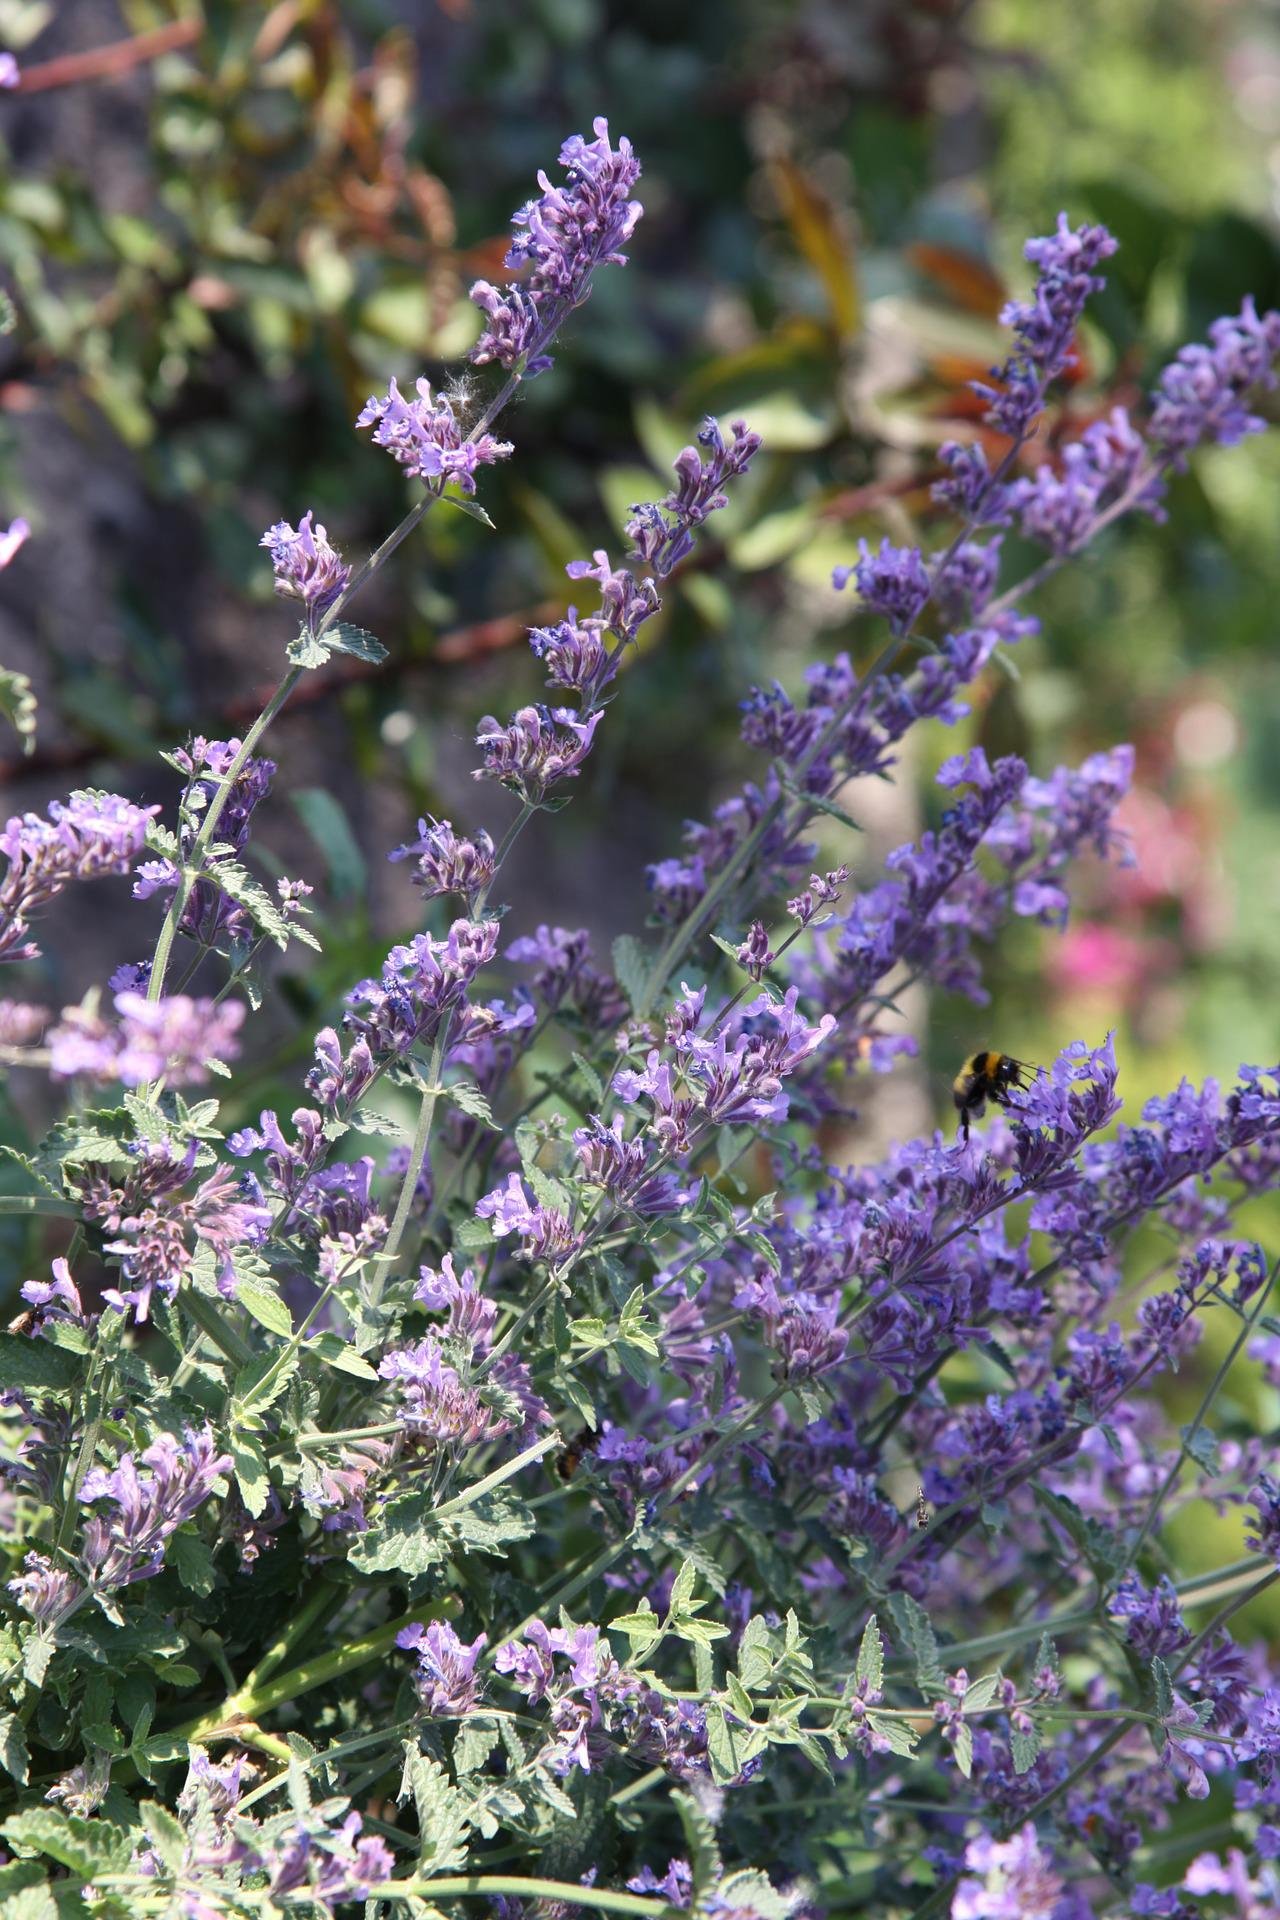
Does catnip  (Nepeta cataria, pronounced NEP-eh-tuh kat-AR-ee-ah) repel mosquitos? A recent article in iScience says, “Yes.” (Read the full text here.)

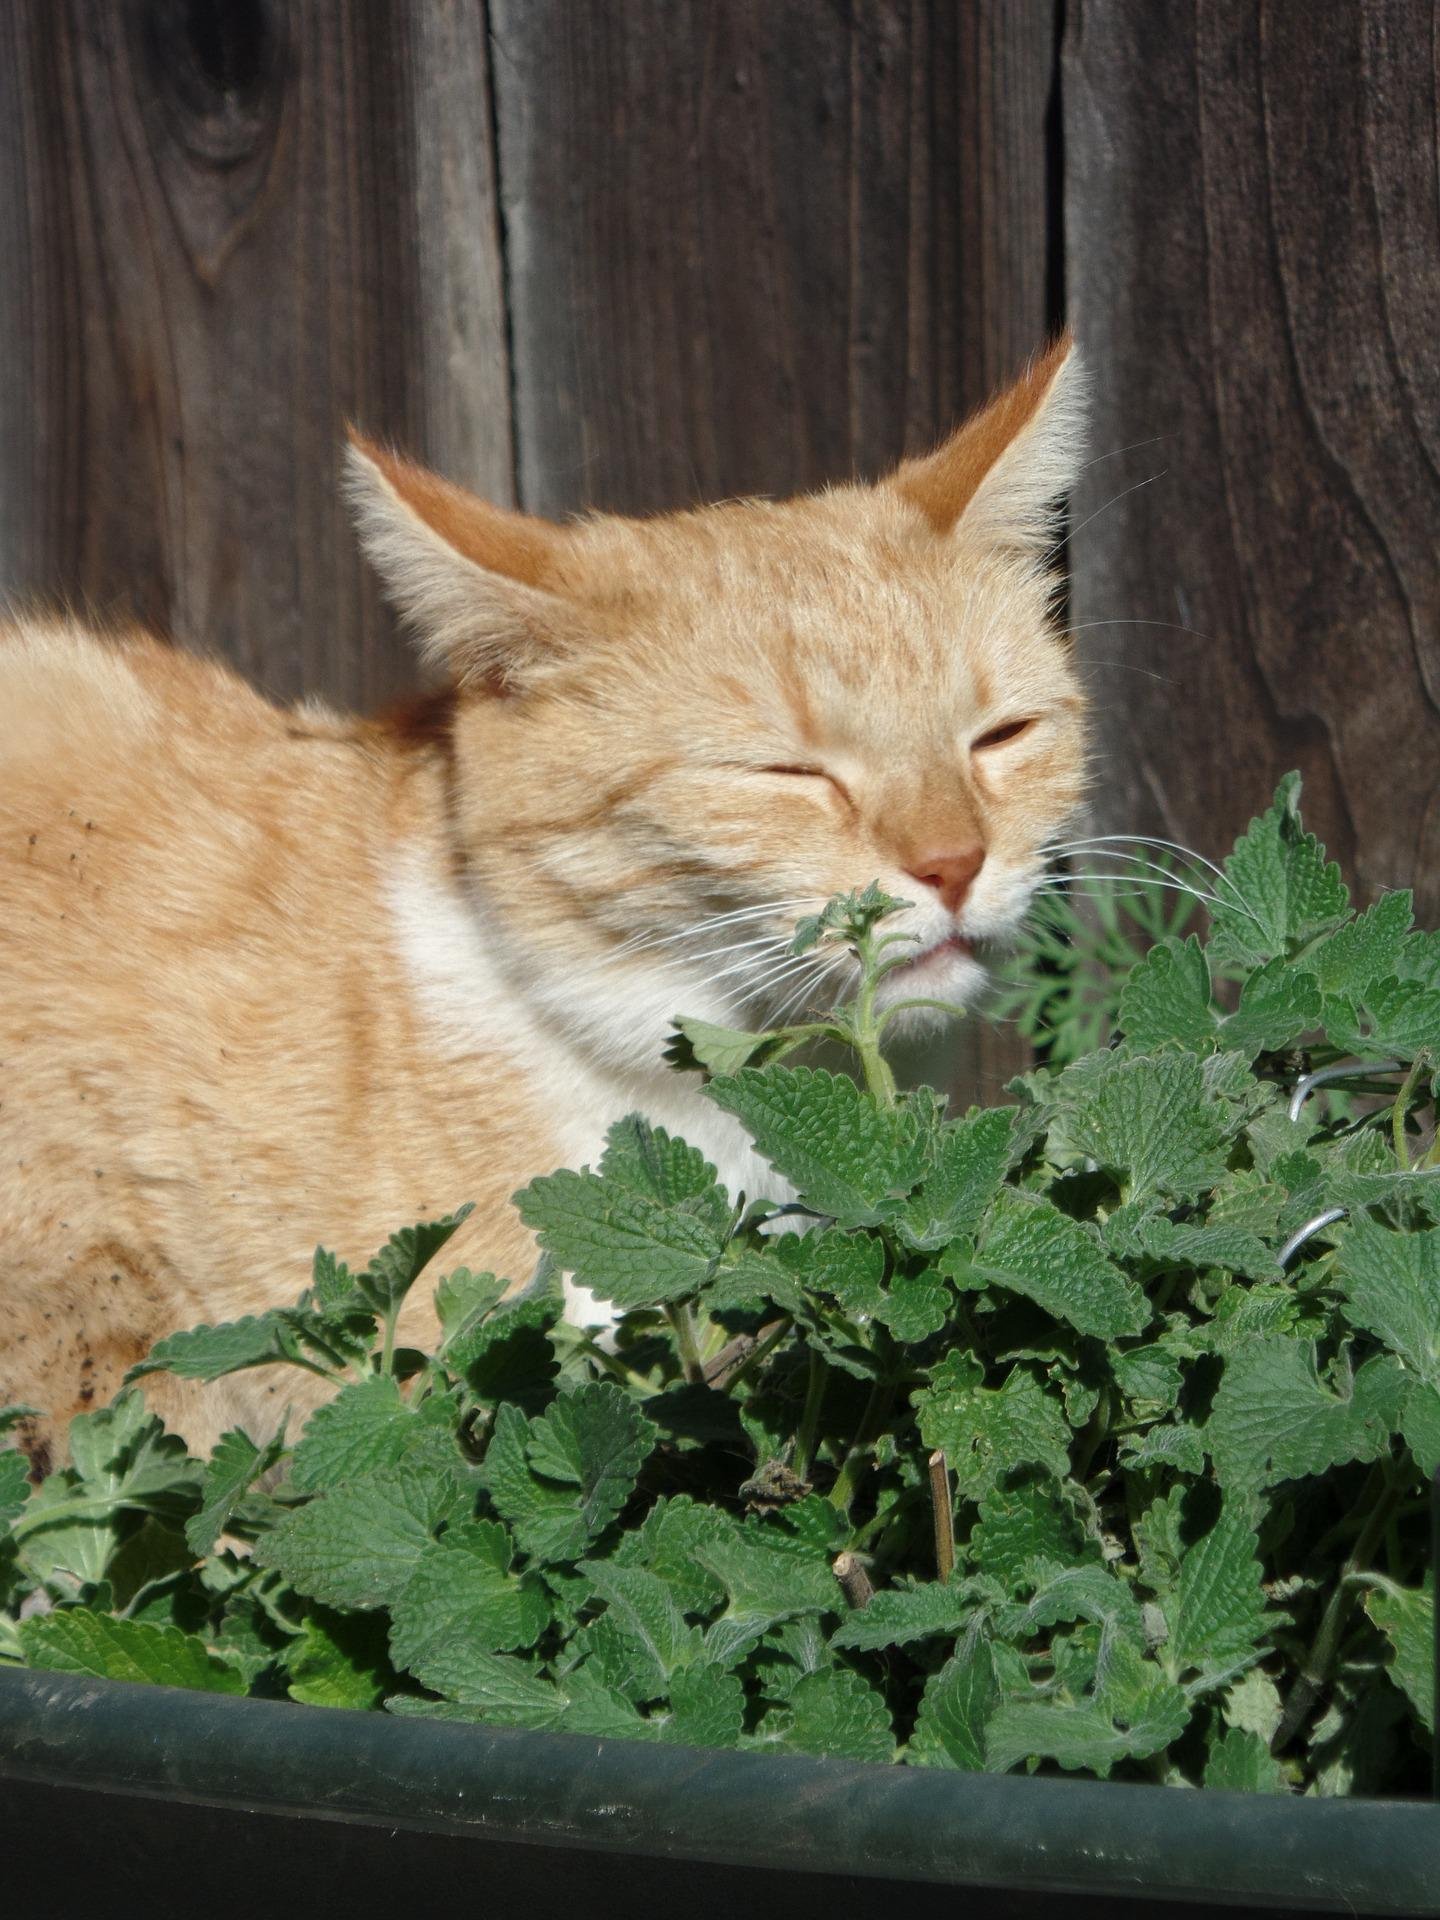
A perenial herb, catnip is among a group of plants that produce compounds, called iridoids, which discourage insect attacks. Two of these compounds are nepetalactol and nepetalactone. The latter substance attracts cats, who often nibble the leaves or rub against the plants. A couple of our felines prefer to dive into the middle of mine as if they are wading pools on a steamy day. Then they aimlessly race around (“the zoomies”) for a while before they collapse for a nap. If disturbed, they may open their dilated eyes and acknowledge my presence with a little chirp, almost as if saying, “That’s some good Nip, man.”

Now, science tells us that those same compounds are an effective mosquito repellant. A research collaboration between Northwestern University and Lund University (published in Current Biology journal) indicate that crushed catnip can be as effective as the synthetic compound DEET and is safer. Silver vine (Actinidia polygama), a relative of the Kiwi vine, has even more insect-fighting substances although it is less commonly grown.

Simply growing catnip near your deck, pool, or treehouse will not do the deed. Leaves must be damaged (torn or bruised) to release the mosquito-fighting magic. The oil from crushed catnip leaves also repels fruit flies.

Catnip is easily started from seed or can be divided. It will grow in full sun to part sun in any well-drained soil, zones 3 through 9, preferring part sun in hotter zones. It has attractive spikes of blue-to-purple flowers that bees and butterflies love. As a member of the mint family, square-stemmed catnip is a vigorous grower and can become woody and shrub-like with age. Prune it back hard after blooming to encourage repeat flowering and keep the plant compact. The next time I prune those in the Mary Snoddy garden, I plan to put squashed leaves and stems around the deck to test out the mosquito-repelling scheme.

Nom, nom, nom.

Blossom End Rot on Tomatoes

A perfectly ripe, home-grown tomato is a thing of beauty and unparalleled flavor, the perfect combination of acid and sweetness. Mother Nature seems to plot against us, marring our perfect fruits with various maladies. One of these is Blossom End Rot. There is a lot of misinformation out there, so here are the facts, straight from institutions of higher learning.

Blossom End Rot on tomatoes is a common problem. It presents first as a discolored, water-soaked patch on the bottom (“blossom end”) of the fruit, opposite the stem. With age, the watery spot becomes firm and leathery. Such spots may be small or up to one-third of the fruit. They may occur on green fruit or ripe fruit, rendering it inedible. A quick internet search will reveal that Blossom End Rot is caused by a lack of calcium.

Incorrect advice abounds on how to add calcium: stir ground eggshells into the surrounding soil, water with powdered milk, bury scraps of Gypsum board (“sheetrock”) nearby, or (most amusing) water plants with a couple of dissolved antacid tablets such as Tums. Yes, Blossom End Rot is caused by a shortage of calcium in the fruit’s tissues, but it may have nothing to do with the calcium present in the surrounding soil. The problem can be found in plants growing in soil with plentiful calcium. So what gives?

Scientifically speaking, Calcium is a large molecule. It takes a lot of water to move Calcium from the soil through roots and stems to where it is needed, in the fruit. If a soil test indicates sufficient Calcium, applying consistent water will remedy the problem. Note that the solution is consistent irrigation, not necessarily more. Over-watering interferes with a plant’s ability to absorb available nutrients from the soil. Over-fertilizing forces the plant to grow faster and worsens the problem. Root damage caused by energetic cultivation also exacerbates the issue.

 How to deal with the problem:

  1. Prior to planting, perform a soil test to ensure an acceptable pH and sufficient nutrients, including Calcium. A soil that is too acidic can prevent the uptake of nutrient. High acidity is treated by the addition of lime (limestone). Do not add lime unless the soil test indicates a need,

  2. Water consistently. One inch per week, either via rain or irrigation, is ideal. More may be needed in the hottest part of the summer.

  3. Use a soaker hose or ground-level irrigation rather than overhead watering. Wet leaves may encourage certain diseases.

  4. Use mulch to aid in soil moisture retention.

  5. Don’t try to “push” tomatoes by over-fertilizing.

  6. Remove any fruit that shows signs of Blossom End Rot. While it does not spread from fruit to fruit or from plant to plant, the affected tomato will be inedible.

  7. Do not try to treat Blossom End Rot with insecticides or fungicides. They have no effect.

What about those spray-on calcium products? Allow me to quote directly from a Clemson Extension agent: “Sprays of any form of calcium, such as calcium chloride, do NOT reduce the problem of blossom end rot. Foliar applied calcium will indeed go into the leaves, but will not be translocated into the stems or into the forming fruit. One can treat each plant with a SOIL applied form of water soluble calcium, like gypsum, which is calcium sulfate. So, apply 1 tablespoon calcium sulfate around each tomato plant per month and water it into the soil for root uptake. This will reduce Blossom End Rot. Plants need mulch to keep soil moisture uniform, and when hot, plants may need to be watered every 1 to 2 days. When the soil gets dry, plants have a difficult time taking up the calcium they need, especially during the rapid growth in late spring/early summer. Blossom End Rot is usually only a problem in the first 2 or 3 months of the growing season, so that may be all that is needed. Do not over apply the calcium, as nutrients will compete to get into the plant, and you don’t want to affect the balance of nutrients in the soil by over-loading it with calcium. If one uses leaf compost and mixes it into the soil prior to planting, it too can add the needed calcium for plant uptake.”

About the aforementioned misinformation: Gardeners can protect themselves from well-meant but incorrect advice by a simple search restriction. For example, if you type “tomato problems” into a Google search bar, you will receive ten pages of search results, some of which are helpful and others which are designed to sell you a product. If you add the term “site:.edu” after your search term, you receive six pages of science-based results, produced by university research. University sites have web addresses that end in .edu rather than .com or .org. I never do any horticulture research without using this tool. [Search term + space + site + the colon symbol + dot + edu]. To quote the character Joe Friday in Dragnet, give me “just the facts, ma’am.”

Tomatoes with Blossom End Rot. Photo by Joey Williamson, Clemson University. Used with permission.

Queen Anne's Lace

When a plant’s common name includes “weed” many people are hesitant to introduce them into a cultivated garden. But those same weeds can prove to be resilient, hardy, and attractive. Consider Butterfly Weed (Asclepias) or Iron Weed (Vernonia) as two examples. The downside of growing weeds is the possibility that they can be TOO resilient, even bordering on invasive. That is the case with today’s featured plant, Queen Anne’s Lace.

Queen Anne’s Lace (Daucus carota, pronounced DAW-kus kar-OH-tah) has a fat, carrot-like tap root that helps it survive in hot, dry climates. It is quick to spring up in disturbed areas, and is listed as invasive in more than 20 states. Queen Anne’s Lace, also called Wild Carrot, Bee’s Nest or Devil’s Plague, is a biennial. It develops lacy basal foliage in its first year, then blooms second year. Mature plants range from 2-4 feet, with a narrow footprint. It is found in all the lower 48 states, in full sun to part shade.

Queen Anne’s Lace flowers are flat white umbrels up to four inches across with one little purple flower dot in the middle. If you place cut flowers’ stems in colored water (use a few drops of the same vegetable-based colors used in cake icing), the blooms rapidly take up the dye and will change from white to a pastel shade of the selected color. I thought every child had done this at least once, but it appears I was mistaken.

Spent flower heads curl up on the edges into a brown cup-like form that resembles a bird’s nest. They become brittle when dry. Winds break them off their stems, and they tumble about, spreading seeds far and wide. This promiscuous habit, along with their tolerance for any type soil and any pH, means that they spread everywhere unless consistently deadheaded. Cut stems stink but the smell wanes fast enough to enjoy them as cut flowers. I once had to resort to herbicide to rid a perennial bed of these, and have since decided to just enjoy them along roadsides. They are prolific in my area of the southeast. Bees and butterflies love the flowers, and swallowtail butterfly caterpillars eat the foliage.

Parts of the plants can be cooked and eaten in small quantities, but larger amounts are toxic. Contact with leaves and stems can cause dermatitis. Unless one in starving in the wilderness, I see to need to test out the toxicity threshold. If you feel the need to consume, be positive of your plant identification. Queen Anne’s Lace is easily confused with Wild Parsnip and Wild Hemlock. Consuming either of these can be deadly. Wild Hemlock is the plant that killed Socrates. Its stem has purple spots.

Cluster of tiny white flowers into a single umbrell

Note the single purple flower in the middle. Not every umbrell has this oddity.

A single plant, flowering in an undeveloped roadside.

A community of Queen Anne’s Lace shows how the plant can multiply into large communities.

Elderberry (Sambucus)

Along partially shaded roadsides, Elderberry is putting on its summer show. Elderberry, Sambucus canadensis (pronounced sam-BYOO-kus can-uh-DEN-sis) is an American native that thrives in moist soils but will survive in wet or dry locations, acidic to neutral soils, full sun to mostly shade. It seems to prefer areas that have previously been clear cut, such as under power lines. Mature plants grow up to 12 feet tall and 12 feet wide. This deciduous shrub is hardy in zones 4 to 9. It is very heat tolerant. If suckers are not removed, shrubs spread by underground runners to form dense thickets. Birds, especially quail, like to nest in their branches.

Flat-topped clusters of white Elderberry flowers are favored by bees and butterflies. The flowers are followed by blue-black berries. According to Texas A&M University, up to 45 species of songbirds eat the fruit, as well as deer and other mammals. Berries are toxic to humans if eaten raw but once cooked can be enjoyed in jelly, pie, or other desserts. Do not allow horses to eat any part of the plant. Both flowers and fruits can be used to make elderberry wine. I’m told that it is delicious, but I can’t get past the toxic-when-raw issue.

Aside: In the delightful play or movie Arsenic and Old Lace, elderberry wine conceals the poison used to permanently relieve unsuspecting visitors of loneliness. A couple of movie versions exist. I recommend the 1943 release, directed by Frank Capra and starring Cary Grant. It is set on Halloween night, but is an enjoyable watch any month of the year.

Plant breeders have elevated the desirability of this common roadside plant by introducing non-green foliage varieties. Proven Winners offers Black Lace® Elderberry a finely cut plant with pink flowers against purple-black foliage. Affordable price, fast growth, and undemanding nature makes it a great alternative to Japanese Maple. I managed to walk away from Black Lace®, but I simply couldn’t resist another Proven Winners introduction, Lemony Lace® Elderberry. Its finely cut, chartreuse foliage looks fabulous in a grouped planting or standalone. Both these Lace cultivars are smaller (5 feet for Lemony Lace® and 8 feet for Black Lace®) than their wilder cousins, which means they could be grown in containers. The reduced size comes at a cost. They are less heat tolerant, and only recommended as far south as Zone 7. Both are “deer resistant.” We shall see…


Elderberry shrub flowers and buds

Elderberry flowers and buds

Elderberry shrub growing on an uncultivated roadside

Elderberry shrub with chartreus foliage

Check out the color and texture of Lemony Lace — Be still my heart!

Elderberry fruit cluster

Elderberry fruit cluster
Image by EM80 from Pixabay

A typical location to find wild Elderberry: underneath power lines

Ghost Pipe - A Non-Smoking Plant

I discovered a new (to me) plant this week: Monotropa uniflora, commonly known as Ghost Pipe or Indian Pipe. “Commonly known” is a bit misleading, however, since my research revealed that while the plant is found across the US, its occurrence is somewhat rare. It is absent in the southwest.

My sighting of the plant was accidental. My Australian Cattle Dog and I were riding from the house to the mailbox, when I spotted something white in the woods alongside the drive. Thinking it was wind-blown trash, I stopped to collect it for disposal. And spent the next half hour on my hands and knees, admiring these weird communities of colorless plants. The longer I remained nose-to-ground, the more of them I discovered. I assumed that they were some form of mushroom, but research revealed that it is not a fungus.

Ghost Pipe is not a saprophyte, which is a plant that lives off decaying plant, like mushrooms. Ghost Pipe (also known as Indian Pipe) does not photosynthesize like other plants do. Instead, it feeds off mycorrhizal fungus attached to the roots of another plant. This absence of photosynthesis explains why there is no green color to the plant. Ghost Pipes do not harm their hosts.

Ghost Pipes occur in wooded areas when an extended dry spell is followed by rain. They are usually located near Beech (Fagus) trees. Since they do not need sunlight for photosynthesis, they can survive in the deep shade of thick woodlands. Flowers dangle like bells until they mature, when they straighten their curved necks. They have a light, sweet fragrance. If you are lucky enough to spot these weirdos, don’t be tempted to pick one. Stems and flowers turn black when picked.

The colorless flower of Ghost Pipe. My apologies for the dirty fingernails (“a gardener’s French manicure”). This is what happens when you dig in the dirt for fun.

A Ghost Pipe community

Interesting Alternative to Miniature Hosta

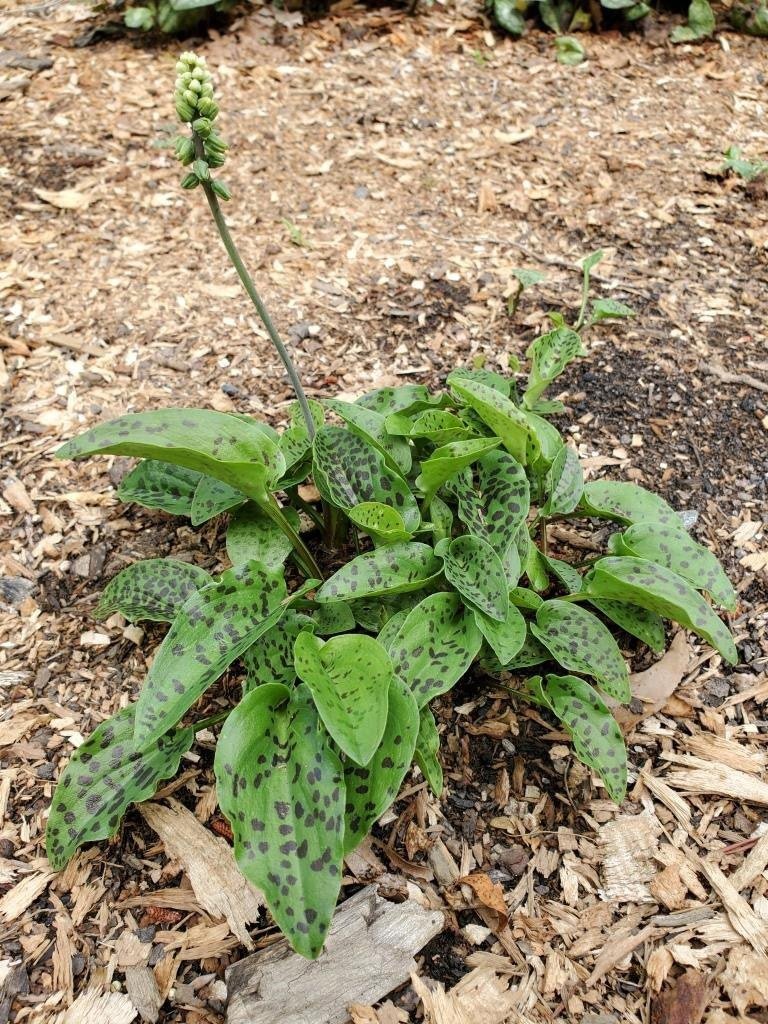
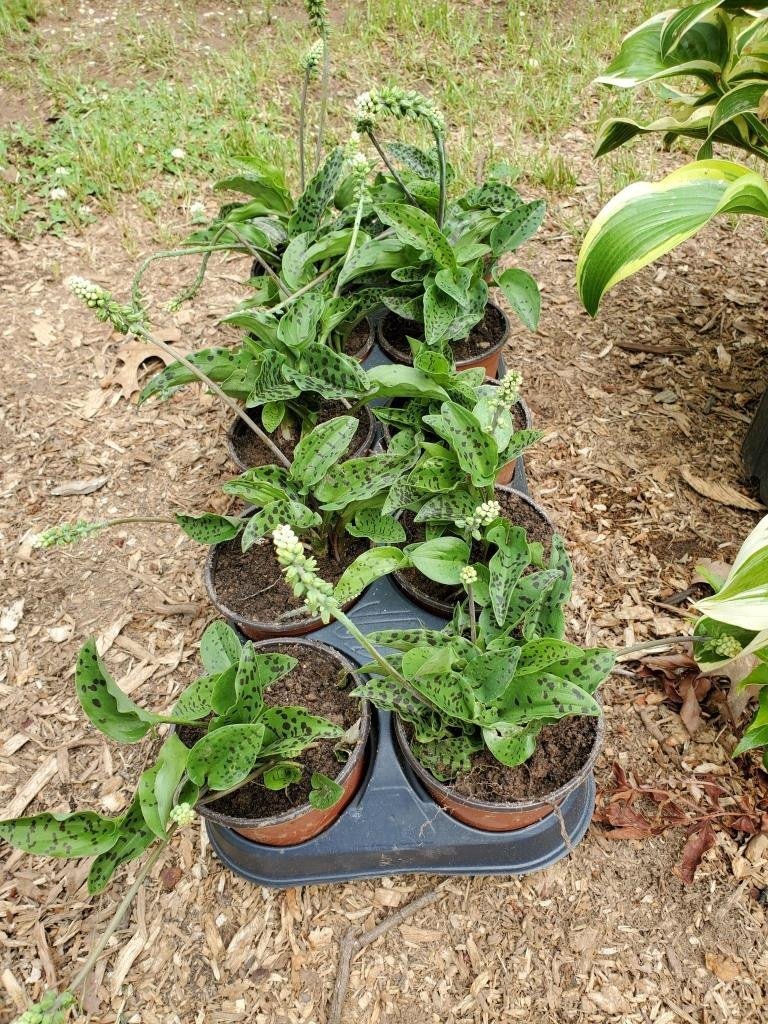
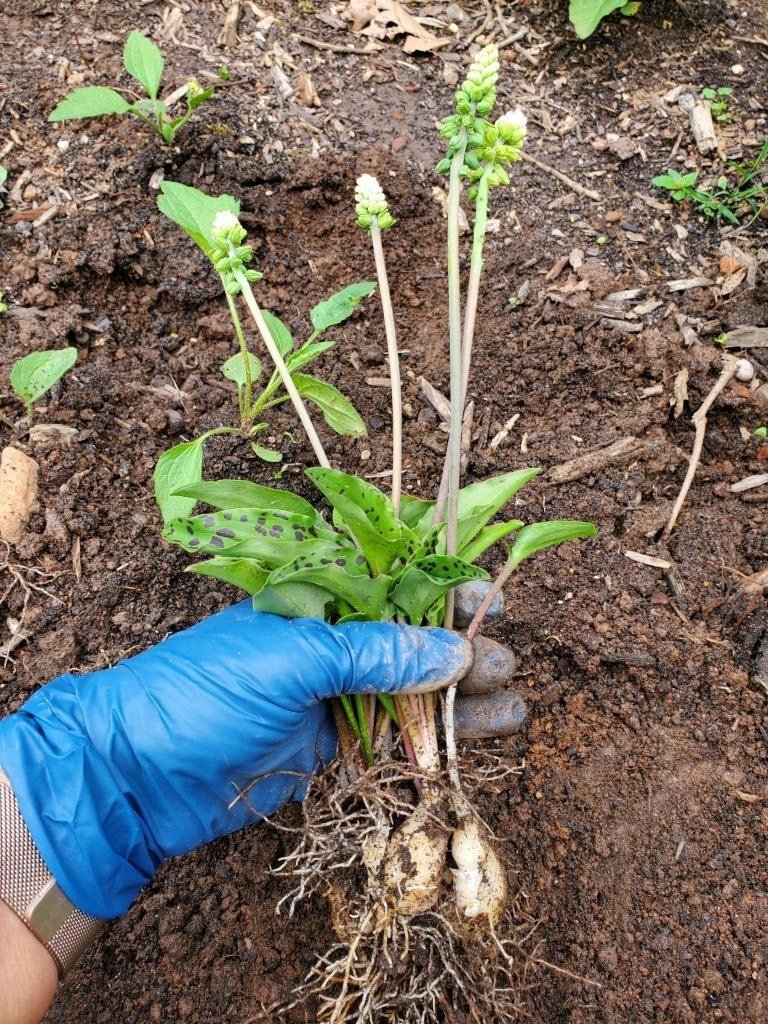
Drimiopsis maculata is a diminutive groundcover, reaching only 6 to 8 inches. Common names include Little White Soldiers, African False Hosta, and Spotted Leopard Lily or simply, Leopard Lily. The “white soldiers” name refers to the spring and summer flowers, which are small, tightly packed clusters that look like a white Grape Hyacinth. The “lily” reference is to the bulb, which is fleshy like a Daffodil rather than overlapping scales like a Lily or Garlic.

Leopard Lily is listed as cold-hardy in zones 8-10, but has grown well for me in Zone 7b for many years. It has the same cultural needs as most Hosta – moist soil with acidic to neutral pH, part to full shade. Leaves emerge directly from the bulb, without stems. Its purple freckles are darker in more shade. The spots may fade away later in the summer. Given a little fertilizer and irrigation during dry periods, Leopard Lily will spread reliably if not rapidly. It will withstand some drought; wilted leaves are a plea for moisture. They are quite tolerant of heat and humidity.

‘Blue Mouse Ears’ or other miniature Hosta make a beautiful edging for a shady bed, but frequently slugs damage those in the Mary Snoddy garden. Leopard Lilies make an attractive edging also, and are rarely bothered by slugs. Voles have never damaged mine, but that may be a case of luck rather than their distaste for the bulbs. Plants also do well in containers but pot-grown specimens are more prone to cold damage.

Like Hosta, Leopard Lily goes completely dormant in winter. Plants are propagated by dividing clumps of bulbs. This can be done at any time of the year but spring is preferred.

A note on the taxonomy of Drimiopsis maculata: There is disagreement between sources as to whether it belongs in the Hyacinth, Lily or Asparagus family (Hyacinthaceae, Liliaceae, or Aparagaceae). The word maculata means “spotted,” and everyone agrees on that.

Lesser-known Hydrangea, a Garden Star

On the evening before Mothers’ Day, I was forced to pick up a few items at the big blue retail store. Yep. Saturday night at Wally World. Lucky me. As I sat in my car, summoning up my strength for the task ahead, I witnessed blue and pink orbs floating from the store’s doorway. They disappeared into cars in the parking lot. When I donned my eyeglasses (don’t fret - I wore them while I was driving), those blue and pink orbs materialized into giant Hydrangea flower heads atop plants that were on their way to be a Mothers’ Day present the next day, no doubt. Wonder how many of those will survive to bloom again next year?

There is much more to the genus Hydrangea than those big pink or blue mopheads, Hydrangea macrophylla. A lesser known but marvelous species is the native Hydrangea arborescens. The common name for this beauty, Smooth Hydrangea, has been displaced by Mountain Hydrangea in a nod to its origins. In the wild, H. arborescens is a lacecap, but in the 1960s, a mophead type was discovered growing in Illinois. It was subsequently introduced to the market as ‘Annabelle.’

‘Annabelle’ remains immensely popular. It is hardy in zone 4 to 9, withstands more sun and needs less water than the large-leaf mophead varieties, and has huge (up to 12 inches across) white flowers from summer through fall. The only downside is weak stems that do not support the giant flowers, especially when rain increases the weight of the already-heavy flowers. Sadly,  puny stems allow the beautiful flowers to droop into mud.

‘Incrediball’ was introduced in 2009 as an improved ‘Annabelle,’ with mature size of 5 ft tall and 5 ft wide. It shared all the same positive qualities as its predecessor but with much stronger stems and even larger flower heads – up to basketball-size! Soon, non-white cultivars followed as introductions from Dr. Thomas Ranney of NC State University and Spring Meadow Nursery. Here are a few newer choices:

·‘Incrediball™ Blush’ has soft pink flowers; 5 ft tall x 5 ft wide. ·‘Invincibelle™ Ruby’ has deep red flowers; 4 ft tall x 4 ft wide. ·‘Invincibelle™ Spirit’ has pink flowers; 4 ft tall x 4 ft wide. ·‘Invincibelle™ Spirit II’ has pink flowers that age to a gorgeous green; 4 ft tall x 4 ft wide.
·‘Invincibelle Mini Mauvette®’ has mauve/purple flowers; 3 ft tall x 3 ft wide.
·‘Invincibelle Wee White® has white blooms; 2½ ft tall x 2½ ft wide.
·‘Invincibelle Limetta® has greenish flowers; 4 ft tall x 4 ft wide.
·‘Invincibelle Garnetta® has ruby flowers; 2½ ft tall x 2½ ft wide. (Proven Winners website describes the color as ruby-red, not garnet. Weird, huh?)

Site H. arborescens in half sun to mostly sun. Shrubs in more sun will require more irrigation than their sisters planted in shadier locations. All bloom on new wood, so they are resistent to bud death due to late freezes. Prune hard in late winter, cutting stems back to 6-12 inches just before new growth starts. Dried blooms can be removed at any time and used in flower arrangements. The dried flowers can be spray painted to match any décor – I’m partial to deep burgundy or silver, for use around the holidays.

Unlike Hydrangea macrophylla, Hydrangea arborescens do not change colors when soil is altered. White flowers stay white. Pink flowers stay pink. Fertilize once in spring, and provide sufficient irrigation to prevent plant wilt without creating a boggy soil. Plants prefer neutral to acidic soil. If in doubt, check the grow zones for your preferred cultivar. Most are hardy in zones 4-9.

Incrediball™ flower

Invincibelle Spirit Pink Hydrangea flower

Invincibelle Spirit™ flower

The Strange World of Plant Galls

I discovered two strange growths on trees in the Mary Snoddy garden this month. Neither were known to me, so I turned to professional sources: Google for the first, and a retired Extension Agent for the second.

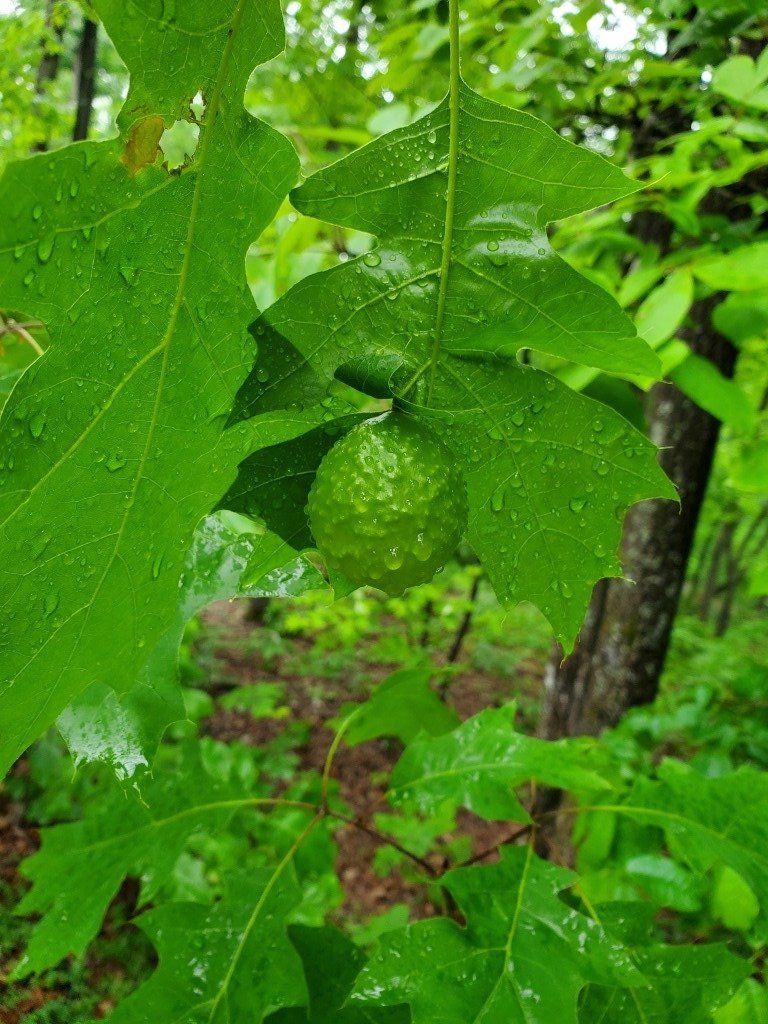
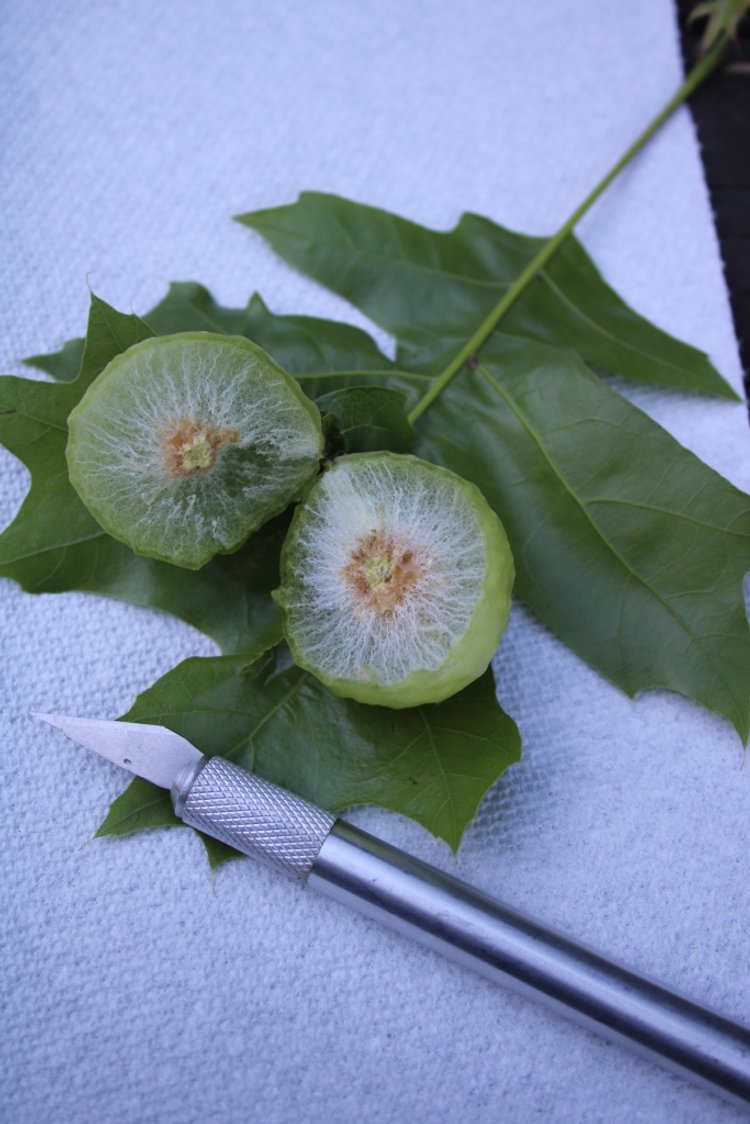
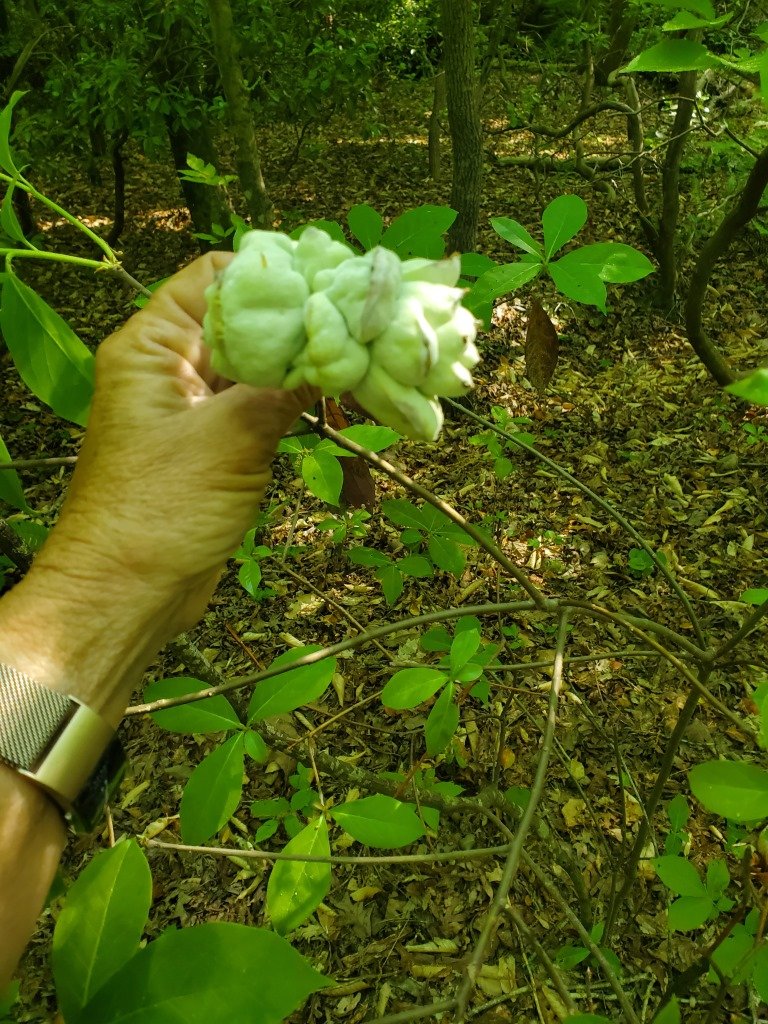
Several Oak (Quercus) trees had round, dimpled growths that resembled pale green golf balls. Some were attached to stems, others to leaves. A Google image search identified them as Oak Galls. Galls are a tree’s reaction to damage caused by intruders such as wasps, mites, aphids, or flies. Identifying names include Wooly Oak Galls, Jumping Oak Galls, Spongy Oak Apple Galls, Wool Sower Galls, Roly-poly Galls, Oak Apple Wasp Galls, Gouty Oak Galls, and others. They vary in appearance based on the irritant that generated the tree’s reaction. They do not injure the health of the host tree.

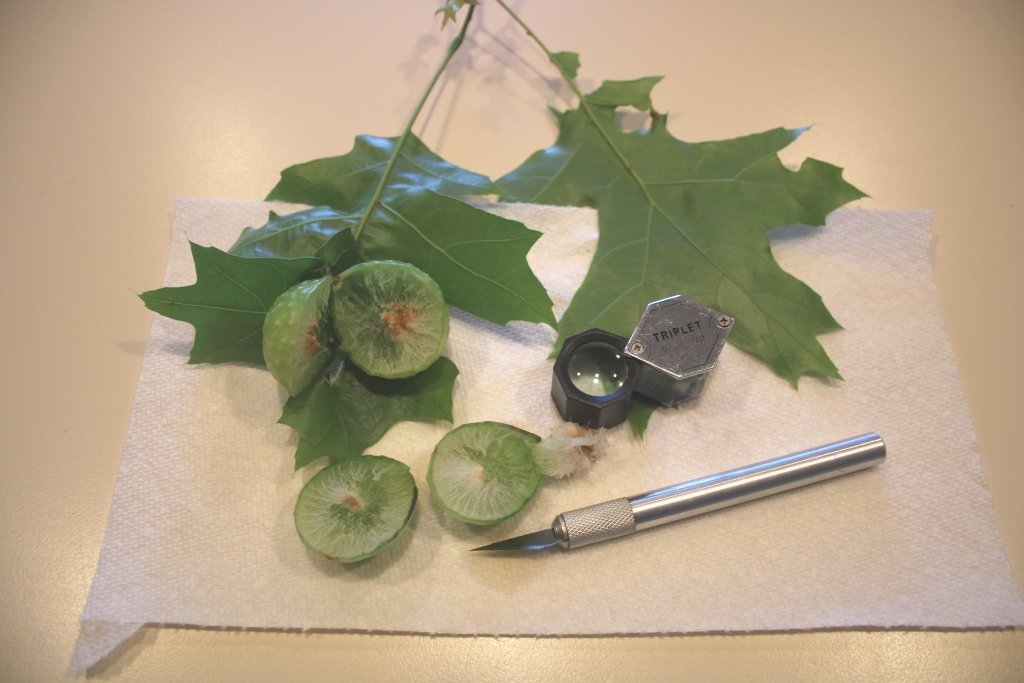
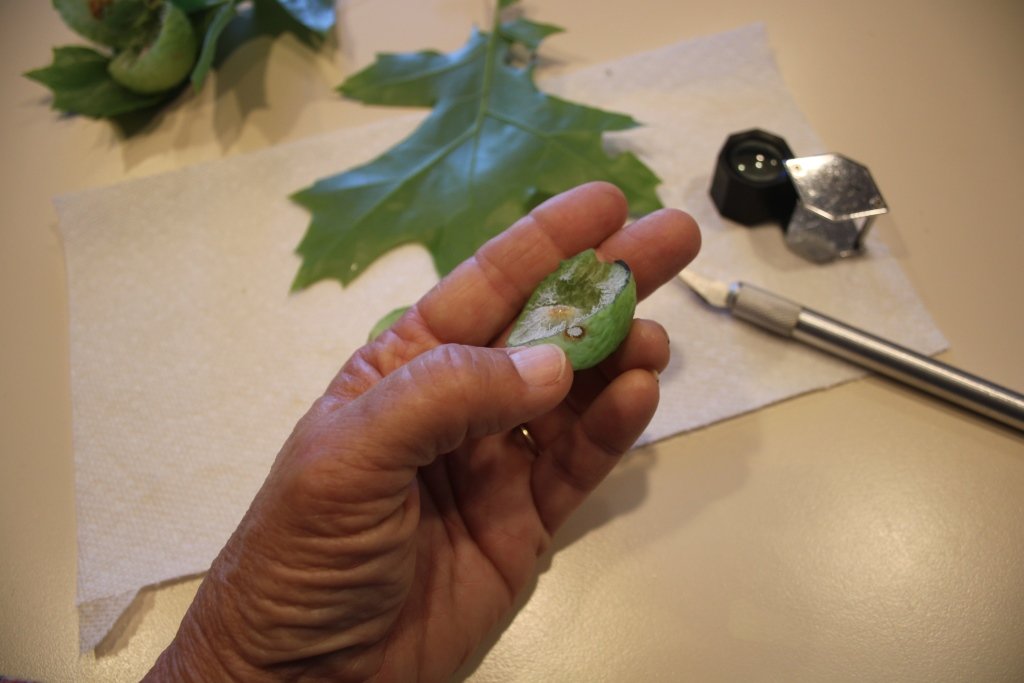
My amateur assessment is that my tree’s galls were caused by a gall wasp, a tiny brown wasp that is not a stinging danger to people. Before they die, the wasps lay eggs in oak tree buds. Eggs hatch into grubs which then produce enzyme secretions, prompting the tree to isolate the damage by forming the gall. Interesting, but I wanted to know what was inside the galls, so I did what any inquiring mind would do. I sliced a couple open. Inside was a fibrous material with a tiny dense section in the middle. Quite a letdown. I was expecting a grub, a baby wasp, or something other than just a gooey orange dot. THEN I got out my handy hand magnifier. There was a tiny white grub inside one. The other was grub-free. Then I noticed the hole on #2, which was evidently an escape hatch. Fascinating stuff, even if it does make one’s spouse hesitant to eat food off the kitchen counter that was used for the gall dismemberment.

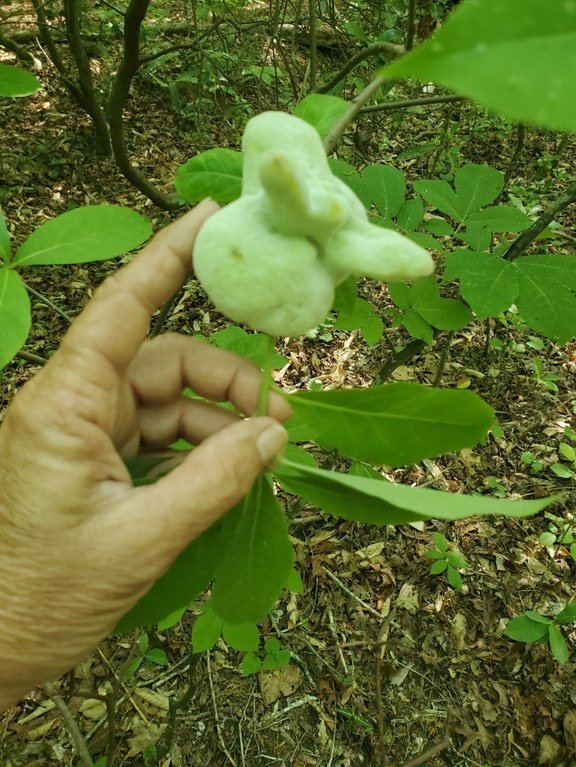
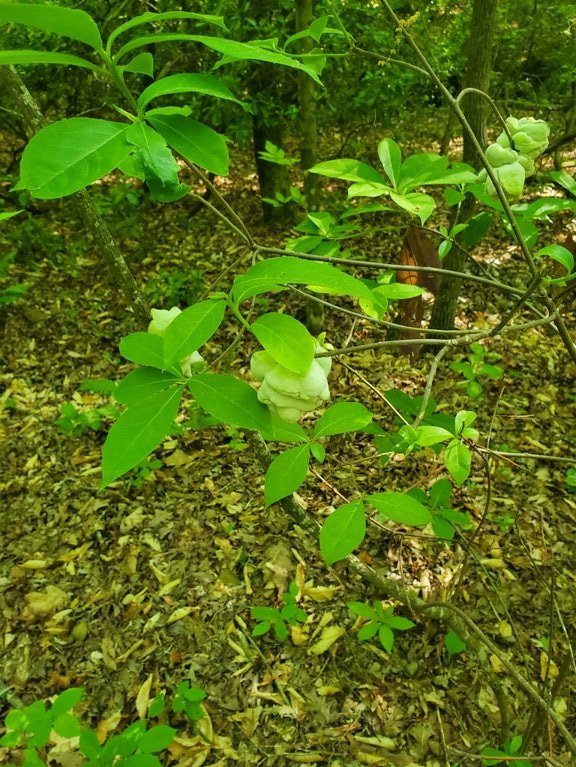
 The other weird finding in my woods were firm fleshy growths attached to several tree stems. They looked almost like a rose carved from stone. I noticed these a few weeks earlier, when they were a bright yellow color. At the time, I thought they were flower buds of some sort. In this case, Google was of no help so I turned to Mr. John Vining, a retired Polk (NC) Country Extension Director who readily identified my mystery growth as a leaf gall and recommended that I remove the gnarly looking things and burn them or bag them for household trash disposal. He further identified the host plant as Horse Sugar, Symplocos tinctoria. Crushed Horse Sugar leaves have a pleasant smell. For the benefit of readers and in the interest of science (and because I have a goat-like tendency to taste everything) I nibbled a leaf. It was slightly sweet, but not a plant I would choose for a snack. But I’m not a horse – just a curious gardener who is thankful for the enormous knowledge base of state Extension agents. Thanks, Mr. Vining!

Mock Orange

Mock Orange, Philadelphus coronarius (pronounced fill-uh-DELL-fus core-uh-NAIR-ee-us), is a deciduous shrub grown for its sweet scent. When not it bloom, it is rather homely. Its stems are stiffly upright or occasionally, arching. Mature size is ten feet tall, eight feet wide. With time, the shrub becomes dense and twiggy. Flowering is on previous year’s limbs, so prune selected stems off near ground level immediately after flowering to force new growth for the following year. The bloom season occurs in May or June, and lasts several weeks.

Mock Orange is hardy in zones 4-8. It prefers full sun to part shade, and moist, well-drained soil, although it is somewhat adaptable. It prefers neutral to alkaline soil. Established plants withstand limited drought. Its white flowers make Mock Orange an ideal selection for a moonlight garden, where its intoxicating scent compensates for its unremarkable appearance. Fragrance is more pronounced in the evening.

Mock Orange is easily propagated from stem cuttings. Plants are somewhat deer resistant.

Philadephus coronarius has pure white, fragrant flowers.

Shrub with white flowers

The shrub has arching stems. Left to its on devices, it can become ungainly.

Note: A sharp-eyed reader noticed a mistake in last week’s blog. Amsonia hubrechtii is native to Arkansas, not Arizona. My secret is revealed — I easily confuse state abbreviations. Thanks for the correction, Gentle Reader!

Amsonia - A Two-Season Star

Blue flowers Amsonia

Amsonia hubrichtii, (pronounced am-SO-nee-yuh hew-BRIK-tee-eye) is flowering right now. This Arkansas native’s soft blue flowers are held at the top of tall stems that waft gracefully on the breeze. Leaves are narrow, leading to the common name Threadleaf Blue Star. Its fine, feather-like texture contrasts well with broad-leaf perennials like Black-Eyes Susans or Coneflowers. It also looks pretty when planted next to burgundy foliage plants like Ninebark, Smokebush, or Loropetalum.

While the spring flowers are pretty, Amsonia’s best season is fall. Those narrow leaves turn a golden yellow that glows in sunlight. For maximum impact, pick a site where the late afternoon sun provides a backlight.

Amsonia is undemanding. Give it full sun or mostly sun and it will be happy in zones 5-8 . Too much shade or excess water will cause it to flop. In rich soil, it may grow so tall that it opens up in the center in late summer. It takes at least a year or two for Amsonia to reach its potential. Don’t pull it up prematurely. Mature plants will reach heights of three feet, with a equal spread. Prevent the flopping or center separation by pruning it back to a height of six inches immediately after flowering ends. Cut to ground level just before spring growth commences.

Amsonia hubrichtii was the Perennial Plant Association’s “Plant of the Year” in 2011. Amsonias look great planted in masses. Flowers attract butterflies, and deer don’t seem too interested.

The blue flowers of Amsonia float at the top of thread-like foliage.

plant narrow foliage yellow leaves

This Amsonia is just beginning to show hints of fall. In a few weeks, it will be a mass of butter-yellow leaves.

Indian Hawthorn for Hedges, Flowers, Berries

Indian Hawthorn is one of the most popular landscape shrubs around. This dense evergreen makes a great hedge or foundation plant. It is hardy in zones 7-10. It will tolerate almost any garden soil (clay, loam, sand) as long as it is mildly acidic and not bone dry or constantly wet. Summer flowers are pink or white, and are followed by attractive clusters of small, deep blue or purple fruits. Pollinators love the flowers and birds flock to the berries. 

Plants naturally form rounded mounds. Mature height is up to 6 feet, so place it where it will not need constant pruning to fit into a small space. A few cultivars are larger, and can gain heights to 12 feet. When pruned severely, shrubs look like piles of sticks for several weeks. Installation or transplanting should be done in fall or winter. Hawthorns struggle when moved in hot weather. Grow in full sun in cooler zones, partial shade in warmer areas. New growth is bronze-green and is subject to damage by late cold snaps.

If Indian Hawthorn (Rhaphiolepis indica, pronounced raf-ee-oh-LEP-iss IN-dih-kuh) is healthy, it is beautiful. Unfortunately, its popularity has led to major overplanting. Place too many of any single type of plant in an area (think city-size, not your yard), and diseases and insects move in and create havoc. (Remember the Red Tip Photinia rage of several decades ago? They were planted in every neighborhood. Then a fungal leaf spot moved in, spread like mad, and bye-bye Red Tip hedges.) The cultivars ‘Eleanor Tabor,’ and ‘Snow White,’ are more disease-resistant than some. Soaker hoses or drip irrigation are preferable to overhead watering, since they keep foliage dry to discourage leaf spots.

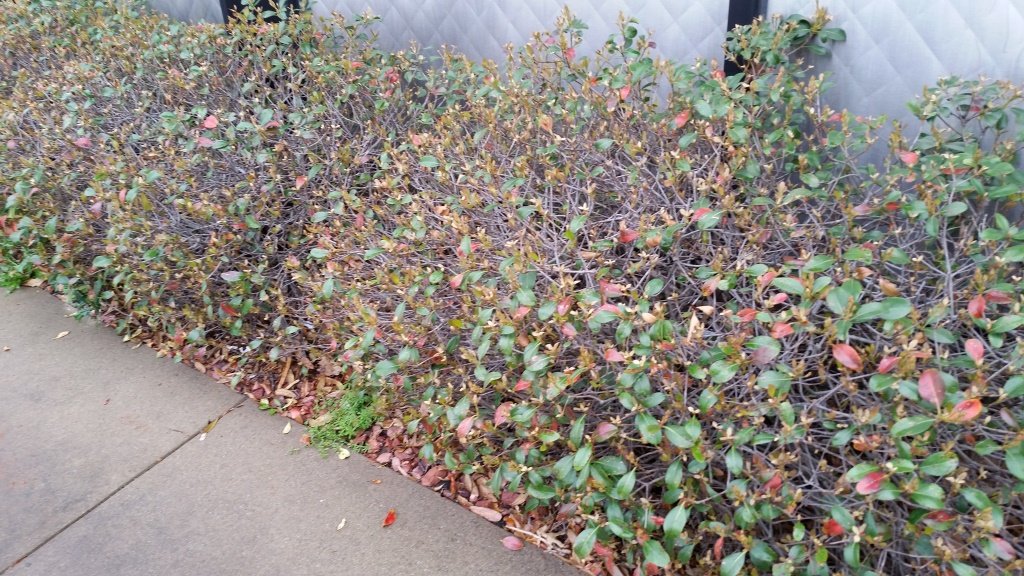
Because Indian Hawthorn is a sturdy shrub, it is planted near parking areas and in shopping center medians. Full sun, excess heat, and insufficient irrigation lead to weakened plants that eventually fall prone to several insects and diseases, resulting in defoliation. In home landscape situations, Indian Hawthorns are frequently eaten by deer.

Closeup of landscape shrub with pink flowers

A close view of the lovely flowers of Indian Hawthorn. Note the beginning of leaf spot disease, left side.

This healthy hedge of Indian Hawthorn lives in a parking lot island of a big box store in upstate South Carolina.

Hedge of sick Indian Hawthorn shrubs

A sad-looking hedge showing leaf loss.

The Tractor Seat Plant

“Tractor Seat Plant” is the descriptive common name of Farfugium japonicum. The variegated (yellow spots) form has the common name “Giant Leopard Plant.”

Farfugium (pronounced far-FEW-gee-um) is hardy in zones 7-9. The yellow flowers are incidental to the foliage, exotic-looking leaves so shiny that they appear polished. Plants are not picky as to soil acidity. They want partial shade and moist soil, and are ideally sited along streams or near water features. They also make impressive container plants if the gardener provides plentiful irrigation. The large rounded to kidney-shaped leaves wilt pitifully when they need water. Plants die to the ground in winter, then pop up in spring and bloom in late summer to fall before they go dormant again.

Opinions vary as to whether solid or variegated leaves are the prettiest. (I favor the solid green.) The clumps of foliage look especially good against a solid brick or rock wall. Give plants plenty of space. Mature plants may reach four feet tall, three feet across. Individual leaves may reach impressive widths of 18 inches, held aloft on 3–4-foot stalks that rise directly from the ground. Plants are propagated by division. ‘Bad Hair Day’ and ‘Crispatum’ cultivars have a ruffled edge to the leaves.

Farfugium is rarely troubled by disease or insects, although slugs sometimes attack. They are moderately deer resistant.

garden Giant Leopard Plant with concrete fairy

A young Farfugium,. When mature, it will shade the fairy statue like a large umbrella.
Photo by Suzanne Leone. Used with permission.

Silvery Artemisia Makes a Deer-Proof Companion

The silvery threads of Artemisia make other plants look better by contrast. It can also play peacemaker between flower colors that may clash. This perennial shrub is hardy in zones 6-9. It will grow to three feet in height, and up to four feet wide in its first season. Any limbs that touch soil may sprout roots, resulting in an increasing clump. It also spreads by rhizomes.

Like other plants with gray foliage, Artemisia (pronounced ar-tem-EE-zee-uh) is heat-tolerant and drought-tolerant but suffers from wet soils or high humidity. ‘Powis Castle’ cultivar is reputed to be more humidity-tolerant than others. It has a finely cut foliage that looks super when paired with needled evergreens or purple foliage (think Loropetalum or Purple Heart). Shrubs may have yellow blooms, but flowering is rare and doesn’t add much to the overall appearance. A newish cultivar, ‘Seafoam,’ has neat curlicue foliage. I plan to trial its humidity resistance in the Mary Snoddy garden as soon as I find it in a local nursery. Artemisia foliage can be dried and used for wreaths or in flower arrangements.

Personal experience taught me that this is a plant that thrives on neglect. Initially, I planted ‘Powis Castle’ in a partly sunny spot and watered it during hottest days. By the end of its first season, it looked tatty, not at all attractive. Year two was even worse – long stems with limited (brown, nasty) foliage. In frustration, I pulled it out of the ground, tossed it on the gravel pile next to my greenhouse, and forgot it. Imagine my surprise three weeks later, when I realized that it had returned from the brink of death and was thriving atop a hot, dry gravel pile. Lesson learned. I planted a pair of future purchases in horrible, red fill dirt on top of a slope and added no supplemental irrigation. They flourished.

‘Powis Castle’ will survive in any soil type, and prefers a neutral to alkaline soil. Mature plants may open up in the center and look rather rangy. Limited pruning can be done any time plants are actively growing. They withstand hard pruning and will regenerate into dense shrubs. Important: Do NOT prune in late fall or winter. Wait until active new growth starts in spring before whipping out the loppers. Plants pruned in winter are likely to die.

Artemisia is not grown for its pleasant fragrance. Crushed foliage or cut stems exude a strong smell. This odor is what makes deer avoid it. Plants are untroubled by insects or diseases.

You will notice that I have not provided a common name for Artemisia. Well, here goes: Wormwood.

Soft, fern-like foliage of Artemesia

Silver foliage of short shrub paired with green needled foliage of another shrub

Artemesia paired with Cryptomeria globosa ‘Nana’

Lambs ears, Artemesia, sedum, Eucalyptus

I threw this Artemesia onto a gravel pile. Instead of dying, it became a robust, healthy plant. Here it shares space with Lambs Ears, a creeping Sedum, and Eucalyptus.

Pretty Pittosporum Shrubs

We have had some trees removed to open up a mountain view. As a result, there is a new design opportunity in the Mary Snoddy garden. The steeply sloped area, approximately four acres, has scattered tall hardwoods, a few native Dogwoods, patches of Mountain Laurel, numerous Sourwood trees, and rocks for days. Big rocks. My vision for the future includes a meandering  path with decorative plantings on either side, all the way down to the creek. The path will need switchbacks due to the steep slope. Opportunities abound for plants in full sun, full shade, and everything between.

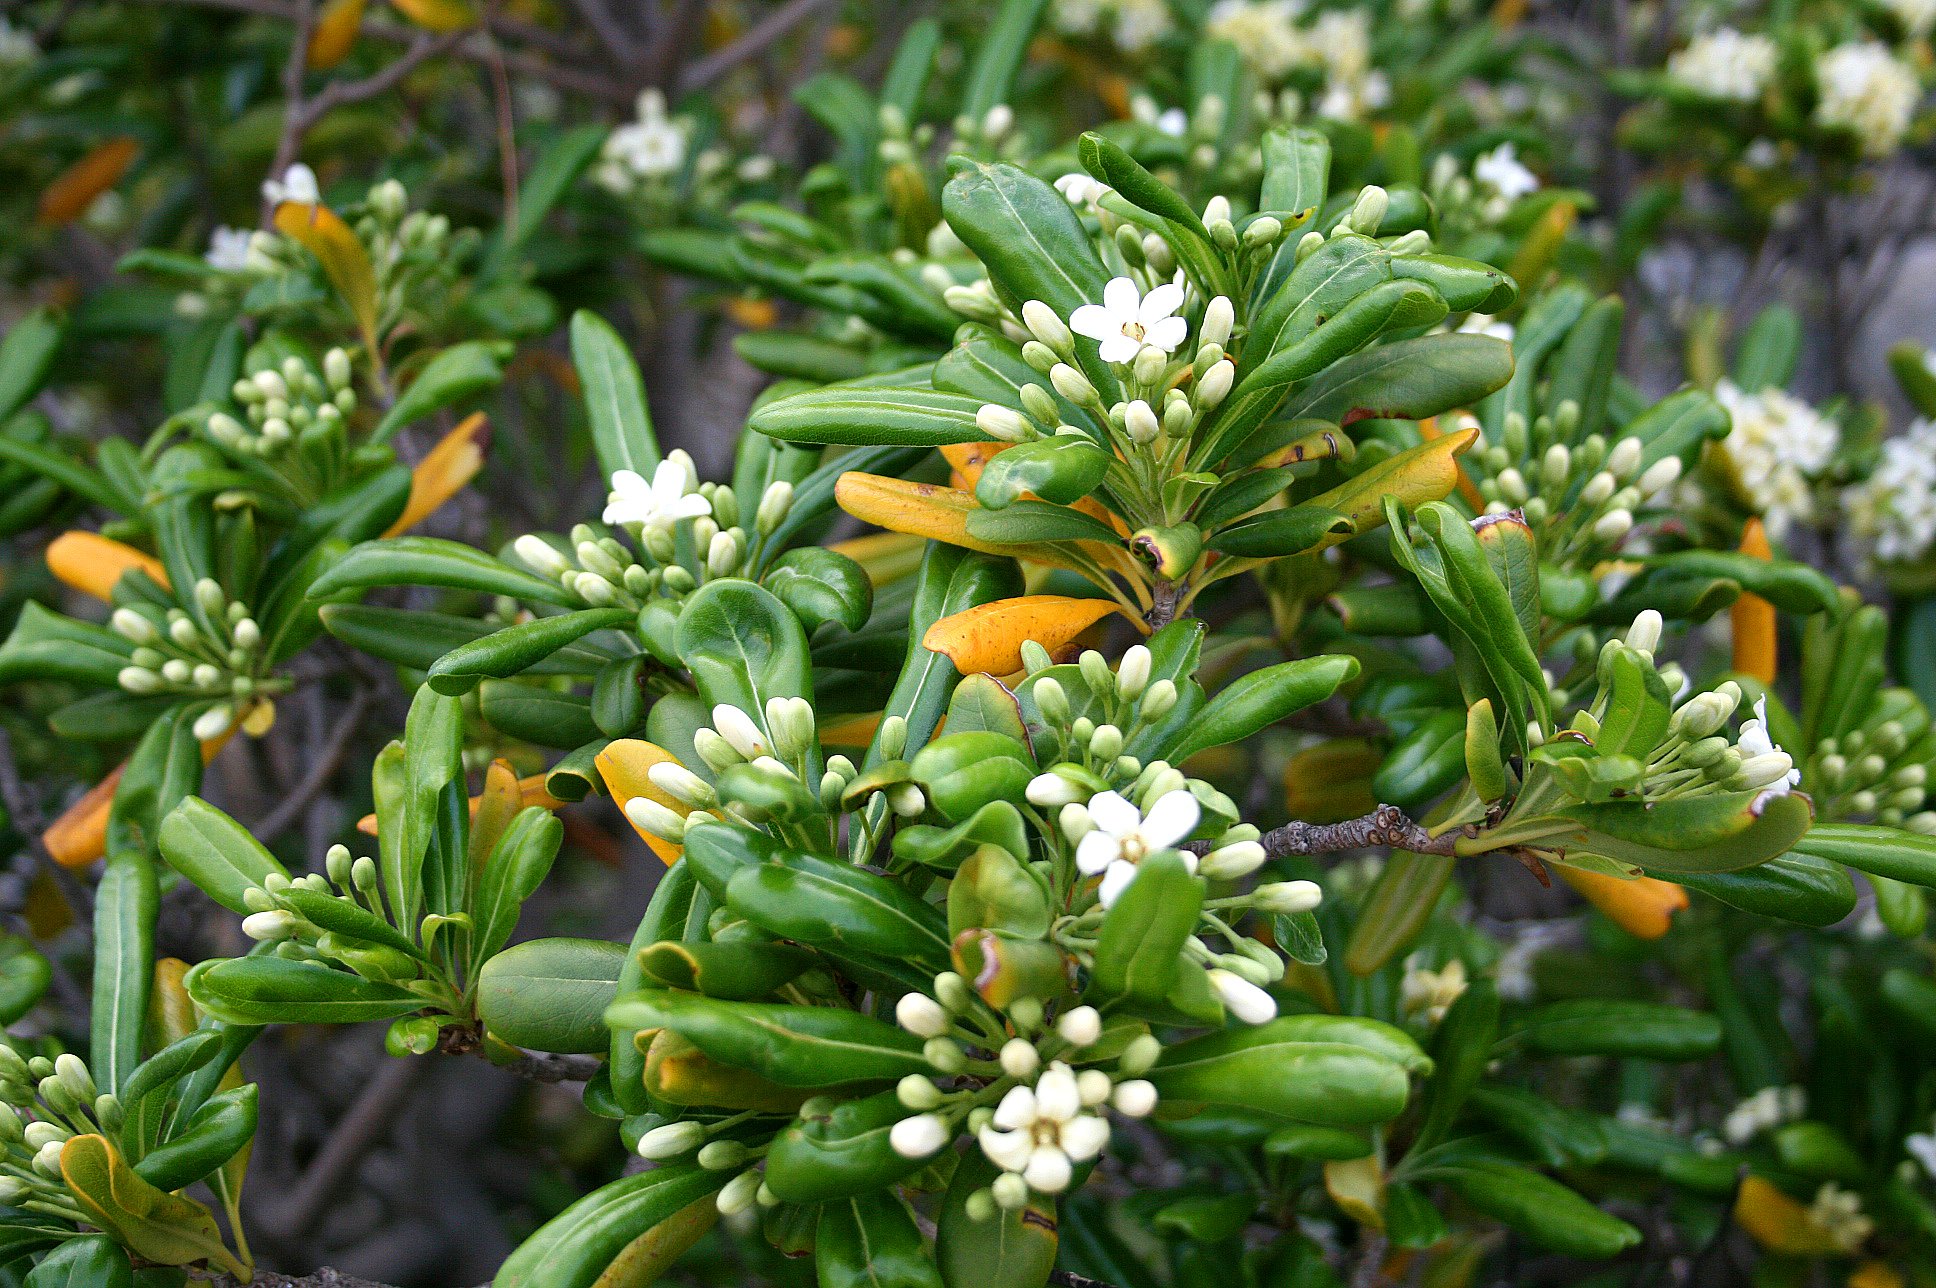
My tree and shrub choices need to be hardy in zone 7 with a tolerance for rocky, acidic soil.  They also need to be tolerant of heat and humidity while being deer resistant (a relative term, for sure). I started my plant selection Wish List by scanning photos of other gardens I have visited and admired. From this, I gleaned a small set of shrubs and trees to research. One of these is Pittosporum tobira ‘Variegata.’ I can still remember the wonderful fragrance of this evergreen shrub, a variegated cultivar clad in gray-green leaves with white margins. The clusters of flowers open white but turn yellow when pollinated. The homeowner had allowed the shrub to grown unpruned. It was four feet tall and about the same width.

I learned several things about Pittosporum. First, I have been pronouncing the name incorrectly for decades. It’s not pit-oh-SPORE-um. The correct pronunciation is pih-TOSS-pur-um. It is cold hardy in zones 8-10, although cultivar ‘Mojo’ is more compact and a bit more cold-tolerant. ‘Wheeler’s Dwarf’ is even more compact but less cold-tolerant than others. Mature height for most cultivars is 8-10 feet.

Pittosporum is tough, fast-growing, demands well-drained soil, and makes a good evergreen hedge. It is not particularly choosy about light (full sun to partial shade) or soil acidity. It is resistant to salt, making it a good choice for coastal gardens.

Unfortunately, deer are attracted to Pittosporum and frequently browse it year-round. This trait and its borderline hardiness in my area moved it from my ‘Wish’ list to the ‘Not For Me’ list.

Pittosporum has an interesting characteristic known as ‘sympodial growth.’ This means that the terminal bud will stop growing and lateral buds will keep on growing, giving stems a zig-zag look. This constant forking is also seen in some orchids and Beech (Fagus) trees. For Pittosporum, the terminal bud usually ceases growth because a flower has formed at the tip.

To prevent leaf spots and fungus problems, provide good air circulation, avoid overhead watering, and remove fallen leaves. Note that Daconil®, a common fungicide, is not labeled for use on Pittosporum and will damage or kill the plant. Counter aphid attacks with spray-on horticultural oil.

Pittosporums are easy to propagate from cuttings taken in late summer. Use a talc-based rooting compound to increase success rate.

Clemson University has an excellent fact sheet: https://hgic.clemson.edu/factsheet/pittosporum/

Pittosporum in flower.

Photo by Jean-Pol GRANDMONT - Own work, CC BY 3.0, https://commons.wikimedia.org/w/index.php?curid=4561211

Proceed with Caution When Planting Horsetail Rush

Equisetum, commonly known as Horsetail or Scouring Rush, has an other-worldly look. There are no leaves. Stems are hollow and bright green, and have narrow horizontal, black joints that faintly resemble bamboo. Other common names include Bottlebrush, Foxtail, Pinetop, Snakegrass, and Dwarf Bamboo. Fossils of Equisetum show its existence 350 million years ago.

Like some bamboo, Equisetum is a serious spreader. It loves wet soil, even standing water up to four inches deep, but will also grow in dryer soils. Be certain that you want it in your garden, because it is impossible to eradicate once established. It will grow in zones 5-10 and under any light conditions: full sun to full shade. Plants put down deep roots (rhizomes up to six feet in length).

Equisetum (pronounced ek-wis-SEE-tum) does not flower. Unbranched stems, up to four feet in height, are either sterile or non-sterile (reproductive). Non-sterile stems have brown scales while the sterile stems have green or no scales. The reproductive stems produce spores on a cone. Stems contain silica, creating a tough, rough texture that was formerly used to scour cooking vessels, leading to the common name Scouring Rush.

This plant can be grown in a container to prevent its spread. It makes a striking pond-side plant and a dandy resting place for dragonflies. It is highly deer resistant.

A patch of Equisetum growing near a bog area.

Horsetail Rush stem showing black horizontal bands

The black horizontal bands around Equisetum stems.
Image by Annette Meyer from Pixabay

Spring Seed Starting

Seed starting season is upon us, and I’m receiving “how to” questions. I do not profess to be an expert, but I can share what has worked for me. Here is the Mary Snoddy methodology, refined over several decades of hand-on experience.

Start with high quality seeds. You can purchase new packages each year, or you can use leftovers from last year, as long as the seeds were stored in a cool, dark, dry place. Some seeds will last several years (tomatoes) while others get stale quickly and should be purchased fresh each year (lettuce, parsley). Starting your own seeds offers the benefit of many more choices than are available from transplants at local nurseries. And some plants (corn, beans) are more successful when started directly in the ground (“in situ”) than from transplants.

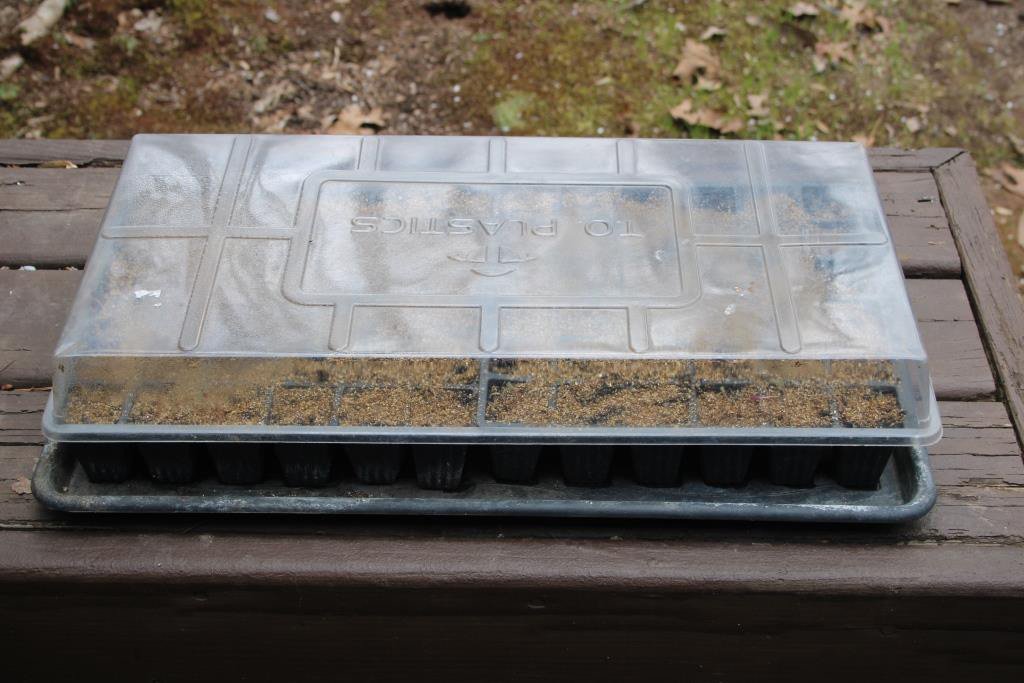
Most big box stores and garden supply stores sell seed starting containers, a waterproof tray that holds six or eight inserts, segregated into four or six sections. A complete kit may include a plastic snap-on lid or dome cover to create a humid environment. It is easy to recycle plastic trays from year to year (I reuse those from plants I purchased) but it is imperative that the recycled trays, dividers, and covers are clean. Before reusing old containers, I soak them for 30 minutes in a five-gallon bucket of bleach water (nine parts water to one part bleach), then rinse well and dry in the sun.

Reusing starter items without sterilizing them may introduce pathogens that will kill off your precious seedlings. It is heartbreaking to see a flat of new seedlings succumb, overnight it seems, to “damping off.” This condition results in stems looking like they have been pinched. Once the stem develops this thin, pinched-looking spot, there is no recovery. Remove the seedling and its soil as quickly as possible, to prevent fungal spores from spreading to healthy plants. Prevent damping off by using clean containers, avoiding overwatering, and providing good air circulation.

Use seed-starting medium instead of potting soil or garden soil. Bags of “seed starter mix” are widely available. This is a very fine, lightweight substance that allows seeds to emerge with minimum effort. It is most efficient to fill the prepared starter trays with pre-moistened starter mix. If the medium seems to shed water rather than absorbing it, either use hot water or add a drop of dishwashing detergent to the water used for dampening the mix. I prefer the hot water method, and usually dump a couple of cups of hot water directly into the bag and wait about 30 minutes for it to absorb, shaking the bag a few times for even distribution. Pack the damp media into the containers, plant seeds at the depth recommended on the package, mist lightly to ensure seeds get wet, and top with a light sprinkle of dry starter mix.

A few seeds need light to germinate, while others need total darkness. These seeds must be exposed to light in order to germinate: African Violet, Ageratum, Artemesia, Begonia, Bells of Ireland, Browallia, Chinese Lanterns, Coleus, Coreopsis (Tickseed), Dusty Miller, Aquilegia (Columbine), Gaillardia, Geranium, Heuchera (Coral Bell), Impatiens, Lychnis (Lamb’s Ears), Nicotiana, Penstemon, Pentas, Petunia, Platycodon (Balloon flower),  Poppies, Portulaca, Primrose, Snapdragon.

The following seeds need darkness to germinate: (Don’t confuse germination with seedling growth. ALL seedlings need light to grow. Insufficient light will result in spindly, weak plants.) Armeria, Calendula, Catharanthus (Periwinkle), Centaurea, Delphinium, Echinacea (Coneflower), Gazania, Nasturtium, Tithonia (Mexican Sunflower).    

Warm temperatures make seeds germinate. Soil heating mats or cables are available in nurseries that sell seed starting supplies. These work great, but there is no need to get fancy like. I have had excellent success by repurposing a couple of old electric heating pads (the kind used for soothing sore muscles). Just take measures to keep them dry when in use.

Plastic dome covers retain heat and humidity. Once seeds have sprouted, remove any soil warming devices and plastic covers. Cooler temperatures and plenty of light will encourage stocky, strong seedlings. Good air circulation helps keep seedlings healthy. I utilize an old box fan to keep the air moving but do not direct the breeze directly at the seed flats.

Treat seedlings with tender care, giving them enough water to keep them from drying out without the soil being constantly wet.

Gradually introduce your seedlings to the harsh outdoors. This process is called “hardening off.”  Place seed flats outdoors in a protected area (away from winds and out of full sunlight) for an hour or two each day, gradually lengthening the time. This is the equivalent of developing a base tan so that your skin doesn’t blister from sudden sun exposure. If a day is especially blustery or unseasonably cool, skip it. There is no place for Tough Love in nurturing seedlings (unless you have sown them too thickly for good air circulation and healthy growth, which is not the topic of this blog).

Check the last frost date in your growth zone, then add a week for insurance before setting your darlings out in the wild world of flower beds, vegetable gardens, or containers. Sometime a stretch of warm temperatures leads us to assume that winter is over. Don’t be misled! It is always better to err on the side of safety than to suffer the loss of time and care invested when Nature has a cold, nasty hiccup.

Why tempt fate? Start only plants that will survive in your zone, soil type, and available light (sun exposure). Plant only vegetables that you and your family will actually eat. It does not matter if you can grow a fantastic bed of eggplant if no one in your family will touch it. Michigan State University has a great chart listing how many row feet to plant per person for various vegetables. Find it by clicking HERE.

Happy Seed Starting! I’d love to see photographs of your successes. Email pictures to mary@marysnoddy.com.
Filled seed flat covered with plastic dome

Ready, set, GROW!

Tiny seedlings leaning toward sun

These Gomphrena seedlings emerged two days ago, and they are already leaning toward the sun source.

Tall, skinny seedlings

These Zinnia seedlings are growing tall and skinny - a clear sign that they need more light than they are currently receiving.

Dead seedling with brown stem

A moment of silence, please, for this poor seedling that has suffered “damping off” from a fungal attack. The problem was likely caused by too wet a soil, as evident from the sheen of dampness on the starter mix.

The Purple Haze of Lamium

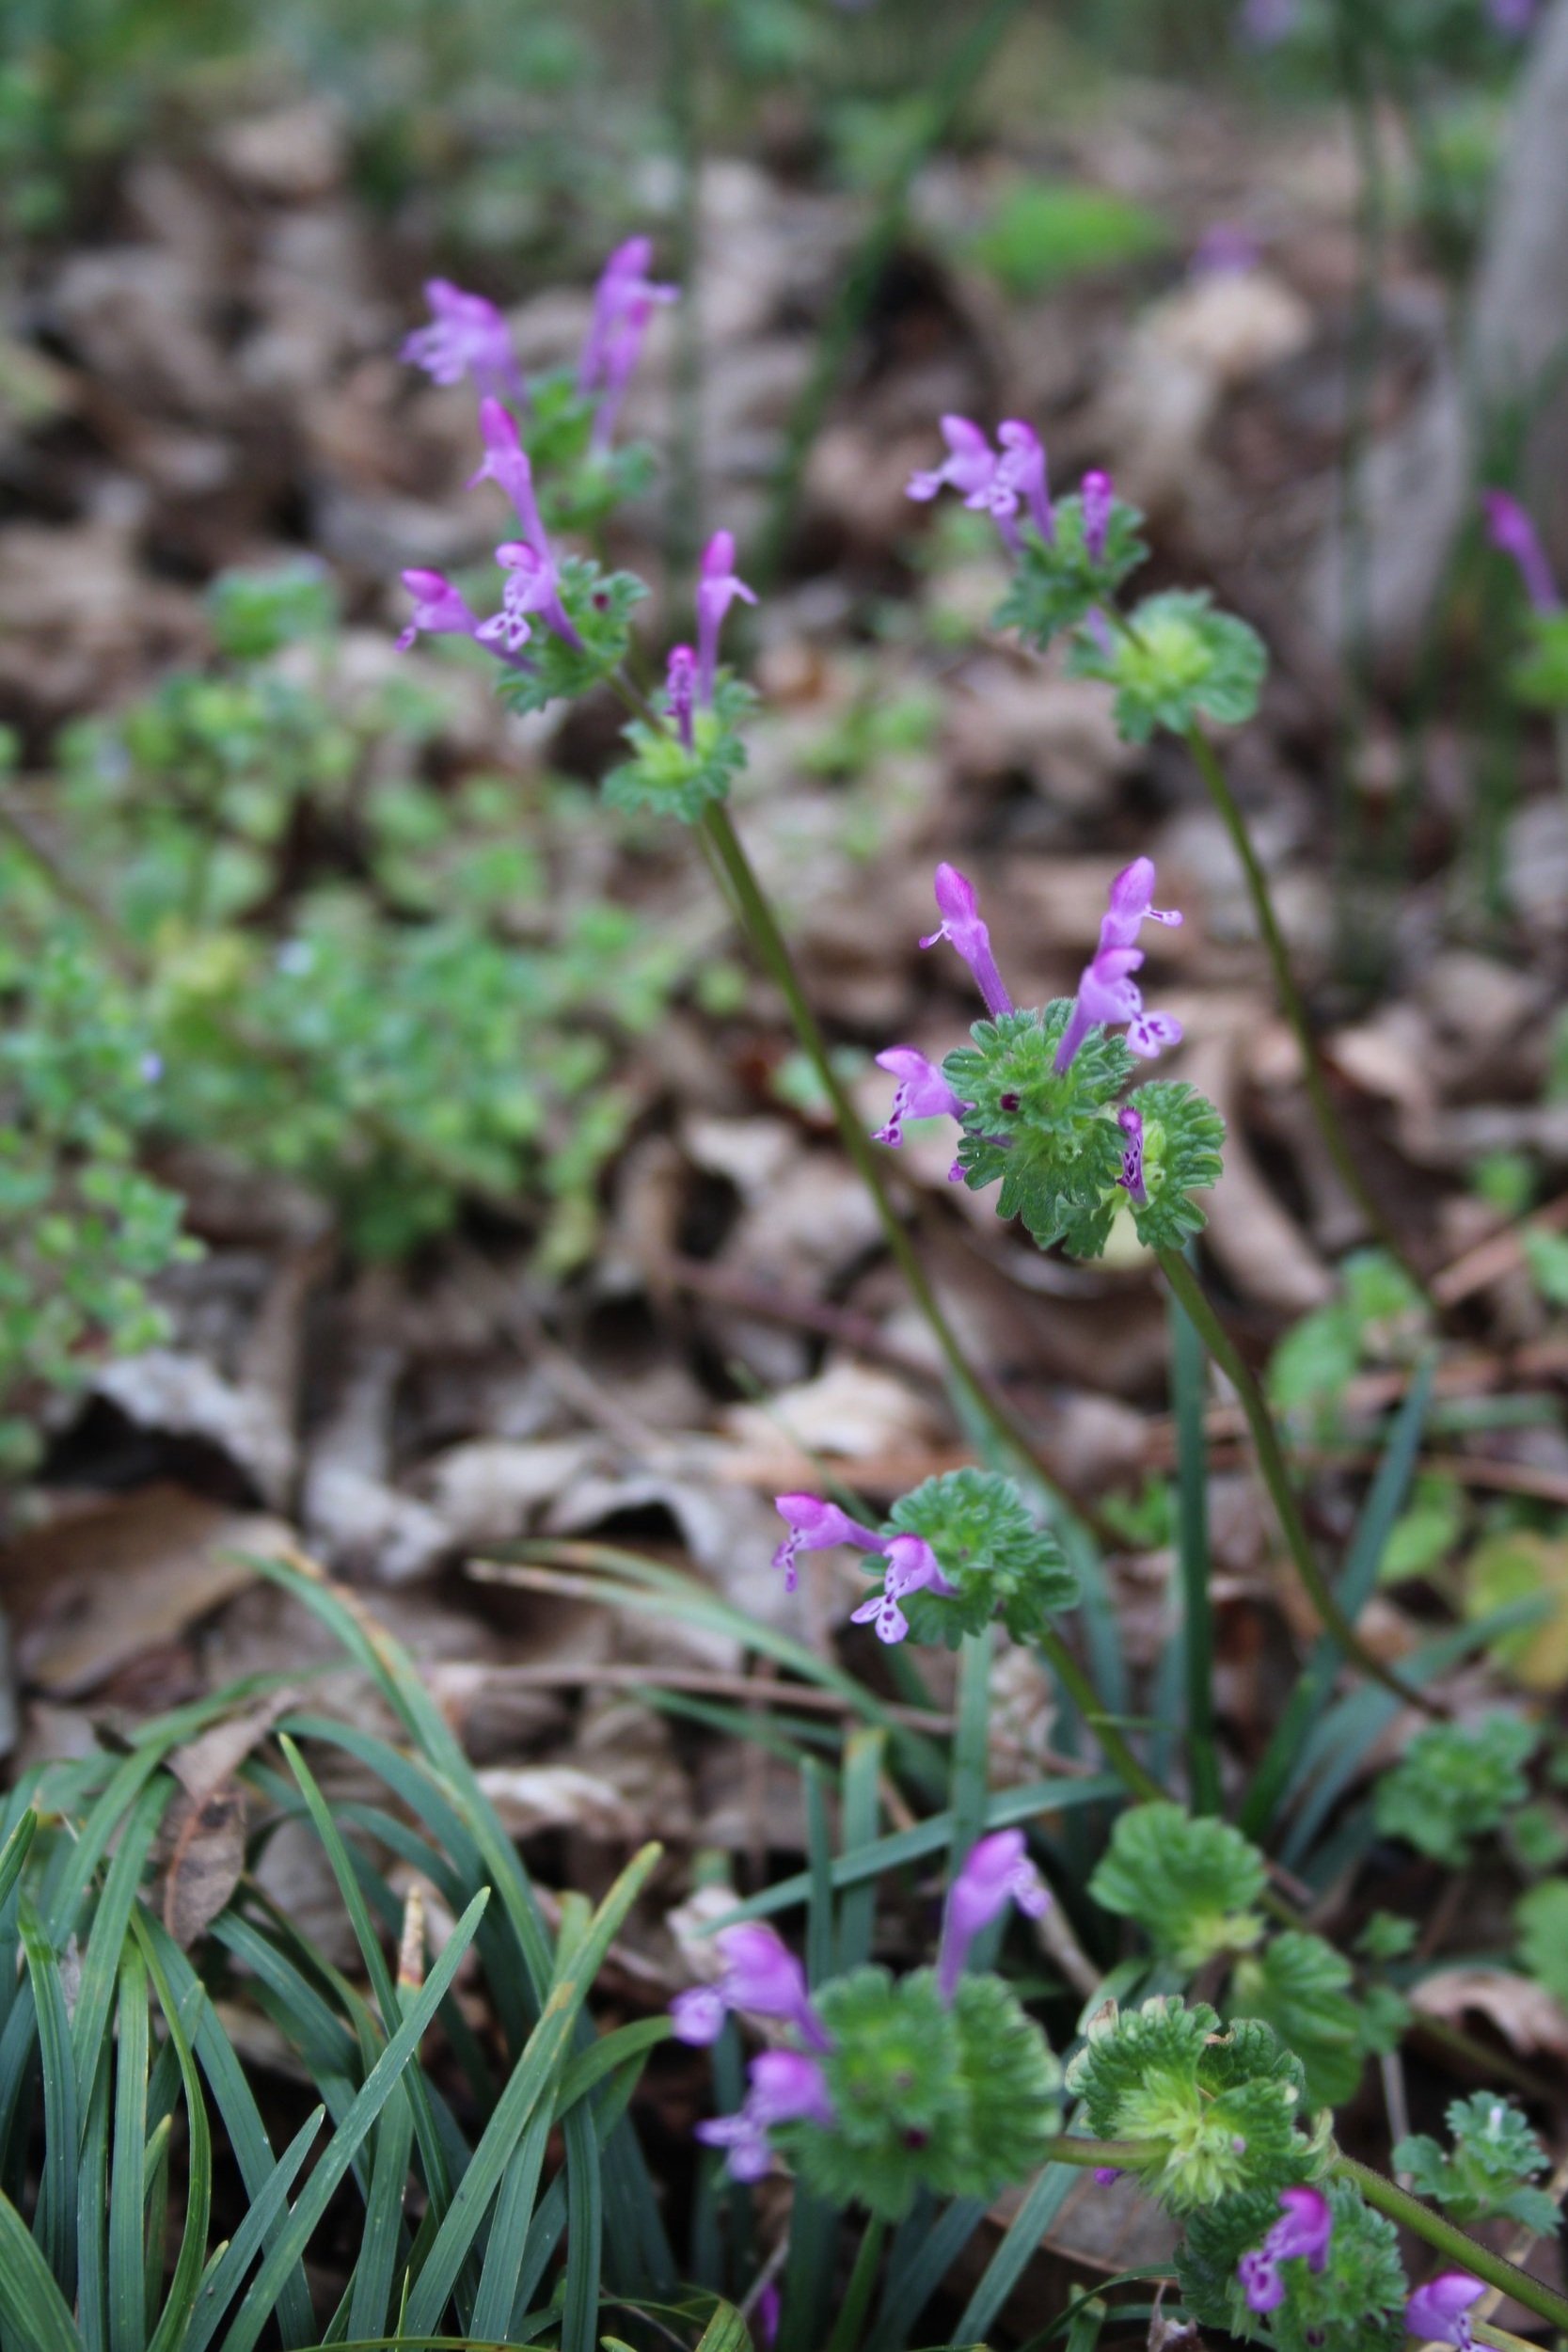
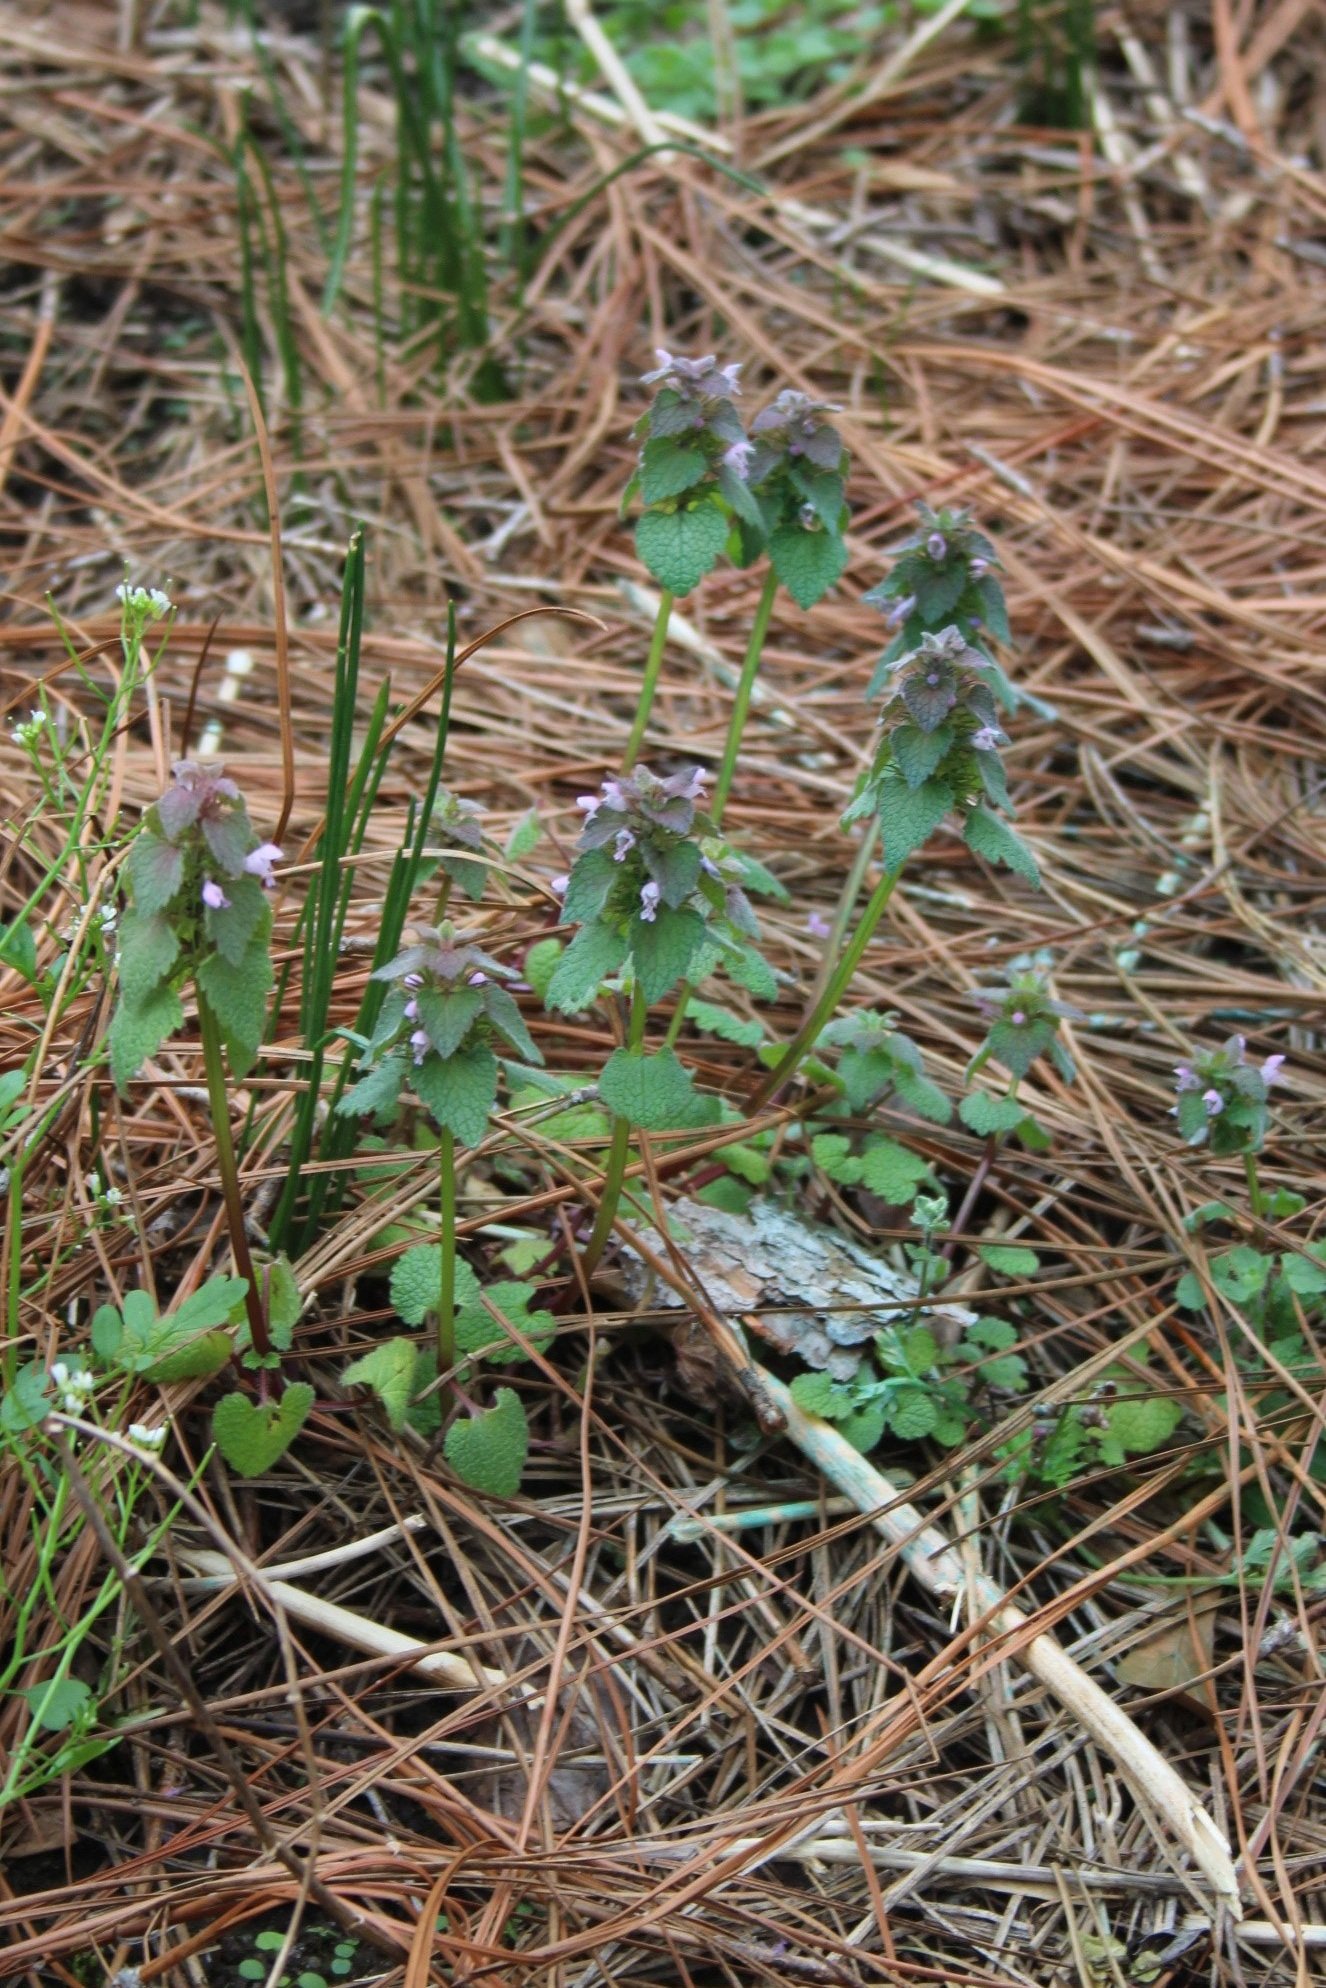
The “purple haze” across lawns and roadsides right now is unrelated to Jimi Hendrix. Instead, it is either Purple Deadnettle or Henbit or both. These weeds are common in the southeast, and can be found growing together. They spread readily and plague homeowners who want a pristine lawn. As a child, I loved the purple flowers with tiny freckles, and gathered many a tiny bouquet as a gift to my tolerant mother.  

A close look reveals the differences between the two. Purple Deadnettle (Lamium purpureum) has heart-shaped leaves, slightly hairy, that attach to the stem with a stalk. The topmost leaves have a purple cast.  Henbit (Lamium amplexicaule) has rounded leaves with scalloped edges that wrap around the stem. Leaves are uniformly green, and attach directly to the stem without a stalk. Stems are square for both, indicating they are members of the mint family. 

These two weeds are not native, but a Eurasian import that has made itself right at home here in the US. While I pull them from my flower beds and borders, I leave those in lawn areas alone.  Deadnettle prefers more sun than Henbit, which prefers shade to partial shade. They appear in all soil types.

Deadnettle and Henbit are reported to be edible. (In this case “edible” means non-toxic and does not equate to “palatable.”) Chickens enjoy eating both flowers and foliage. The blooms provide nectar to honeybees when few other flowers are available, and are also popular with hummingbirds, although peak Henbit season is past when our first hummingbirds appear here in upstate South Carolina. Both plants work well to control erosion (yay!) but set thousands of seeds, all of which seem to germinate (boo!). They can overtake a lawn. 

Both prefer cool temperatures of late winter and early spring, and will gradually fade away once weather is consistently warm. Both plants are annual, so don’t waste time and money applying herbicides.  If you don’t want them in your garden next year, apply anti-emergents in late summer or early fall when dormant seeds are starting to germinate. If you simply must rid yourself of these plants, use an herbicide labeled for broad-leaf weeds and follow the application instructions exactly.

Star Magnolia for Early Spring Flowers

Star Magnolia, Magnolia stellata, is one of the earliest plants to flower each year. It is a slow-growing, short tree (25 feet or less) or large shrub, typically multi-stemmed. The white blooms appear in February or March, and can be damaged by frosts and freezes. Site them carefully, avoiding windy locations and sites with southern exposure that can lead to earlier flowering and worsen cold damage. They can also be grown in a large container. They prefer to be planted in spring rather than autumn.

Star Magnolia tolerates some shade but will flower best when grown in full sun and in moist, neutral to acidic soil. It tolerates heat but not excessively dry or constantly wet soils, and can be grown in zones 4 through 8. Leaves turn yellow in autumn before they drop.

While Magnolia stellata is overlooked in favor of its showier cousins, Magnolia soulangeana and Magnolia grandiflora, its small size makes it easy to incorporate into foundation plantings. It makes a good specimen, especially when backed by evergreen shrubs that will highlight the pure white flowers and the smooth, light gray bark. Several pale pink cultivars are available. 

Star Magnolia is rarely bothered by insects or diseases.

The pure white flowers of Magnolia stellata appear before leaves.

A mature, tree-form Magnolia stellata in flower.

Forsythia Foretells Spring

I spotted a single open flower on my Forsythia this week, a sure sign that spring is almost here. Bring it on!

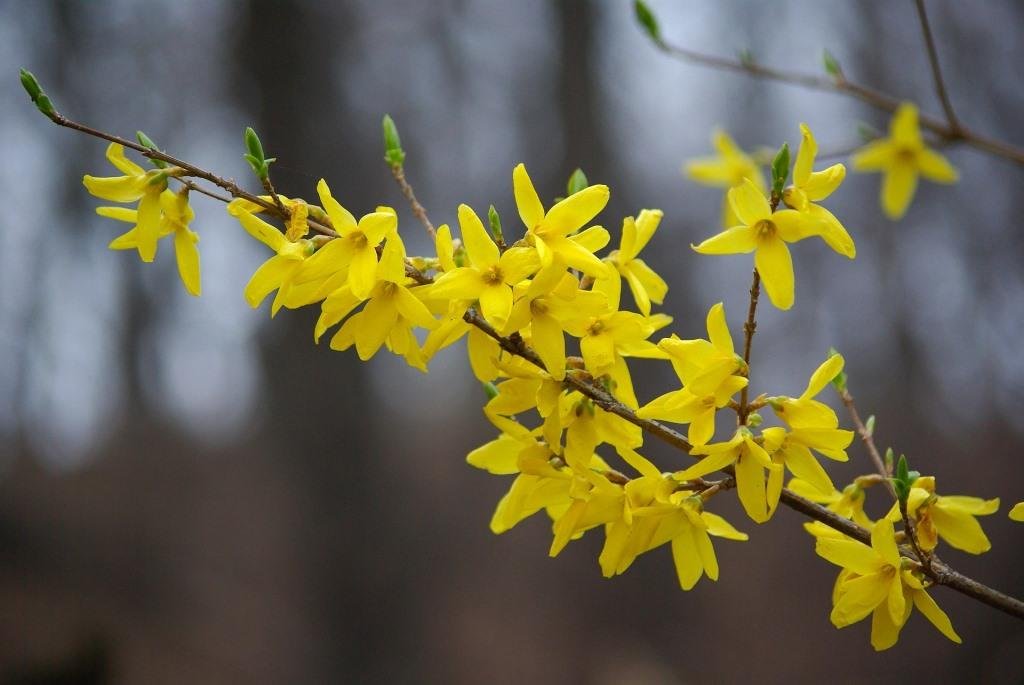
Forsythia, commonly known as “Yellow Bells,” are old-fashioned, indestructible plants that spread to form large thickets. They are among the earliest of shrubs to bloom. Their arching stems are covered with unscented yellow bell-shaped flowers for several weeks before leaves emerge. Plants bloom on prior year’s wood, so prune thoughtfully. Do not shear into tight meatballs. Instead, use hand pruners to remove entire stems at ground level.

Forsythia (pronounced for-SITH-ee-ah) is hardy in zones 6-8. Its arching stems will reach ten feet in height, with an indefinite spread. It is not choosy about soil type or pH. It is easily transplanted, and rarely bothered by insects or diseases. Deer nibble on young plants but tend to leave larger, mature specimens alone.

In full bloom, this Forsythia hedge looks like a yellow ribbon winding its way through the garden.

Forsythias make a good informal hedge where area is sufficient. Avoid siting them in locations where their aggressive expansion might overtake weaker plants or invade the neighbor’s garden. Plant them in full sun for best flowering. Shrubs reach a height of  feet. Dwarf forms are available, but these also spread vigorously.

Cut a few branches with swollen buds to force blooms indoors.

Yellow bell-shaped flower on leafless stem
Shrub with yellow flowers

Flower Timing Dictates Shrub Pruning Schedule

February usually has a few unseasonably warm days, teasers for the spring weather that is still weeks away. Use those days to start on spring gardening chores. I once named Valentine’s Day as the target date for pruning my hybrid tea roses and other summer- flowering shrubs. I no longer struggle with roses (beautiful, but too time-consuming and disease-prone in my hot, humid garden) but mid-February is still a good time to consider pruning.

Broken, damaged or crossing limbs can be removed any time of the year. Prune summer- or fall-flowering shrubs (Gardenia, Beautyberry, Crape Myrtle, Butterfly Bush, Tea Olive) in late winter, before spring growth begins.

For shrubs that bloom in spring (Azalea, Weigela, Forsythia, Lilac, Spirea, Mock Orange), wait until after flowering is over, then prune. Any pruning done in late winter will remove dormant buds and eliminate some or all their flowers.

While it is unlikely that you will kill a shrub by poor pruning, it is possible that the result will be so unattractive that you wish the plant would die. Even if you got a pair of shiny new pruners for Christmas, have a specific result in mind (renewal, size reduction, shaping, thinning, increased flowering) before you start cutting. Refrain from mindless trimming.

Select shrubs whose mature size will fit into your border or foundation bed. When I worked in a garden nursery center, a vein bulged in my forehead every time I heard a shopper announce that they were going to purchase a shrub too large for the intended location and say, “I’ll just cut it back every year to keep it small. It will look okay.” Please, I implore you, do not be that person. Because you won’t. In five years, the shrub will either have outgrown its space or its natural shape will be lost by excessive pruning. Butchered plants look horrible.

To obtain privacy from a dense hedge, start pruning when plants are small. Use hand pruners to cut back the tips of each branch. This will make dormant buds along the stems wake up and produce new branches. Repeat this tip removal as needed to encourage additional branching until the hedge is approaching the desired mature size. Informal, loose hedges are easier to maintain than tight shapes, but a sharply-edged hedge gives a lovely, formal appearance. You can use powered (electric, gas, battery) hedge trimmers to trim hollies, boxwoods, Ligustrum and similar shrubs into tight shapes, but always cut at a slight angle so that the top is narrower than the bottom. When done properly, this allows sunlight to reach the lower leaves as well as the upper ones and prevents leaf-loss near the ground. The angle does not need to be exaggerated to be effective – think of the bottom half of the letter A.

Think twice before planning a formal, tightly pruned hedge of Azalea, Forsythia, or Loropetalum. These plants look best when allowed to maintain their open, spreading shapes. Restricting them into a narrow strip will require frequent trimming and result in reduced flowering.

Conifers respond poorly to hard pruning. Yew, juniper, and Arborvitae rarely break new growth from old stems. Light tip pruning is okay. Remove dead or damaged branches; otherwise, leave them alone. For broadleaf shrubs like Aucuba, avoid cutting large leaves. Instead, reach loppers to the interior of the shrub to make cuts, removing entire branches. This will increase airflow and allow sunlight to enter the interior. Boxwoods, a staple of many southern gardens, look their best and are healthier when pruned this way.

Hydrangeas require special attention to pruning. Those that bloom on new growth (‘Incrediball’ or ‘Limelight,’ for instance) should be pruned in winter. Those than bloom on old growth (oakleafs, many of the old-fashioned mopheads) should be pruned immediately after flowering. Some, known as rebloomers (‘Endless Summer’™ types), bloom on both new and old growth. If you plan to add a new Hydrangea to your garden, purchasing a rebloomer will ensure that you still have some flowers if a late freeze zaps buds that have already started to open. What if you don’t know which cultivar of Hydrangea you have? Leave them unpruned one season and pay attention to where the flowers occur. Use this information as your guide for future years.

When using hand pruners or loppers, prune just above a bud. In this case, “above” means between the bud and the tip of the stem (not between the bud and the end of the stem that meets the ground.) Don’t leave too much stem between the bud and the cut, or the stub will die. Don’t cut too close to avoid damaging the bud itself. Make an angled cut near the bud (between the bud or stem). New growth will angle off the pruned branch in the same direction as the bud. See the photos for an illustration.